
Back that thing up

Someone had asked how I make and install backboards on cabinets and I’m a sucker for an easy post topic, so let’s dive in!
It’s not flashy or fancy, but for almost all of my cabinets, I’ve done the backs the same way: Ship-lapped boards, nailed into a rabbet along the back of the cabinet.


I have done frame and panel backs before, and they do look much nicer, but they’re also a LOT more work, so I reserve them for when I feel like being a fancy lad.
The first step for these backs is rabbeting the carcass. For my dovetailed carcasses, this involves using a powered router and a rabbeting bit in either my trim router (for large cases) or my router table (for smaller ones). I shoot for a rabbet that is half the width of my case sides. The rabbet’s depth is governed by the thickness of my backboards1, ranging from 3/8” to 1/2”. I’m leery of powered routers so I take multiple passes, 1/8” at most, to reach the target depth. Then I use a chisel to square the corners, and now I have an opening to measure for the backboards.
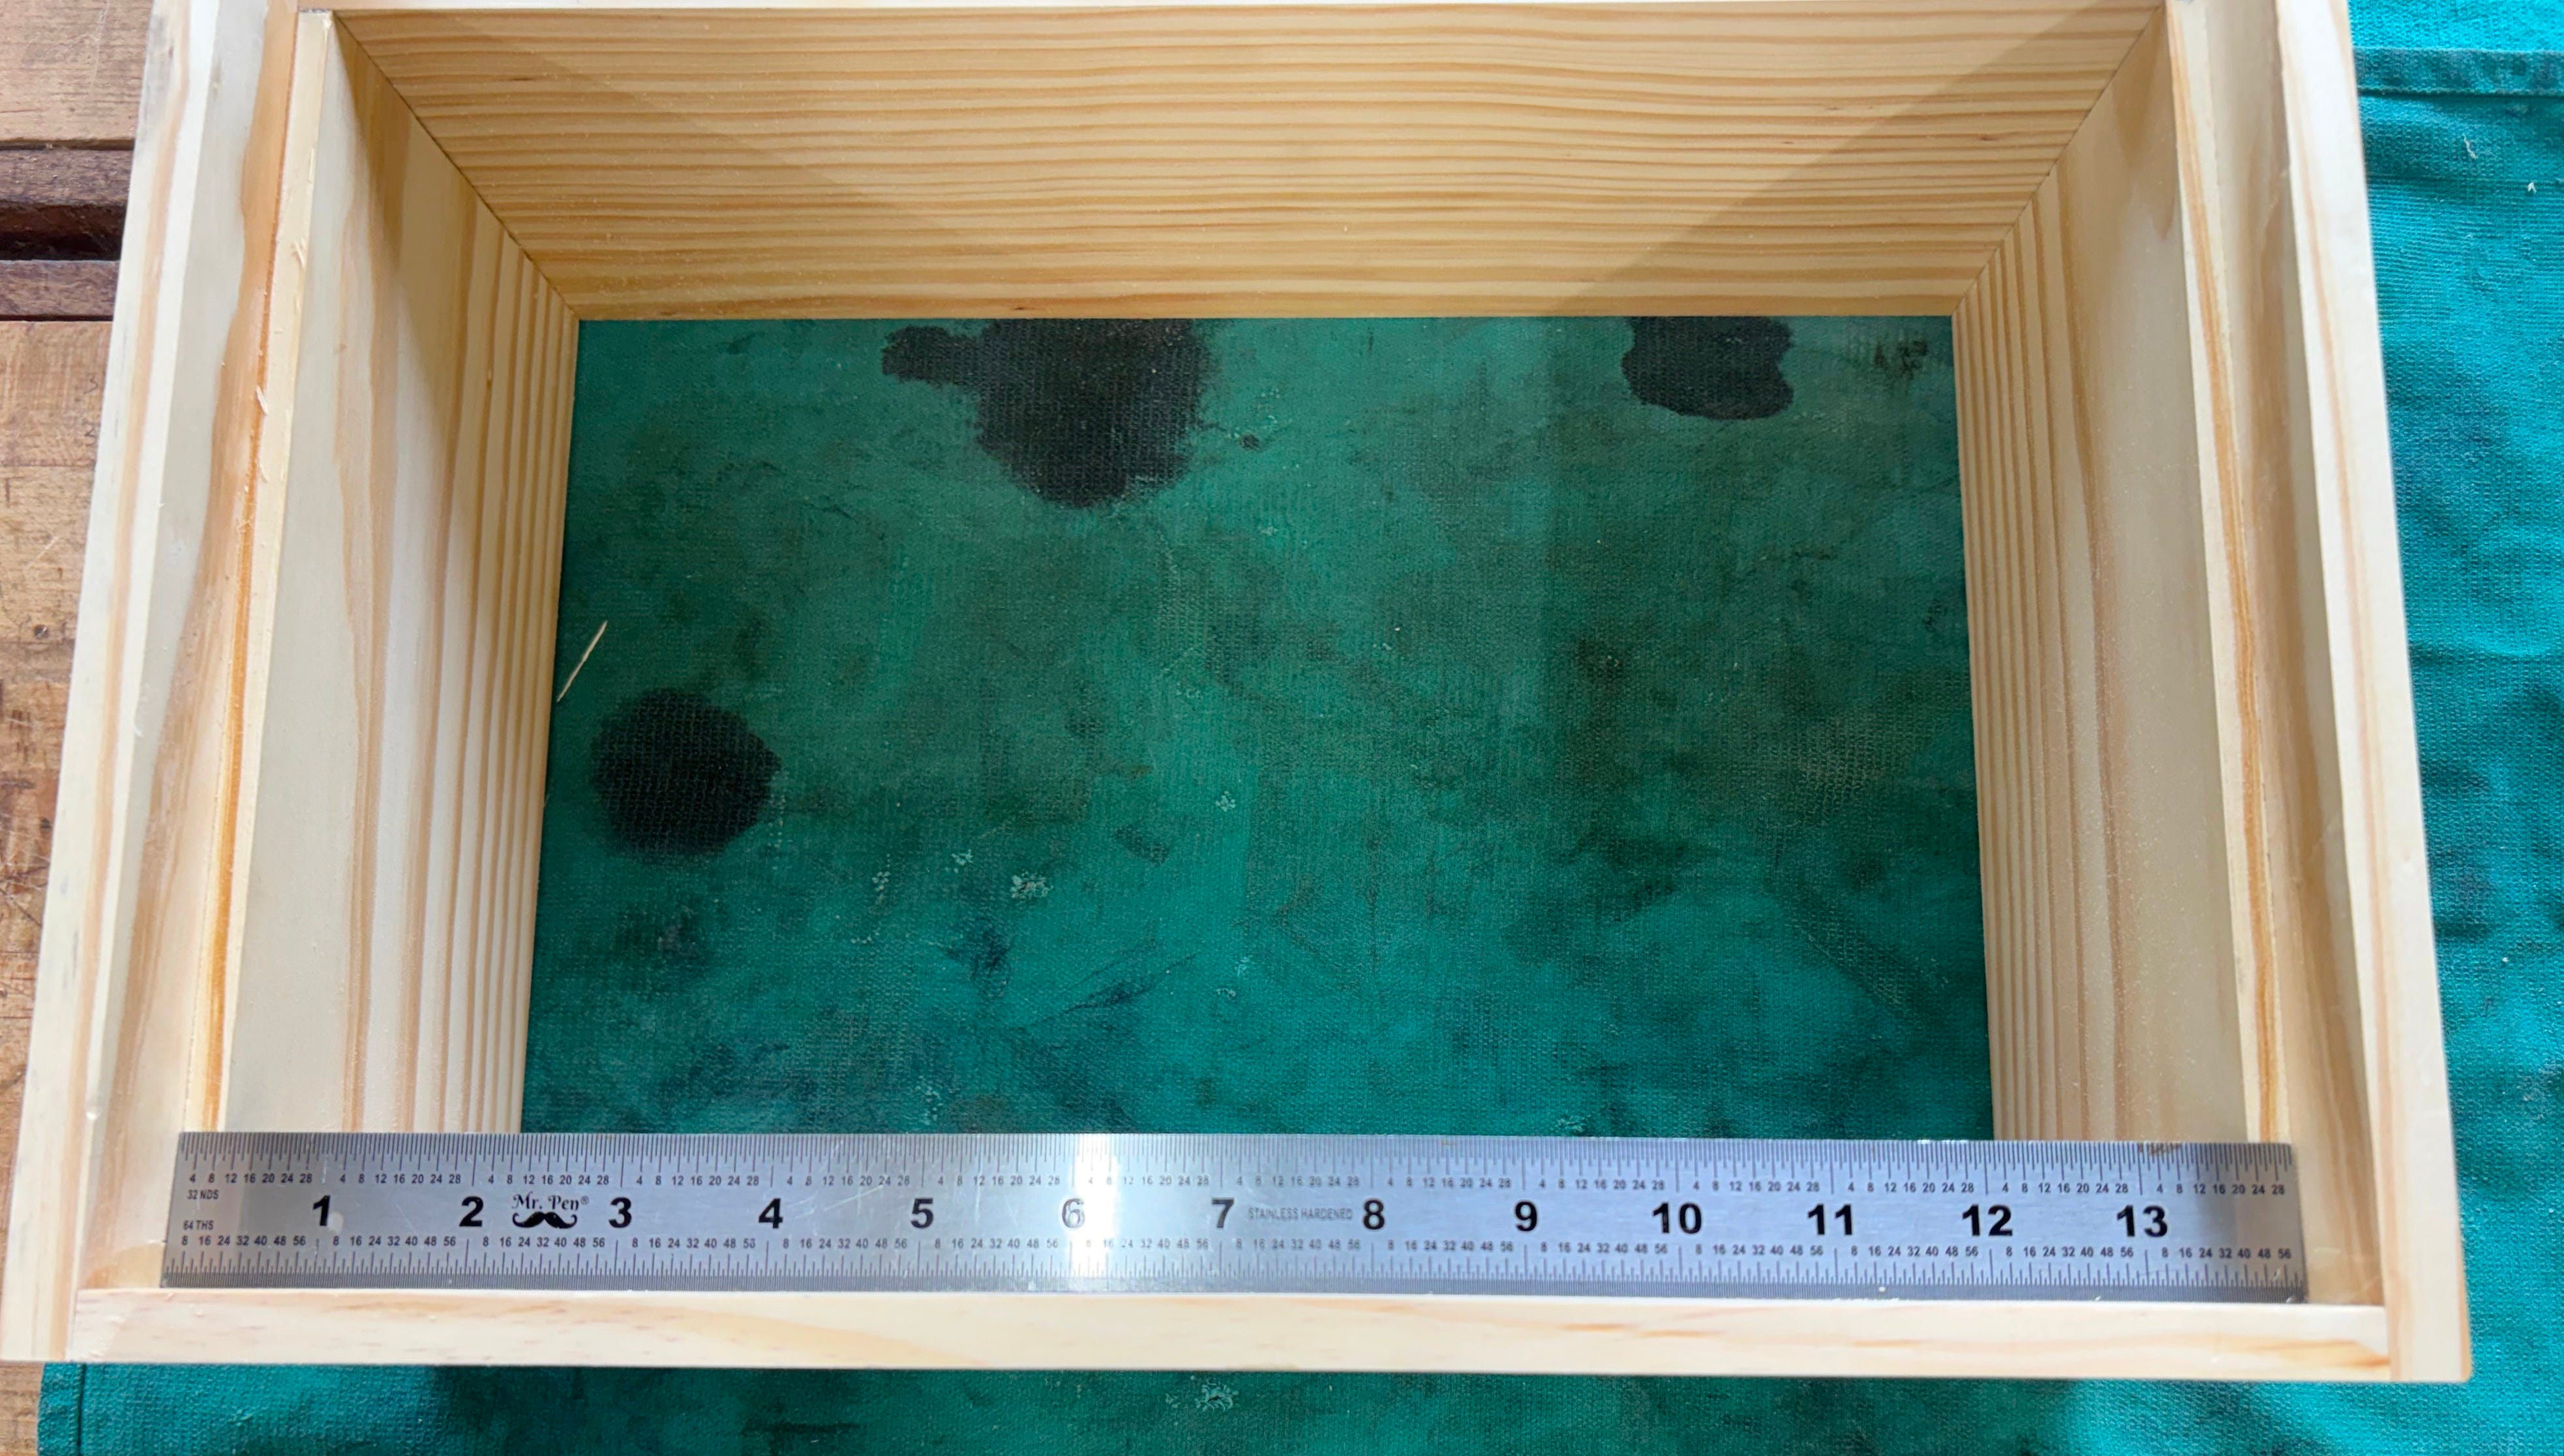
If, like the first aid cabinet, you use rabbets for your case joinery, you can cut them before assembly, provided your rabbet width/depths match.
Using the first aid cabinet as an example, my opening is 14” wide and 20” long. The length is the easy dimension, I cut your boards 1/16” longer (more on that later). The widths of the boards requires planning.
When I first did this for a pair of nightstands, I was ignorant of artisan geometry and the use of dividers and still relied heavily on math/spreadsheets, so I determined a formula for sizing backboards to an opening. If you aren’t mathematically inclined or find this too nerdy/boring, feel free to skip ahead.
I started with a sketch:
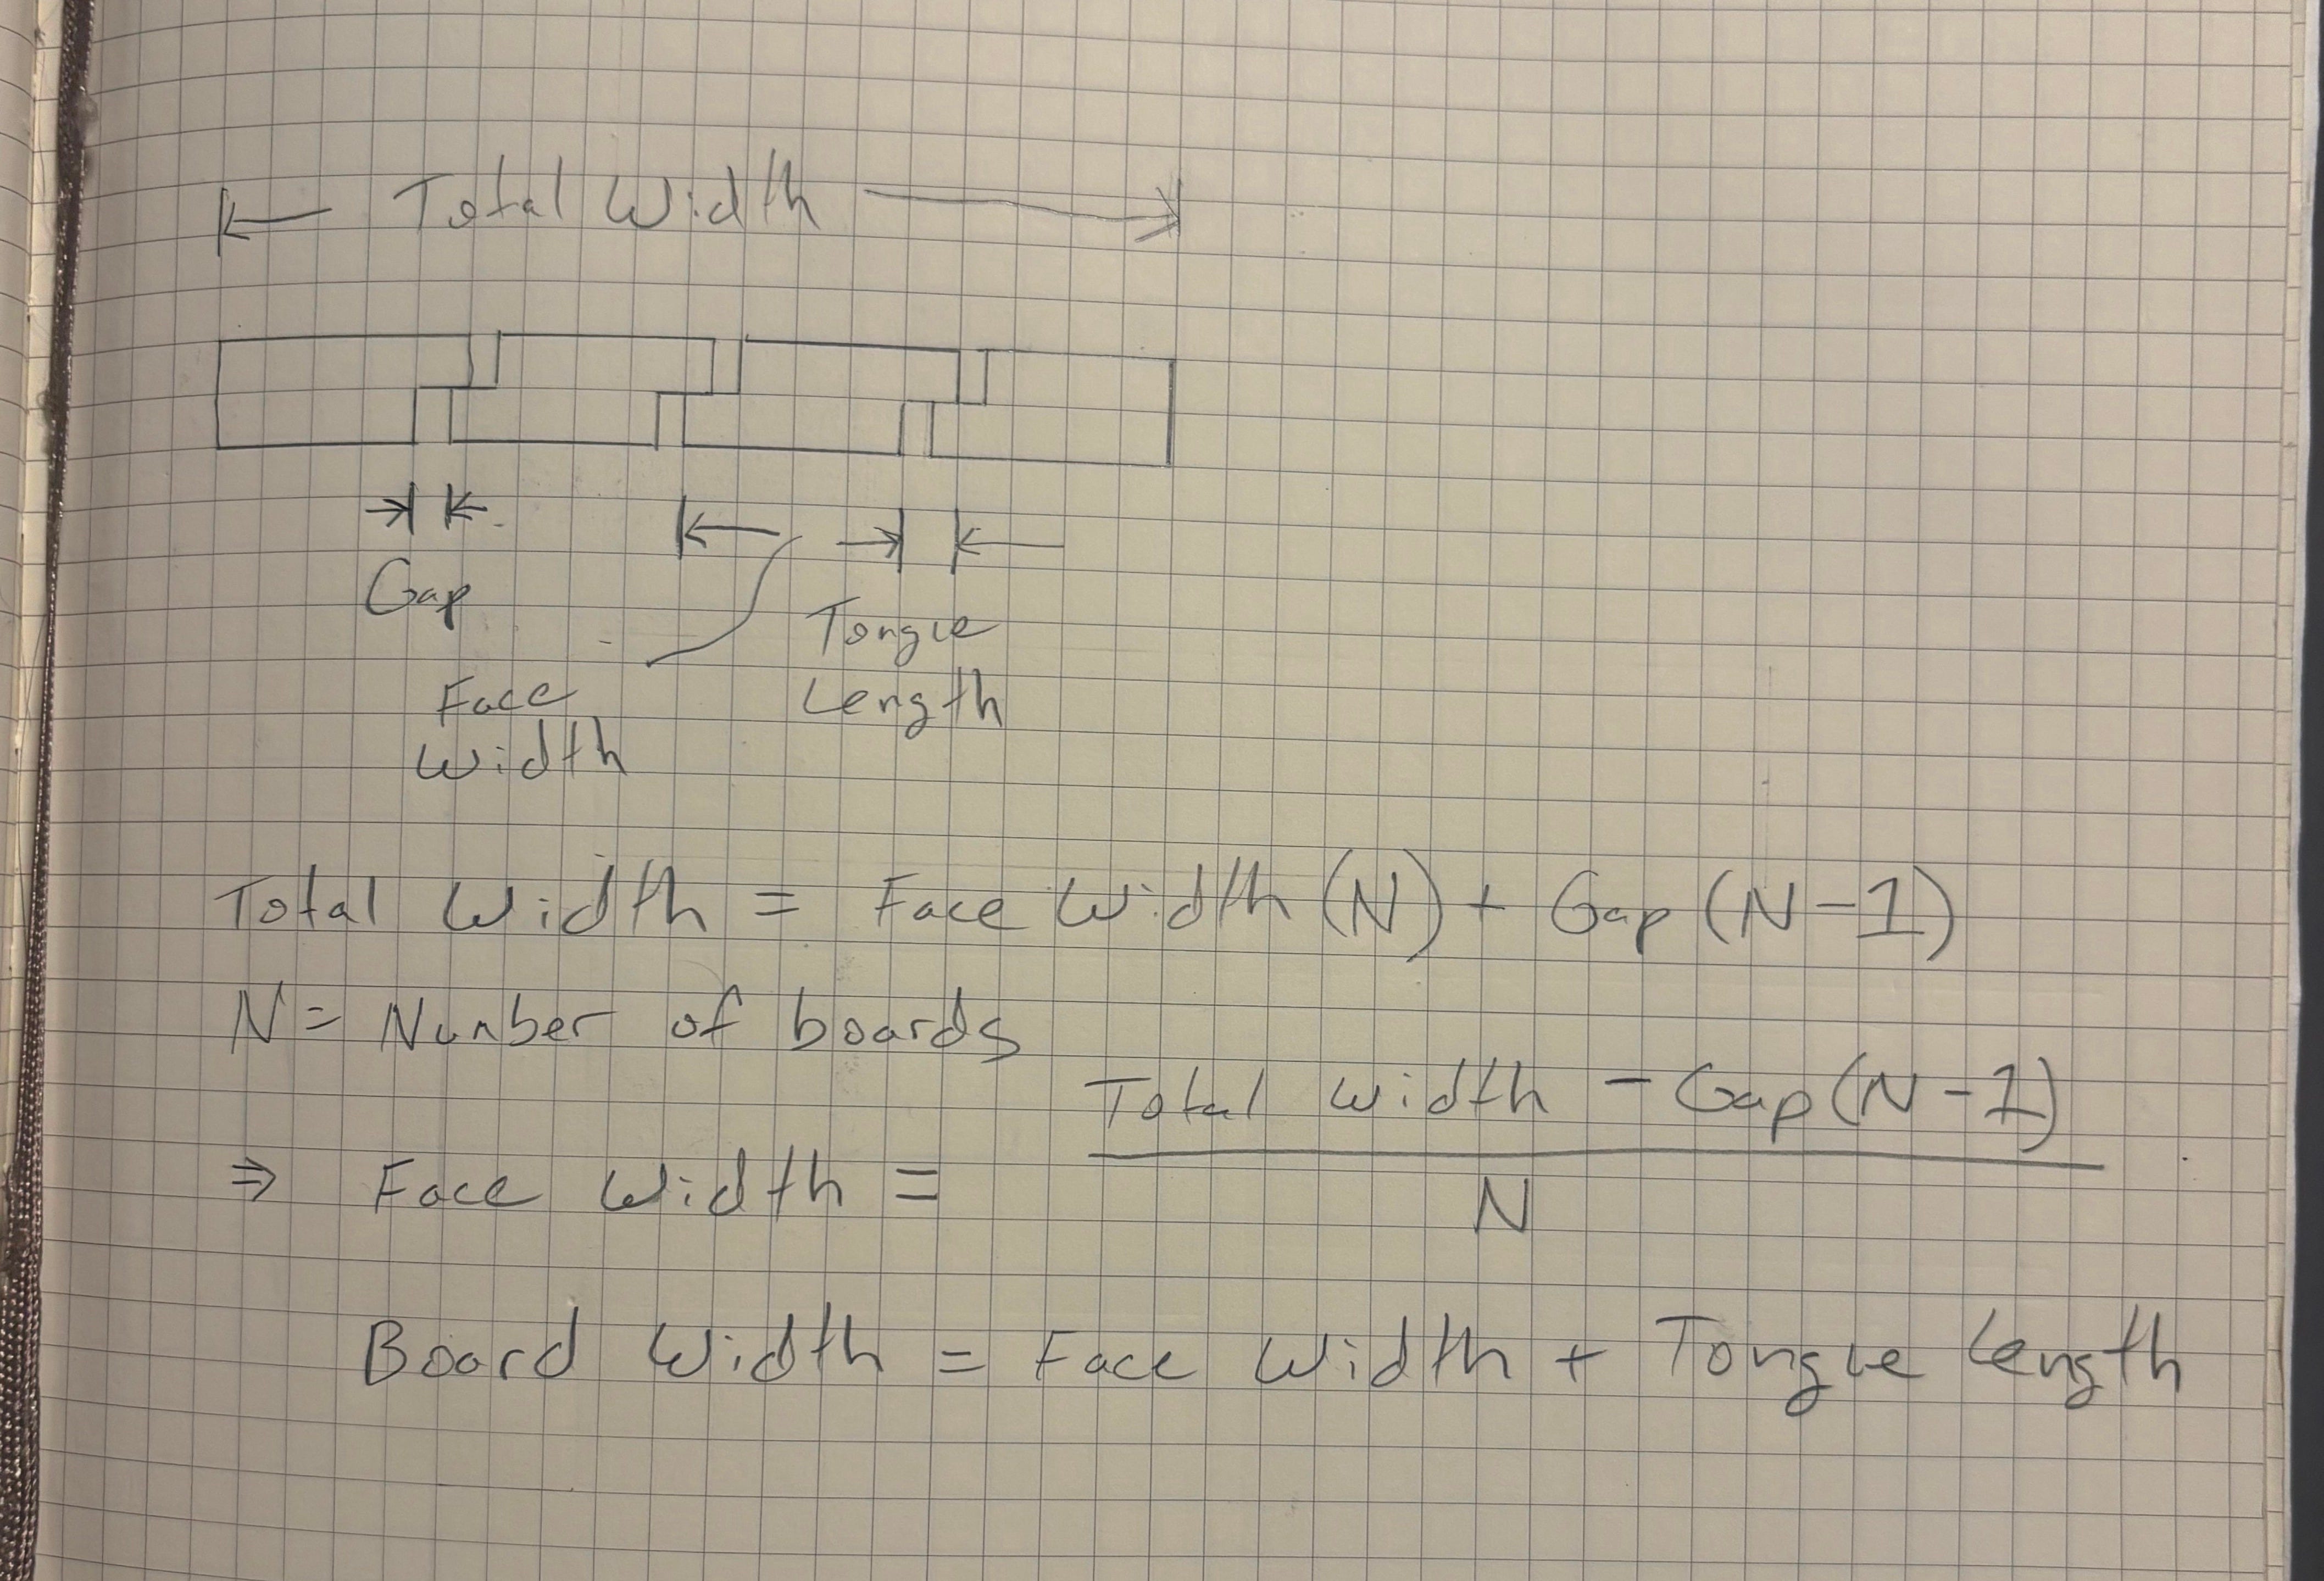
I made the approach as generic as possible so I could ‘solve’ it and then just plug in the numbers later for any size opening, requiring only a few inputs: number of boards, gap width (to allow for expansion), tongue length, and width of opening. I used that framework for a simple spreadsheet2, shared here. To use it, click the link and save a copy before inputting your own values.
Using the sheet, I opted for 5 backboards (I like odd numbers for backboards, it looks better to my eye) and a gap of 1/16”. This yellow pine will move very little in service, and the boards are narrow, so this gap is more than enough for expansion. I’m also making the cabinet in late spring, so it won’t expand much more in the summer and will mostly experience shrinkage in the winter.
While I can’t remember the exact source, Megan Fitzpatrick said she uses coins to space her backboards, nickels in the winter and dimes in the summer.
For the tongue length, I used 3/8". The first time I did this I used 3/8” long tongues (same length as the board thickness), so I’ve just kept with that length. I could’ve used a 1/4” tongue and it would’ve been fine.
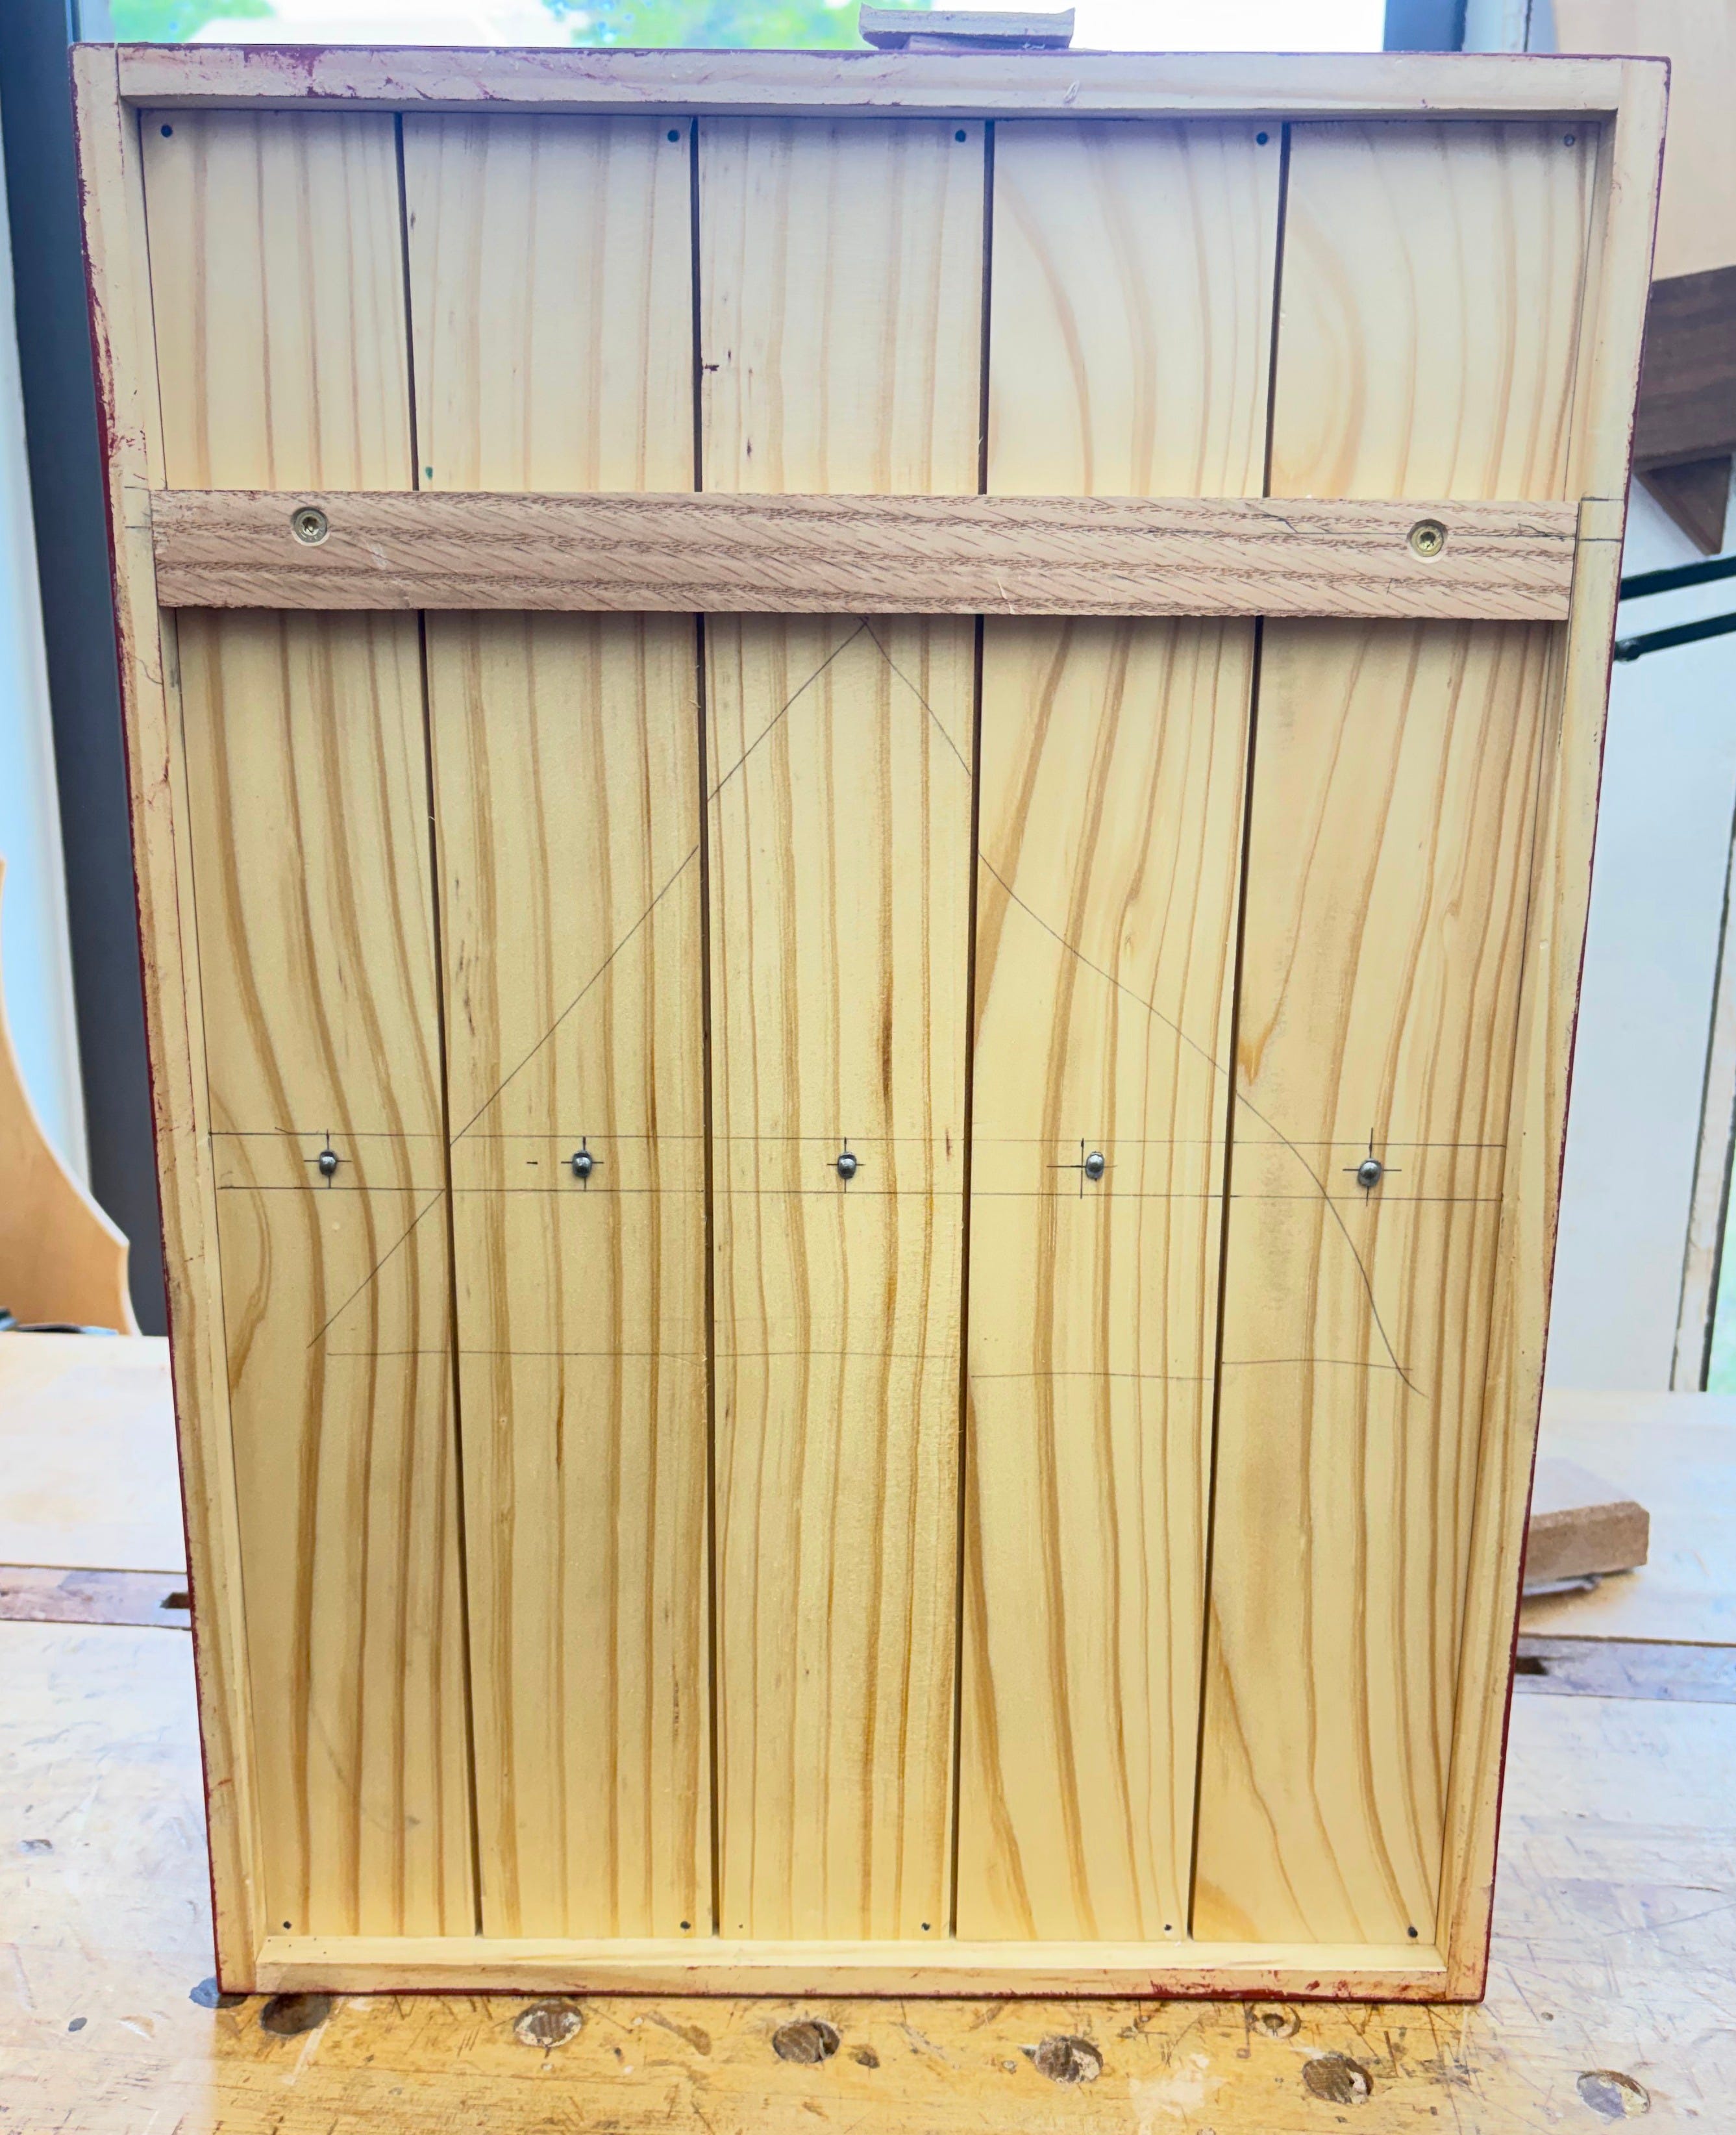
With all my variable set, I typed it in and the spreadsheet spit out an answer. For this case’s back, I would need boards that are 3-1/8” wide. You ‘technically’ only need 4 boards that wide, with the fifth board being equal to the face width (2-3/4” here) since that board will only need one tongue and will sit flush against the side of the cabinet. I still cut all 5 boards to 3-1/8” to give myself wiggle room in fitting the final board.
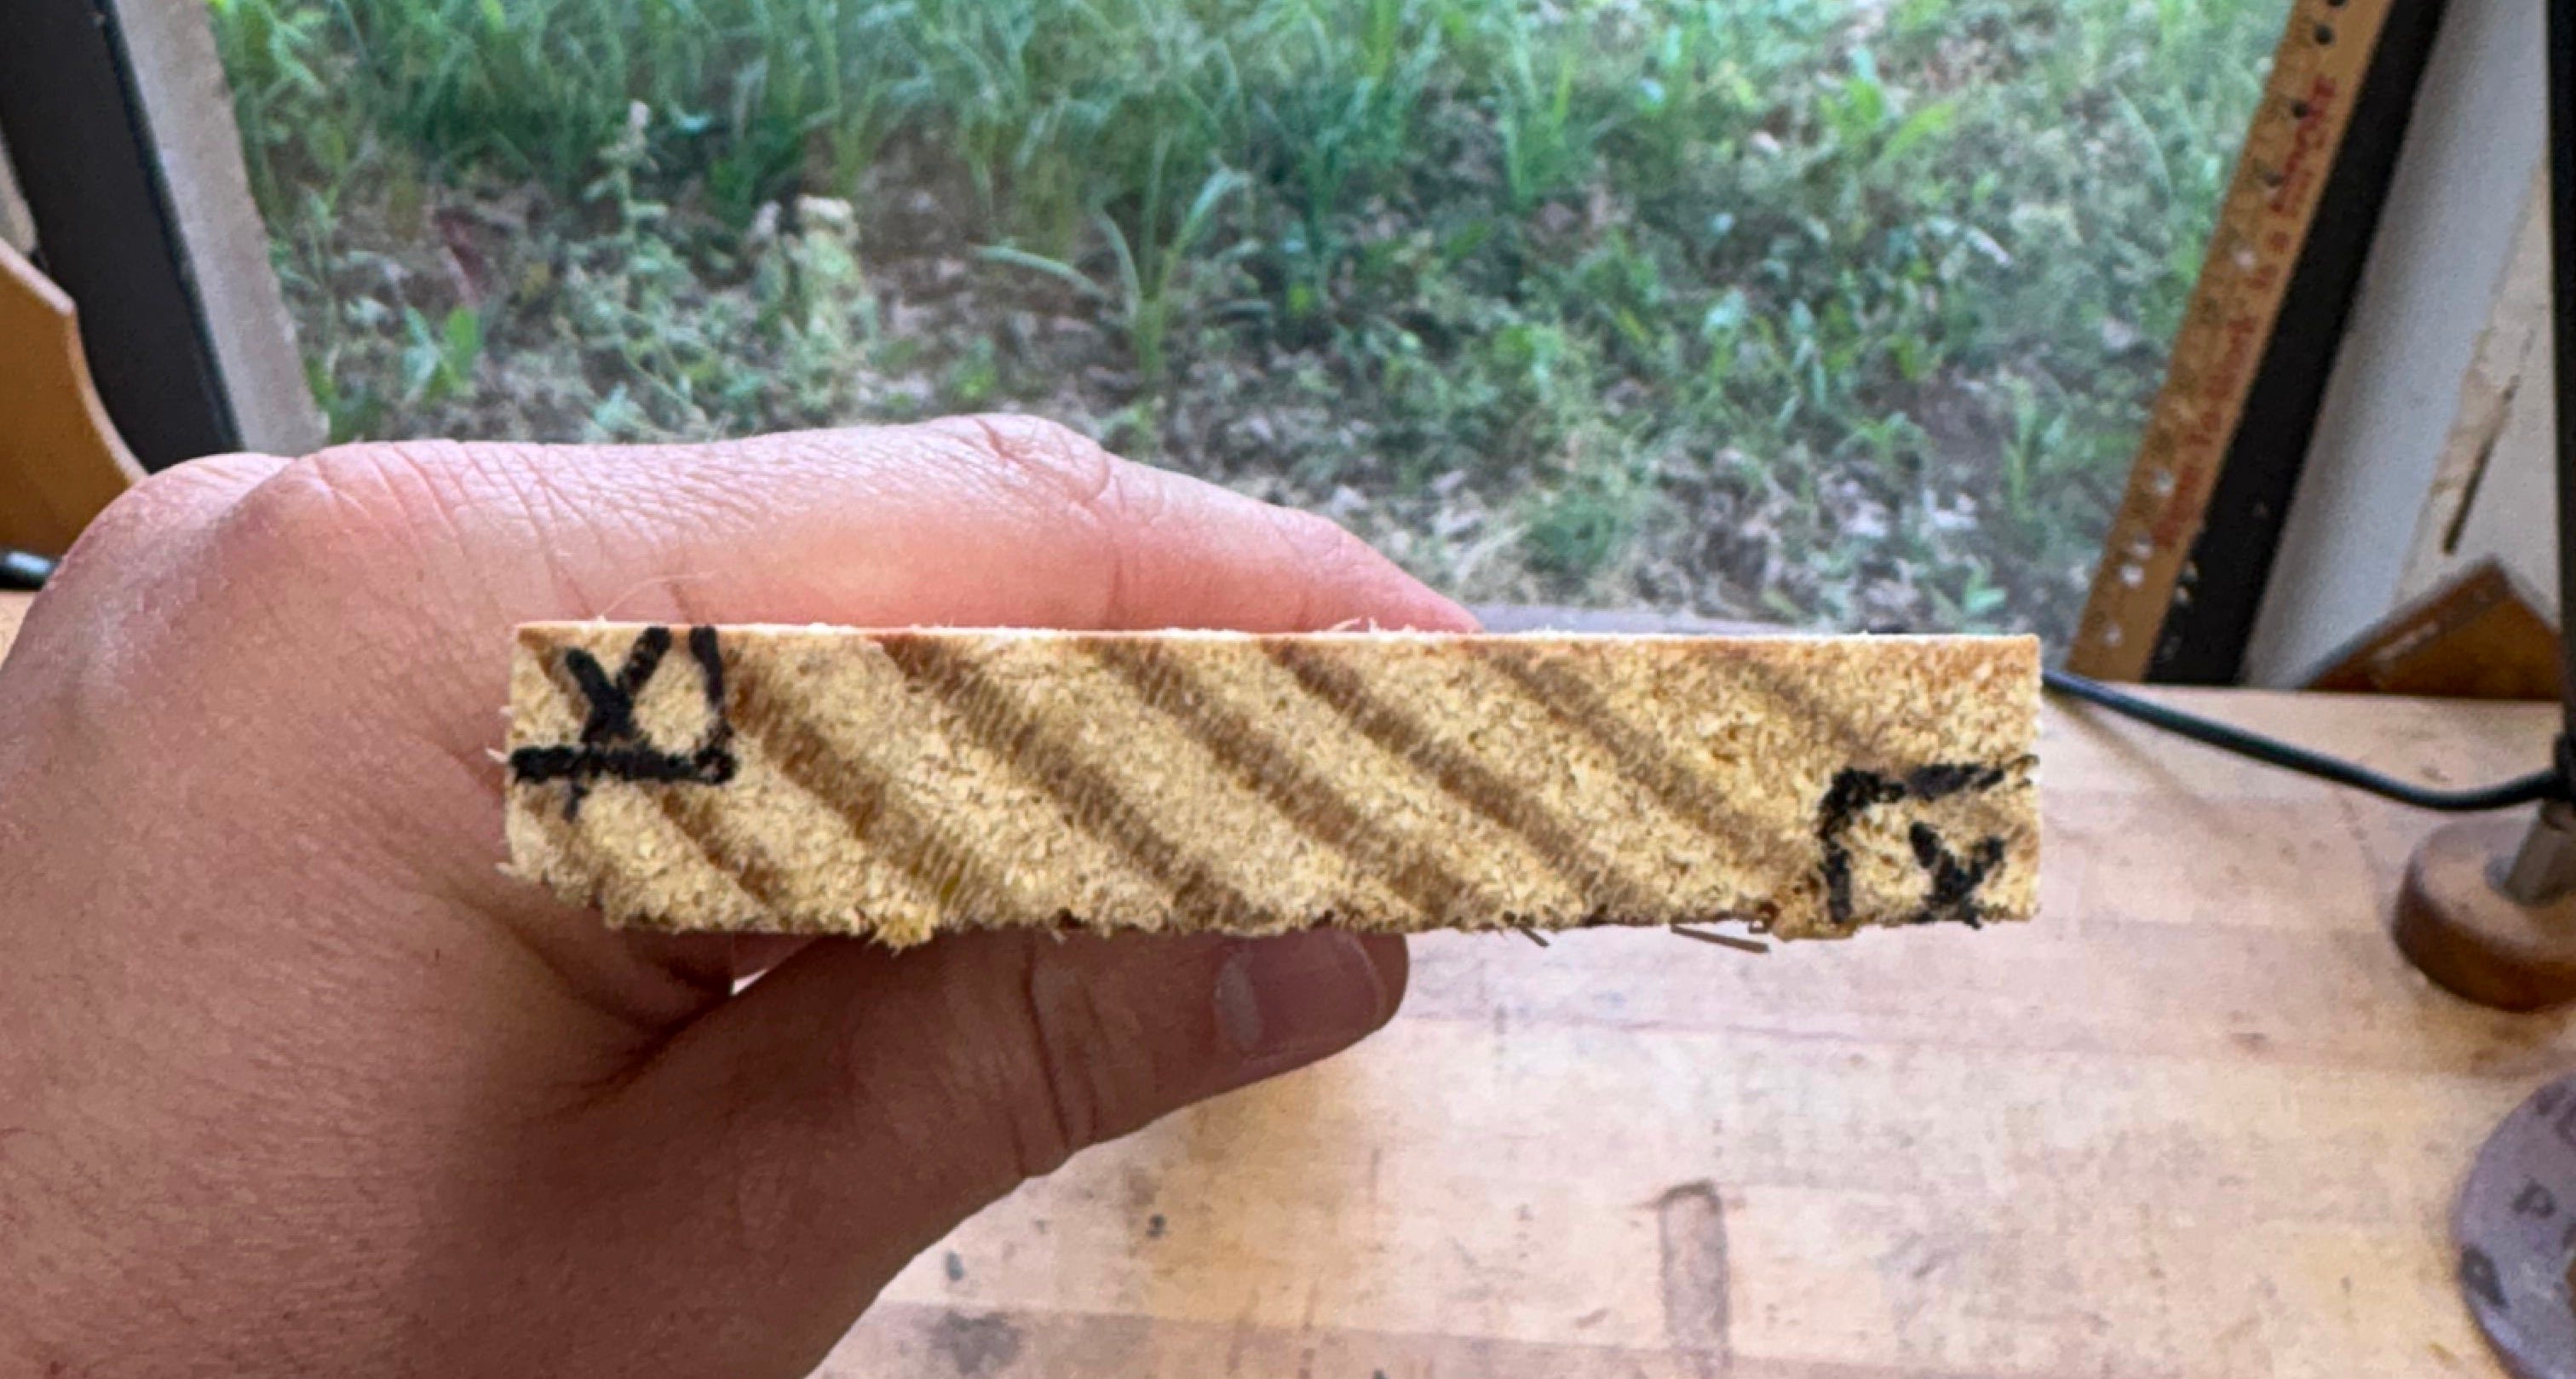
I lay out all my boards and draw a cabinet makers triangle to set the orientation (careful to mark it on the backs of the boards so I don’t have to remove the pencil marks prior to assembly). With the layout set, I also draw waste marks on the end grain of each board showing where I will rabbet. You don’t want rabbets on your two outside edges. I’ve unfortunately auto-piloted rabbeting before and put them where they don’t belong and had to remake parts, so these marks are extra insurance.
For the tongues, I set a rabbet plane to cut a rabbet the width of my tongue, and set the depth stop for half the thickness of my boards. I check the fit after planing the first 2 boards and adjust as necessary before planing the rest of them.
You could also do this with a table saw (with or without a dado stack, just depends on how may passes you want to take) or a router.
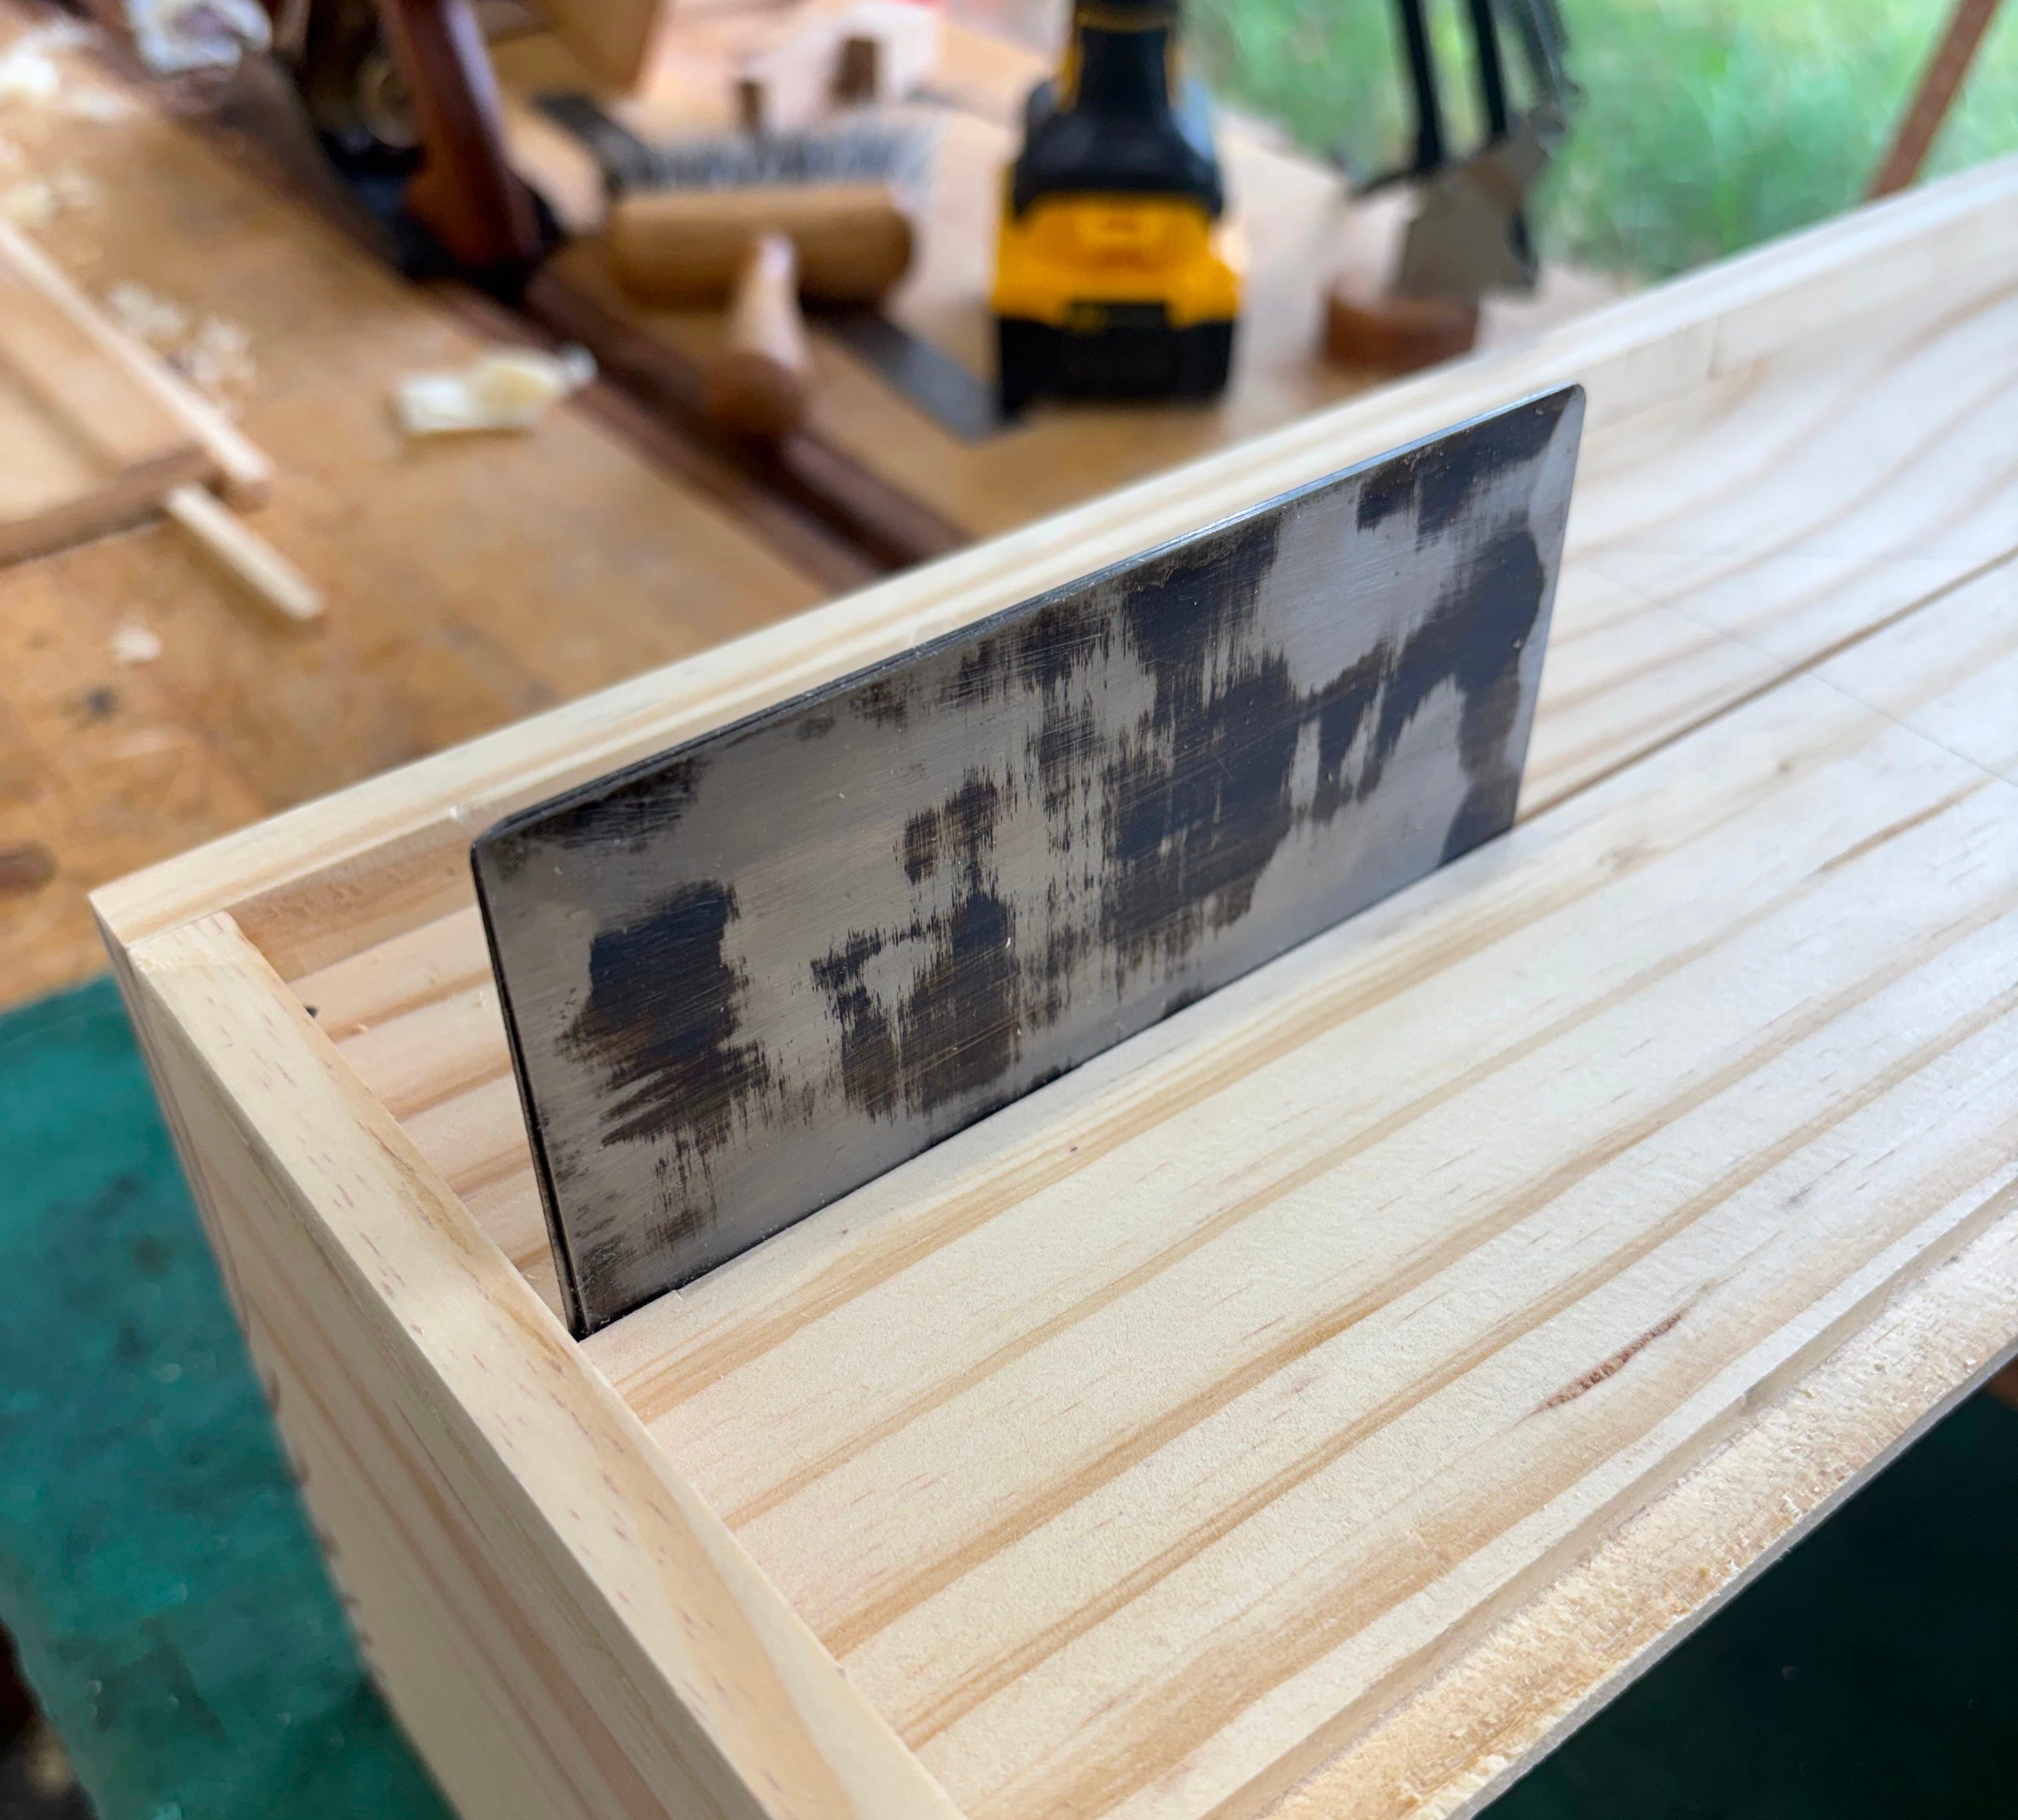
Now I fit them to the opening with a shooting board. I intentionally leave the board 1/16th long so I can sneak up on the perfect fit. I start at one end and shoot the board until I just fits on the opening and then press it against the edge. In a perfect world, the board would sit flush the full length of the edge, but sometimes we make cases that aren’t perfectly square. I note the area of the edge that is touching and remove the board. Next I take tapering cuts with a hand plane, checking the fit as I go until the edge fits perfectly to the case side. This fettling, plus any discrepancy in the gaps when nailing the boards in, is why I keep the last board over-wide.
Another approach to the fitting is to offer the over-long boards up to the opening, holding it firmly against the side of the case to see if the ends need to be shot slightly out of square. You can then shoot the ends until the board fits snugly and is flush with the edge, but if you take this approach, you will need to shoot all the edges slightly off square to fit. By fitting the long edge you give yourself a square reference edge for all the subsequent boards, allowing you to shoot them square. You may have to plane a taper on the final backboard as well, but I find it easier to taper and fit 2 edges than potentially tapering both ends of every board. Again, this only really applies to out of square cases.
Once the boards are fit, I’ll plane a slight round over/chamfer on the front facing tongues and shoulders. This helps to hide any discrepancies in the gap/spacing. Once that is finished, I usually start nailing and spacing them out, but I wanted to be a semi-fancy lad this time and cut a bead along the edges. This will help break up the interior visually and also hide any imperfections or odd gaps as the boards move over time. While I am moulding plane curious, I didn’t have the time or budget to acquire a 3/16th beading plane for this project. The next best option was a scratch stock, but I’m saving that process for another post3.
I nail the first board in place with either small finish nails or rosehead cut nails from Tremont Nail Company if I have the space to fit them. The finish nails technically have a head, its just very small, and the cut nails will hold better. I use two nails at most, taking care not to nail through the tongues (which would defeat their purpose in accounting for wood movement). My card scrapers are about 1/32” thick, so I sandwich 2 together as a makeshift 1/16” shim between my boards when nailing in the next one.
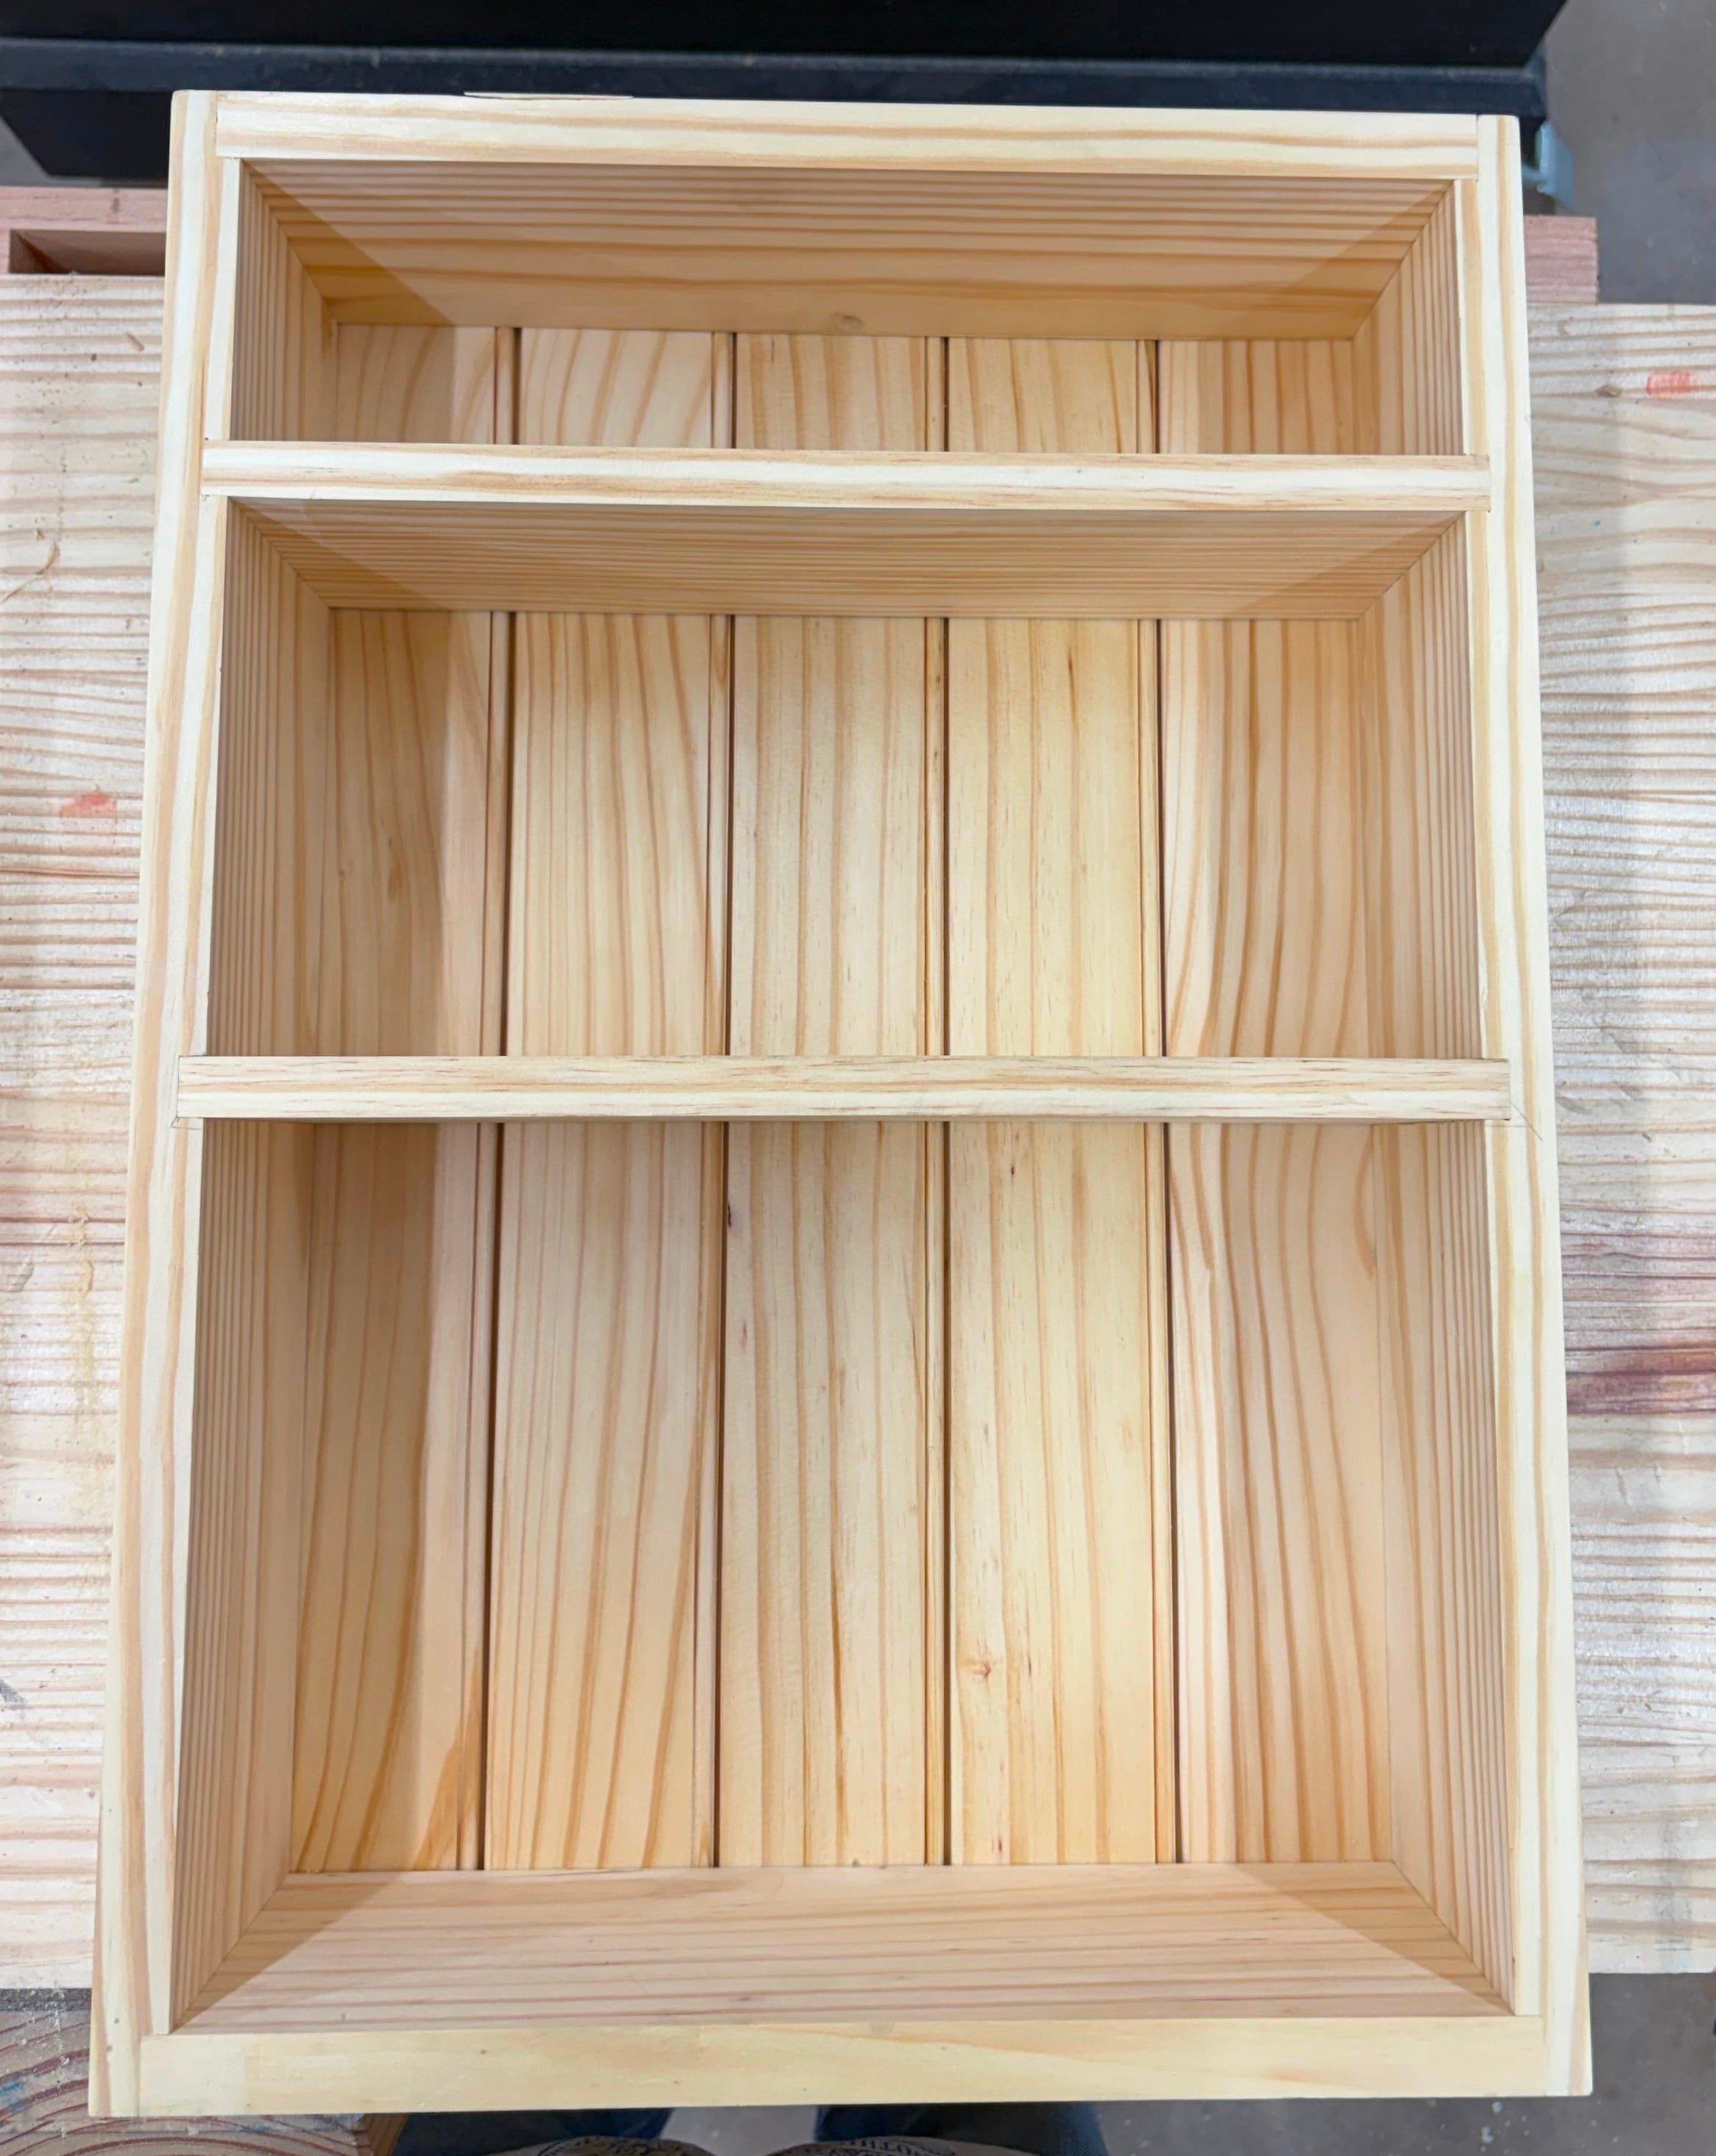
I’m mounting the french cleat to one of the shelves (larger surface to screw into vs a 1/4” rabbet on the top edge), so before I hastily fit and nail on the last board, I marked the shelf location along the back.


Then I offer up the final board to the opening and mark it, cutting it to just fit (no gap) on the bandsaw. Then I can hand plane it until it just fits with the spacers.


With the last board nailed it, I added the french cleat and nailed into the other shelf with rosehead cut nails for extra insurance (only after drilling pilot and clearance holes for said nails).
Bonus Section - How To Layout Backboards with Dividers
Given my love for artisan geometry and using dividers, I decided it was time to figure out how to layout backboards without the aid of a spreadsheet, so I’ll take you along for the ride.
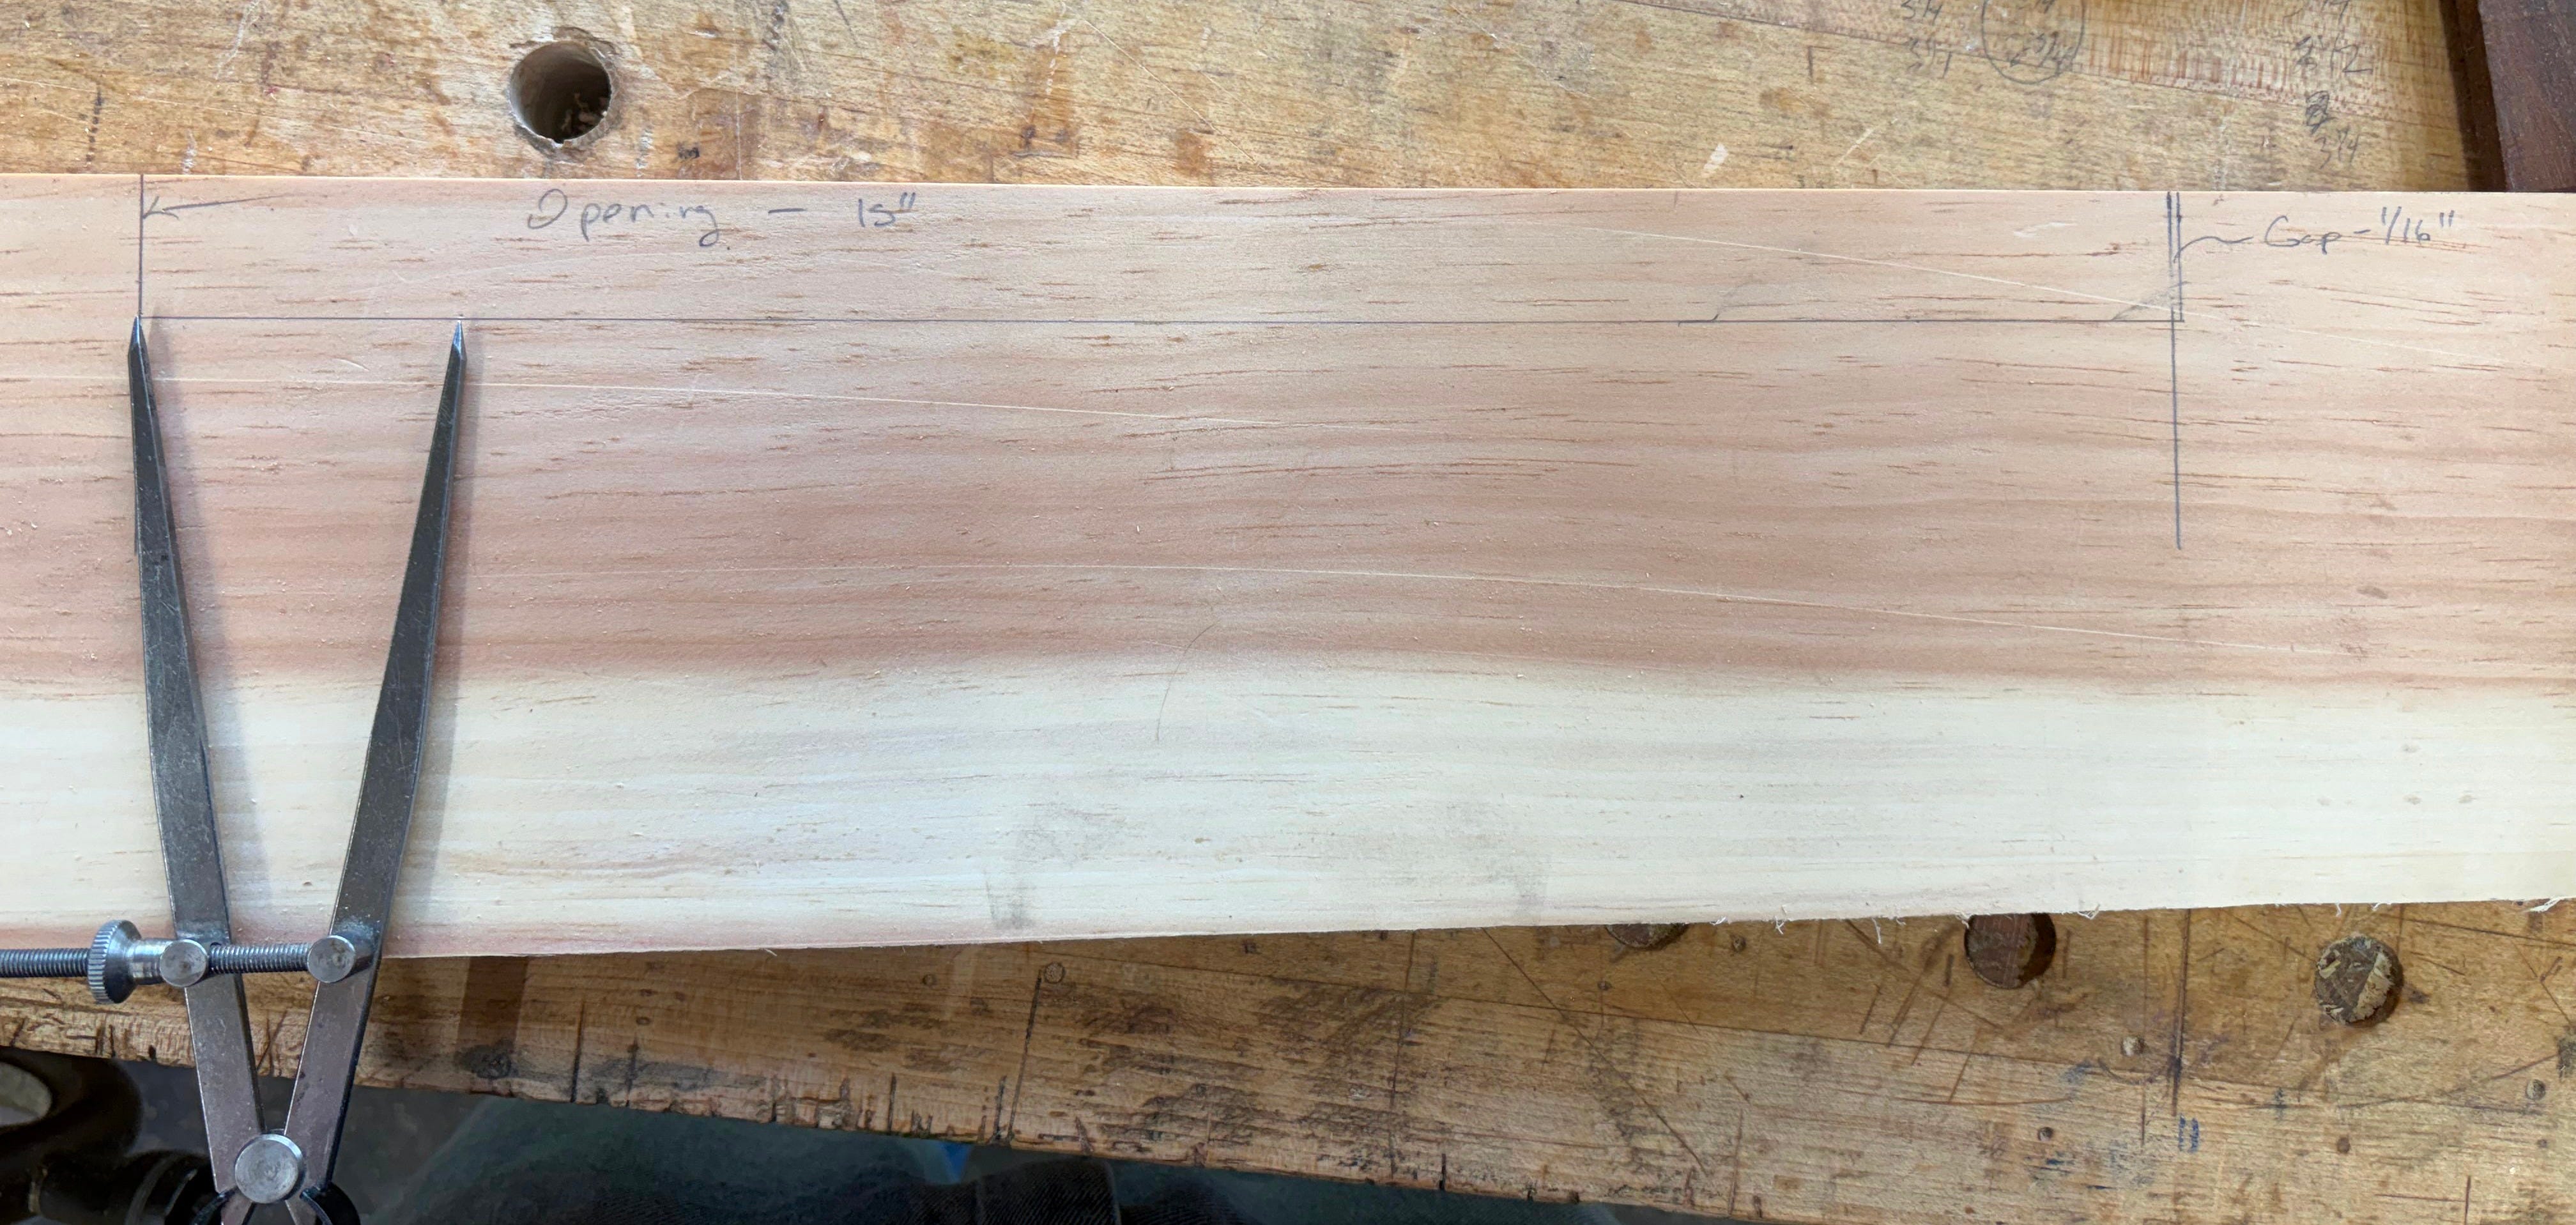
I started with an ‘opening’ of 15”, a desired gap of 1/16”, and using 7 boards.
I marked the ‘opening’ on a scrap board and added another line 1/16” past that (my gap). My idea here is that stepping this off with dividers would work just like stepping off dovetails. You start on your half pin line, walk the dividers out until you get your desired number of tails and the final step terminates at the end of the board, leaving you with evenly spaced tails, and pins that are as wide as your half pins4. So my thought here was that once I reach my desired number of steps to my opening + gap line, that would give me the face width (plus the gap) for each individual board.
After some trial and error, I walked out 7 equal steps to my gap line. This is the measurement:
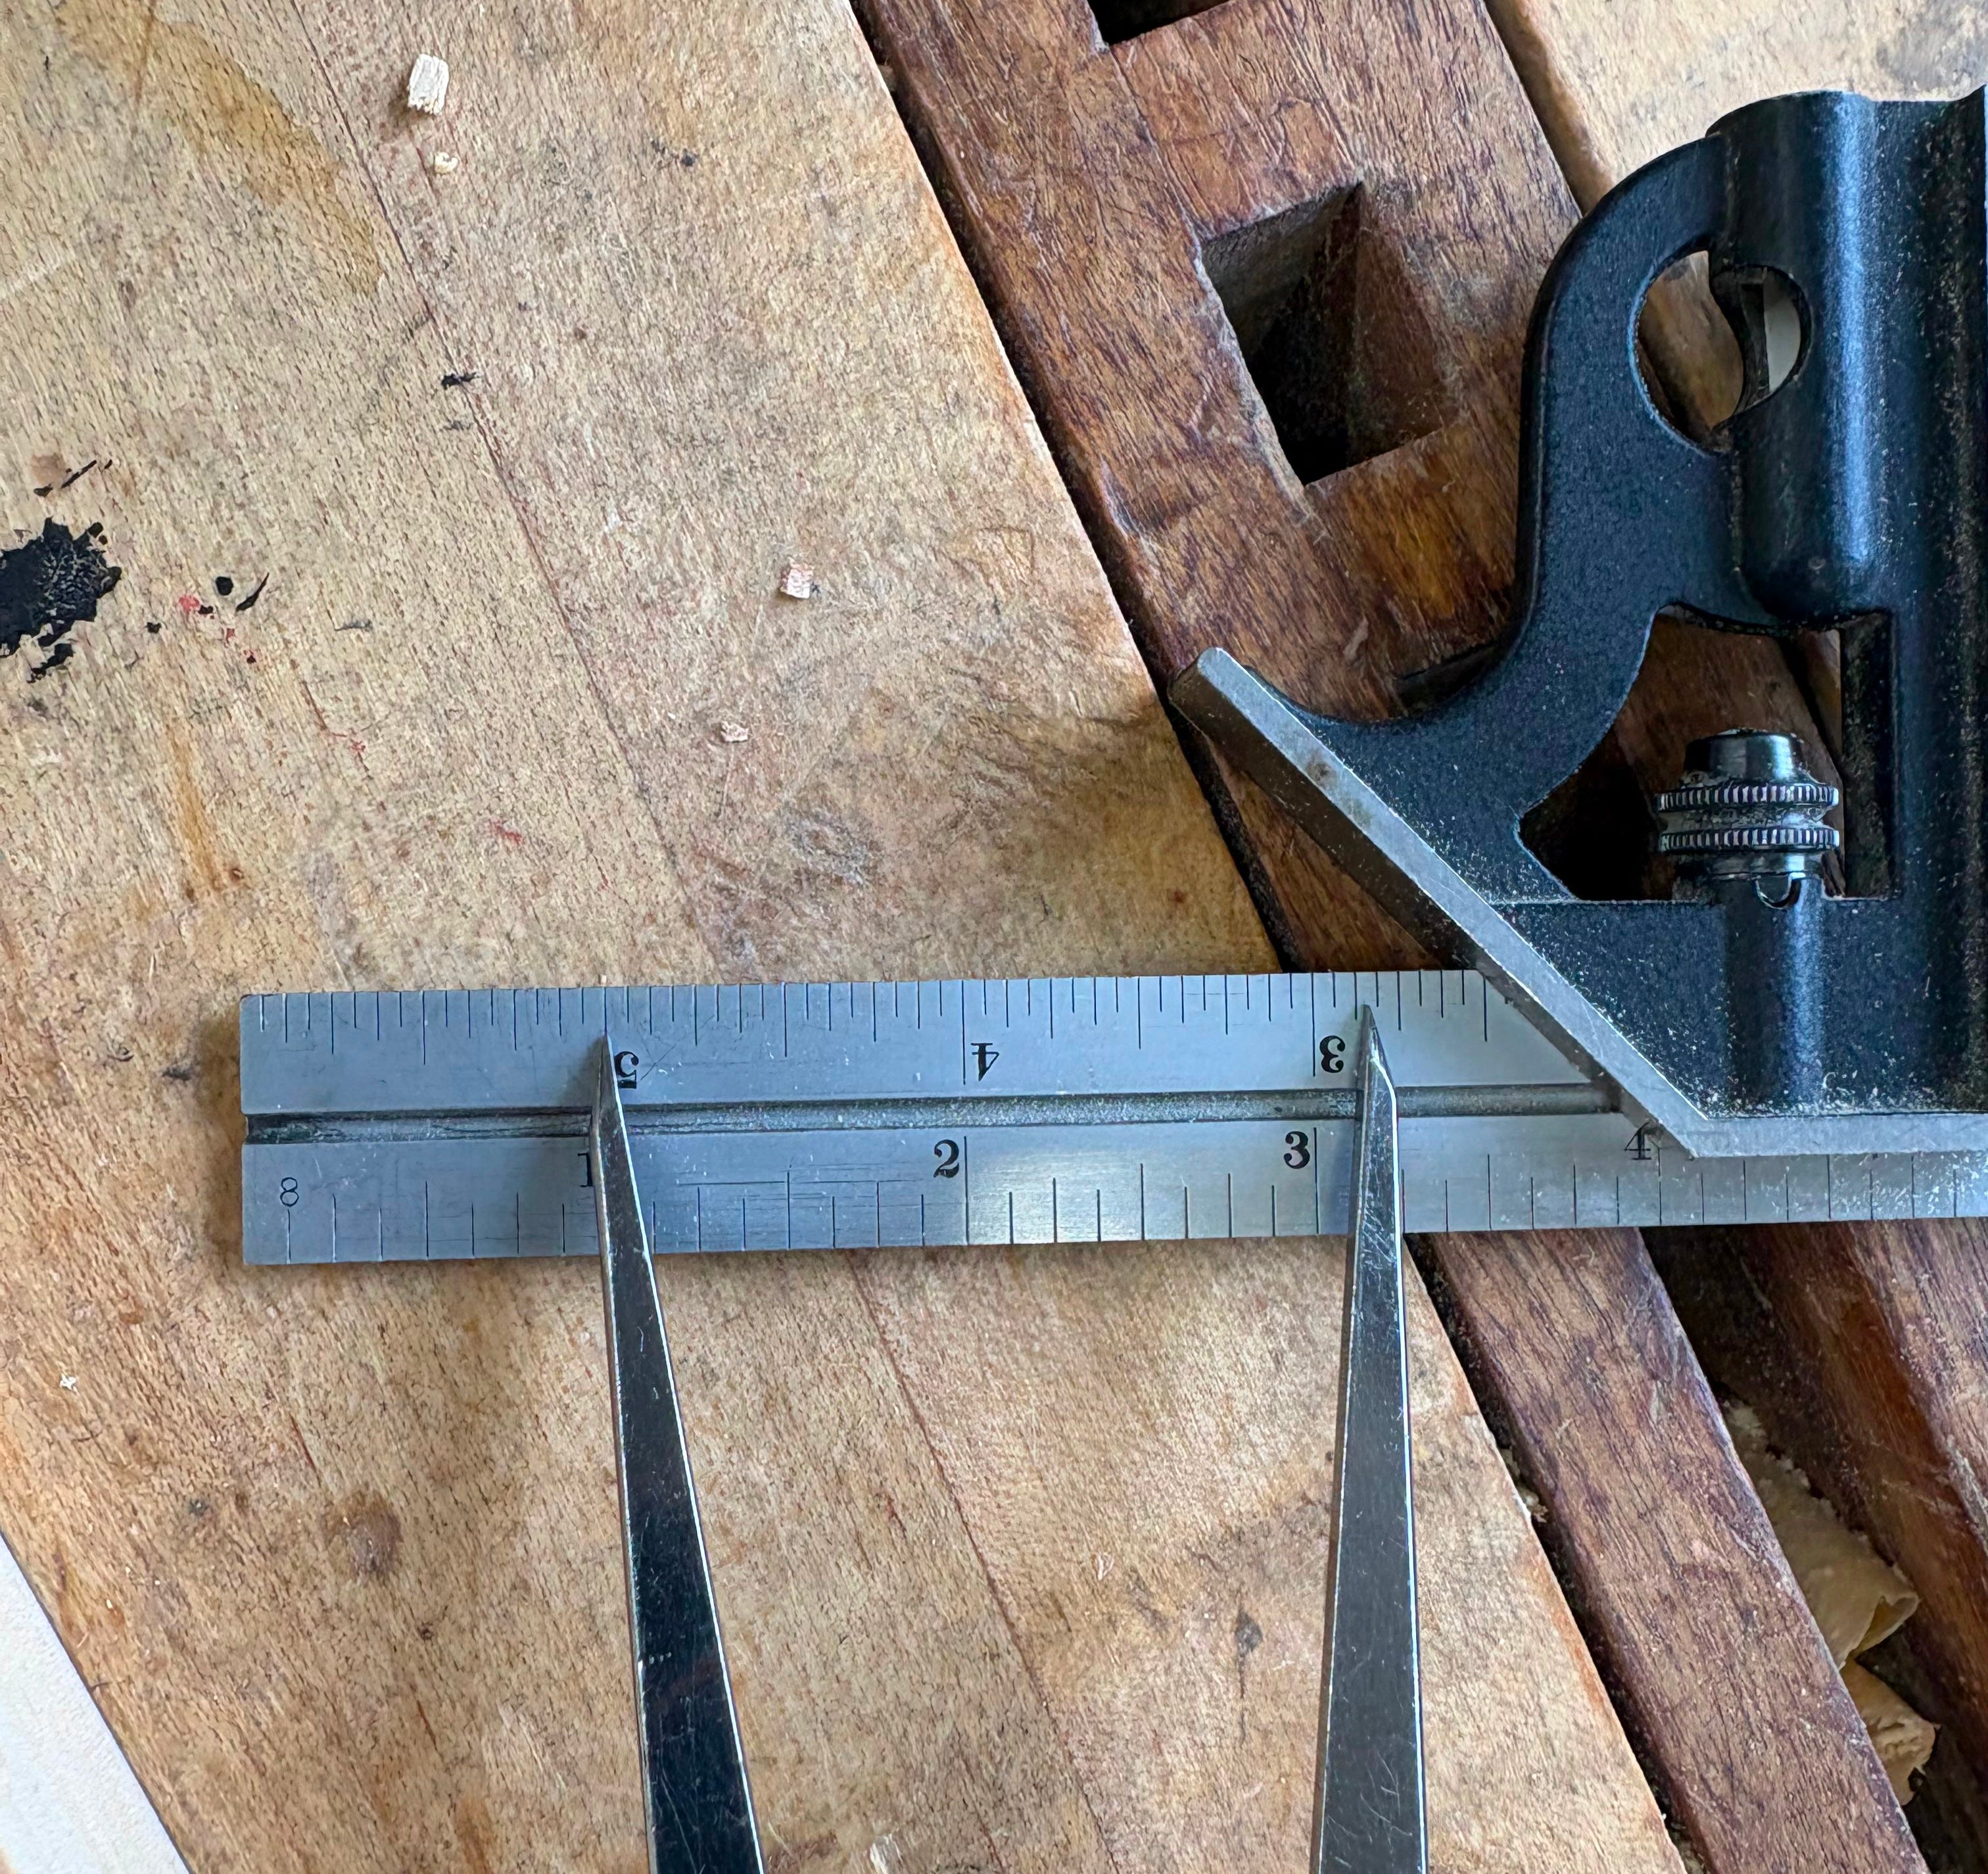
About 2-5/32”5. This measurement represents my board ‘face’ width plus the gap, so to get the necessary total board width, I subtract the gap (1/16”) add my tongue length (in this case 3/8”). This yields a total board width of just under 2.5”.
Using the spreadsheet to validate, it calculated a face width of 2.09” and 2.46” total width. Good enough for me! I checked it again with a 13” opening and a 1/8” gap with 5 boards and the results played out the same, but were more ‘exact’ since it was an even division (2-1/2” face width and 2-7/8” total board width).6
For cabinets that will be hung on a wall, I add in the thickness for a french cleat (~1/2”) as well. It’s my preferred way to hang cabinets, but whatever method you use, just be sure to account for it if you want the cabinet back to sit flush with the wall.
My ‘classical’ training as a mechanical engineer is on full display
Sorry for the tease, but it felt correct to split this off as its own post.
If you’re not familiar with that layout or this sounds confusing, this video from Christopher Schwarz explains it well.
The actual measurement isn’t important for execution, I just needed something to plug into the sheet to validate. If I wasn’t checking the result against anything, I would leave the dividers on that setting and mill my back boards until they were that width.
Thank you sir 🫡🫡🫡