
Artificial Iridescence
Part 2 - Tests

After my first foray into using synthetic pigments, I had a few takeaways that I wanted to address via some testing.
Settling: the pigment settled out of the paint very quickly. It was easy enough to address, just mix/stir it very frequently, but I wanted to try 2 things to see if it would help
Thicker paint. Idea being that a thicker paint would hold the pigment in solution better
Gradual Slaking. The Earth Pigments website recommended gradual mixing of the pigment to avoid micro clumping (which may or may not even be related) so I figured I’d test that.
Surface quality. Even after knocking down the raised grain of the first coat, I noticed tiny surface bumps in the painted surface after every coat. This could be more related to the micro clumping, so the gradual slaking might help and I was going to pay more attention to surface quality between coats to see if the problem replicated itself with this batch.
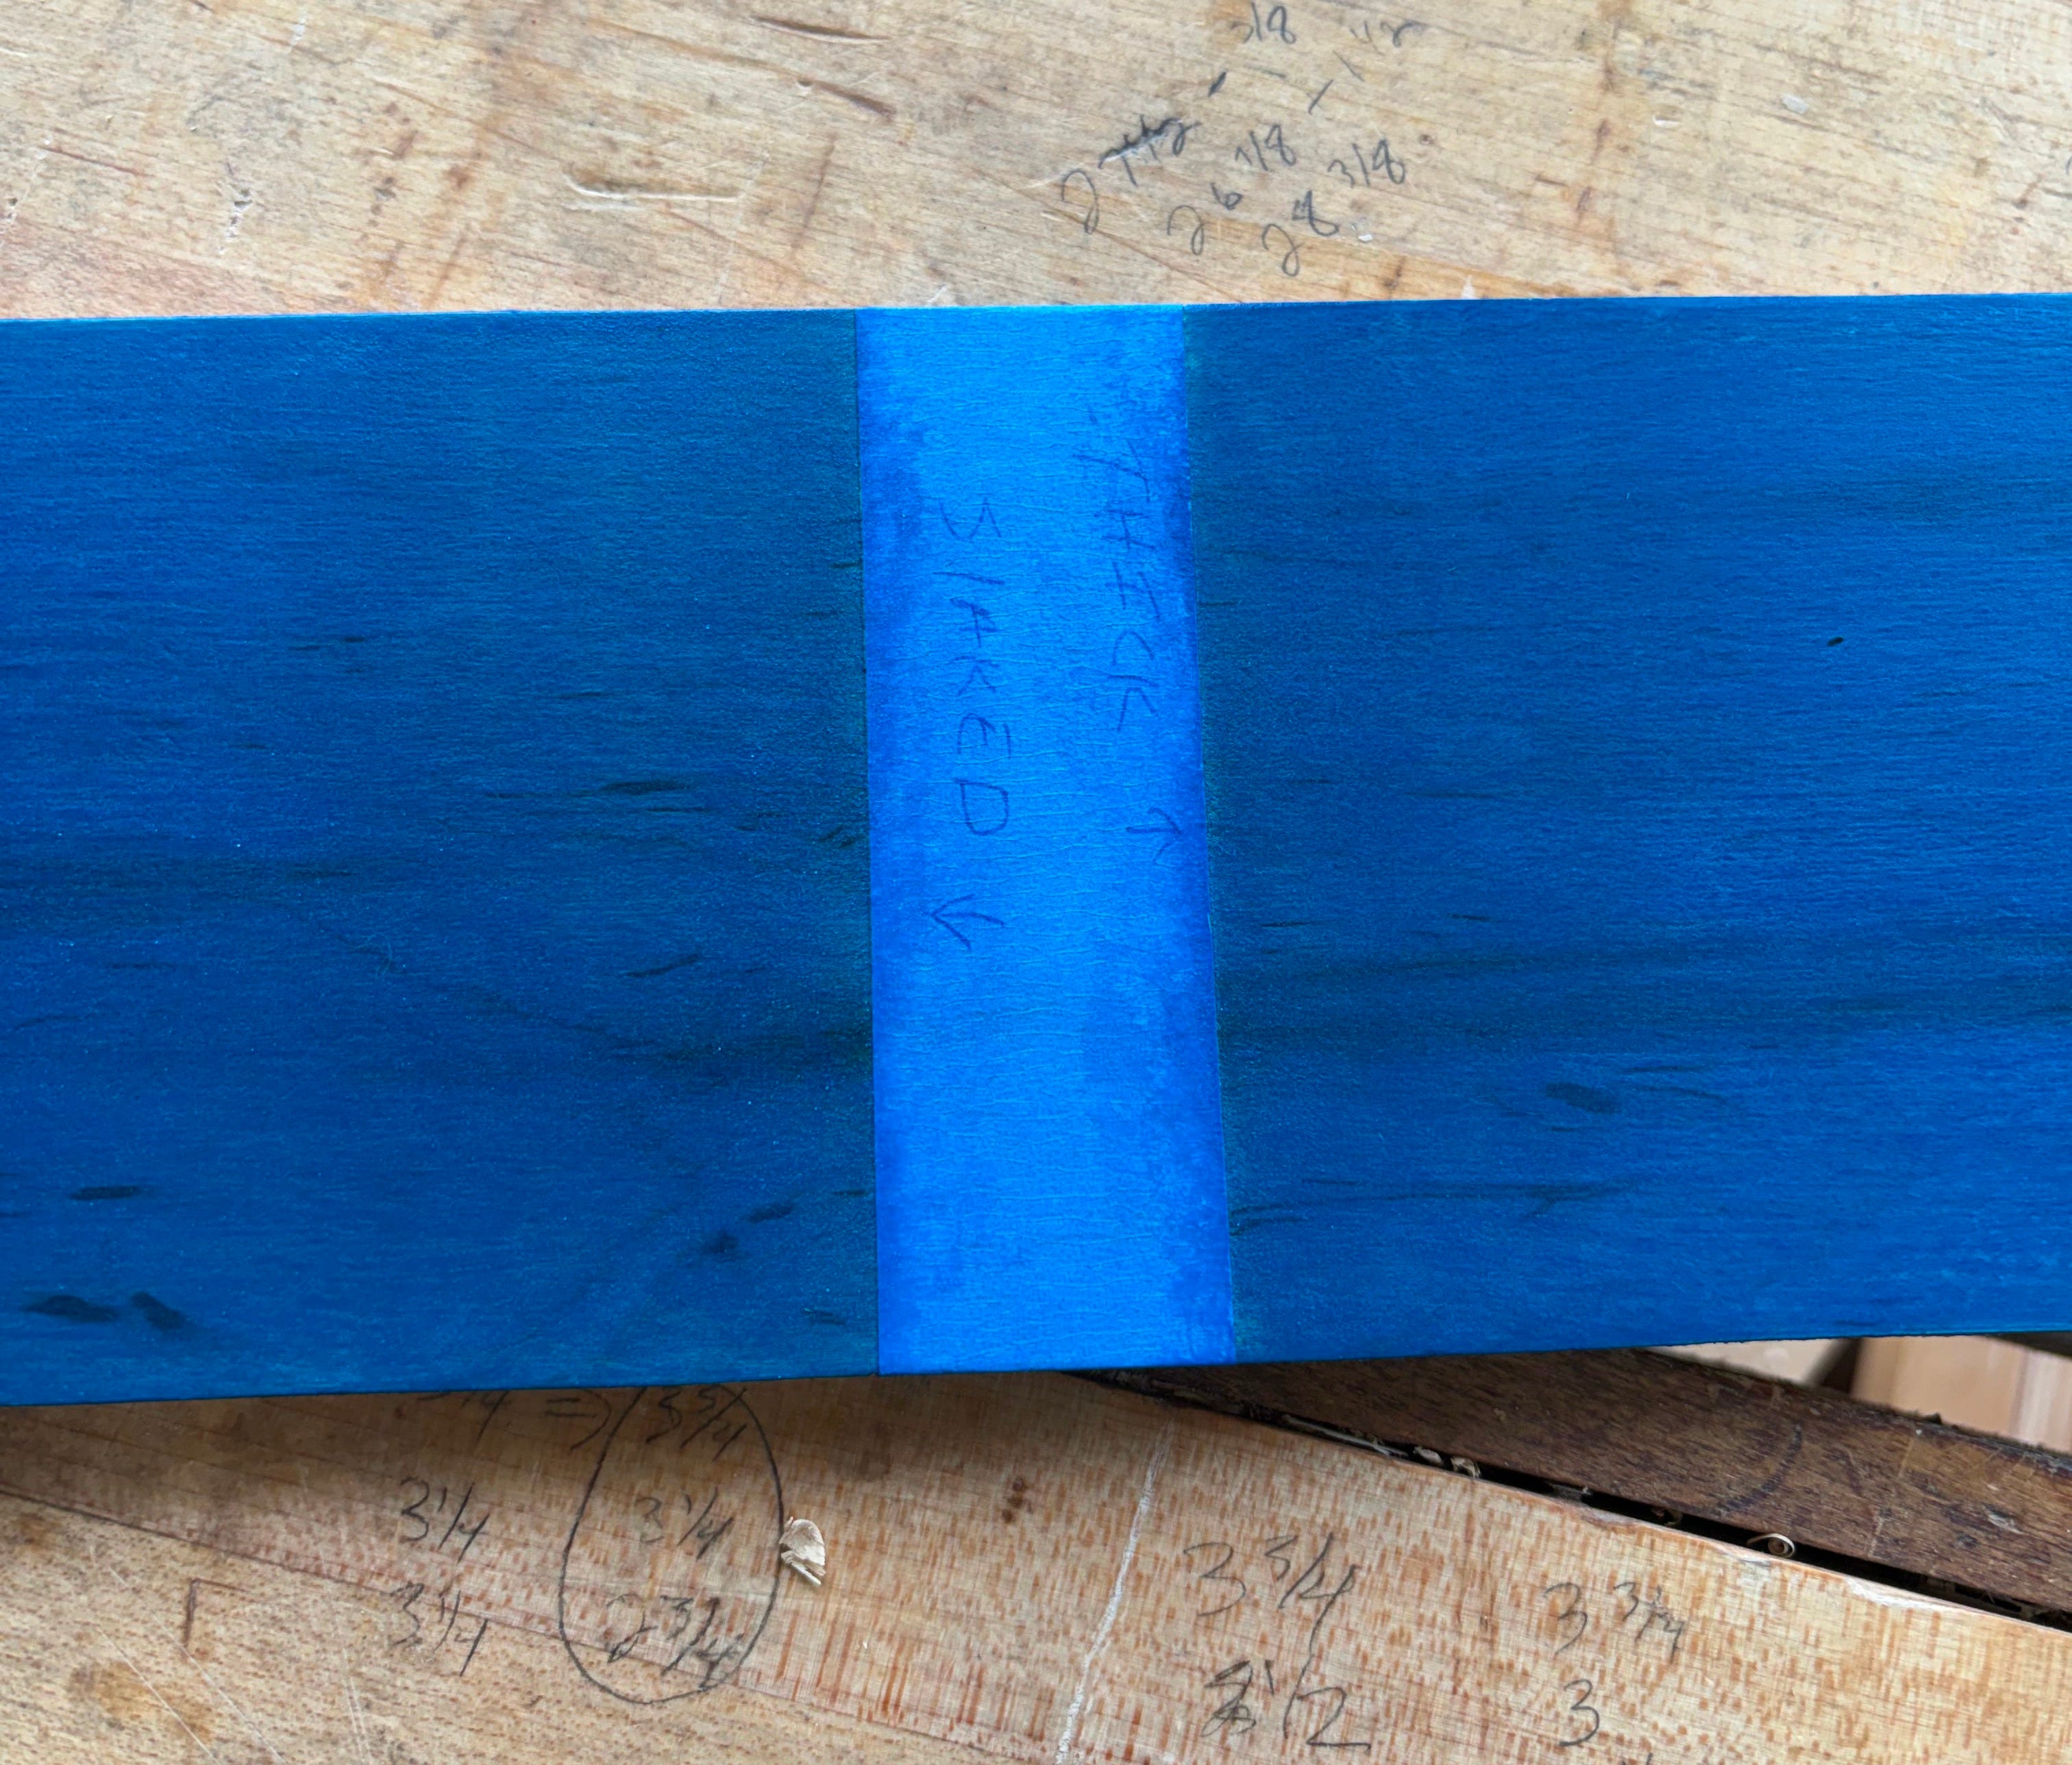
Test Sample and Prep
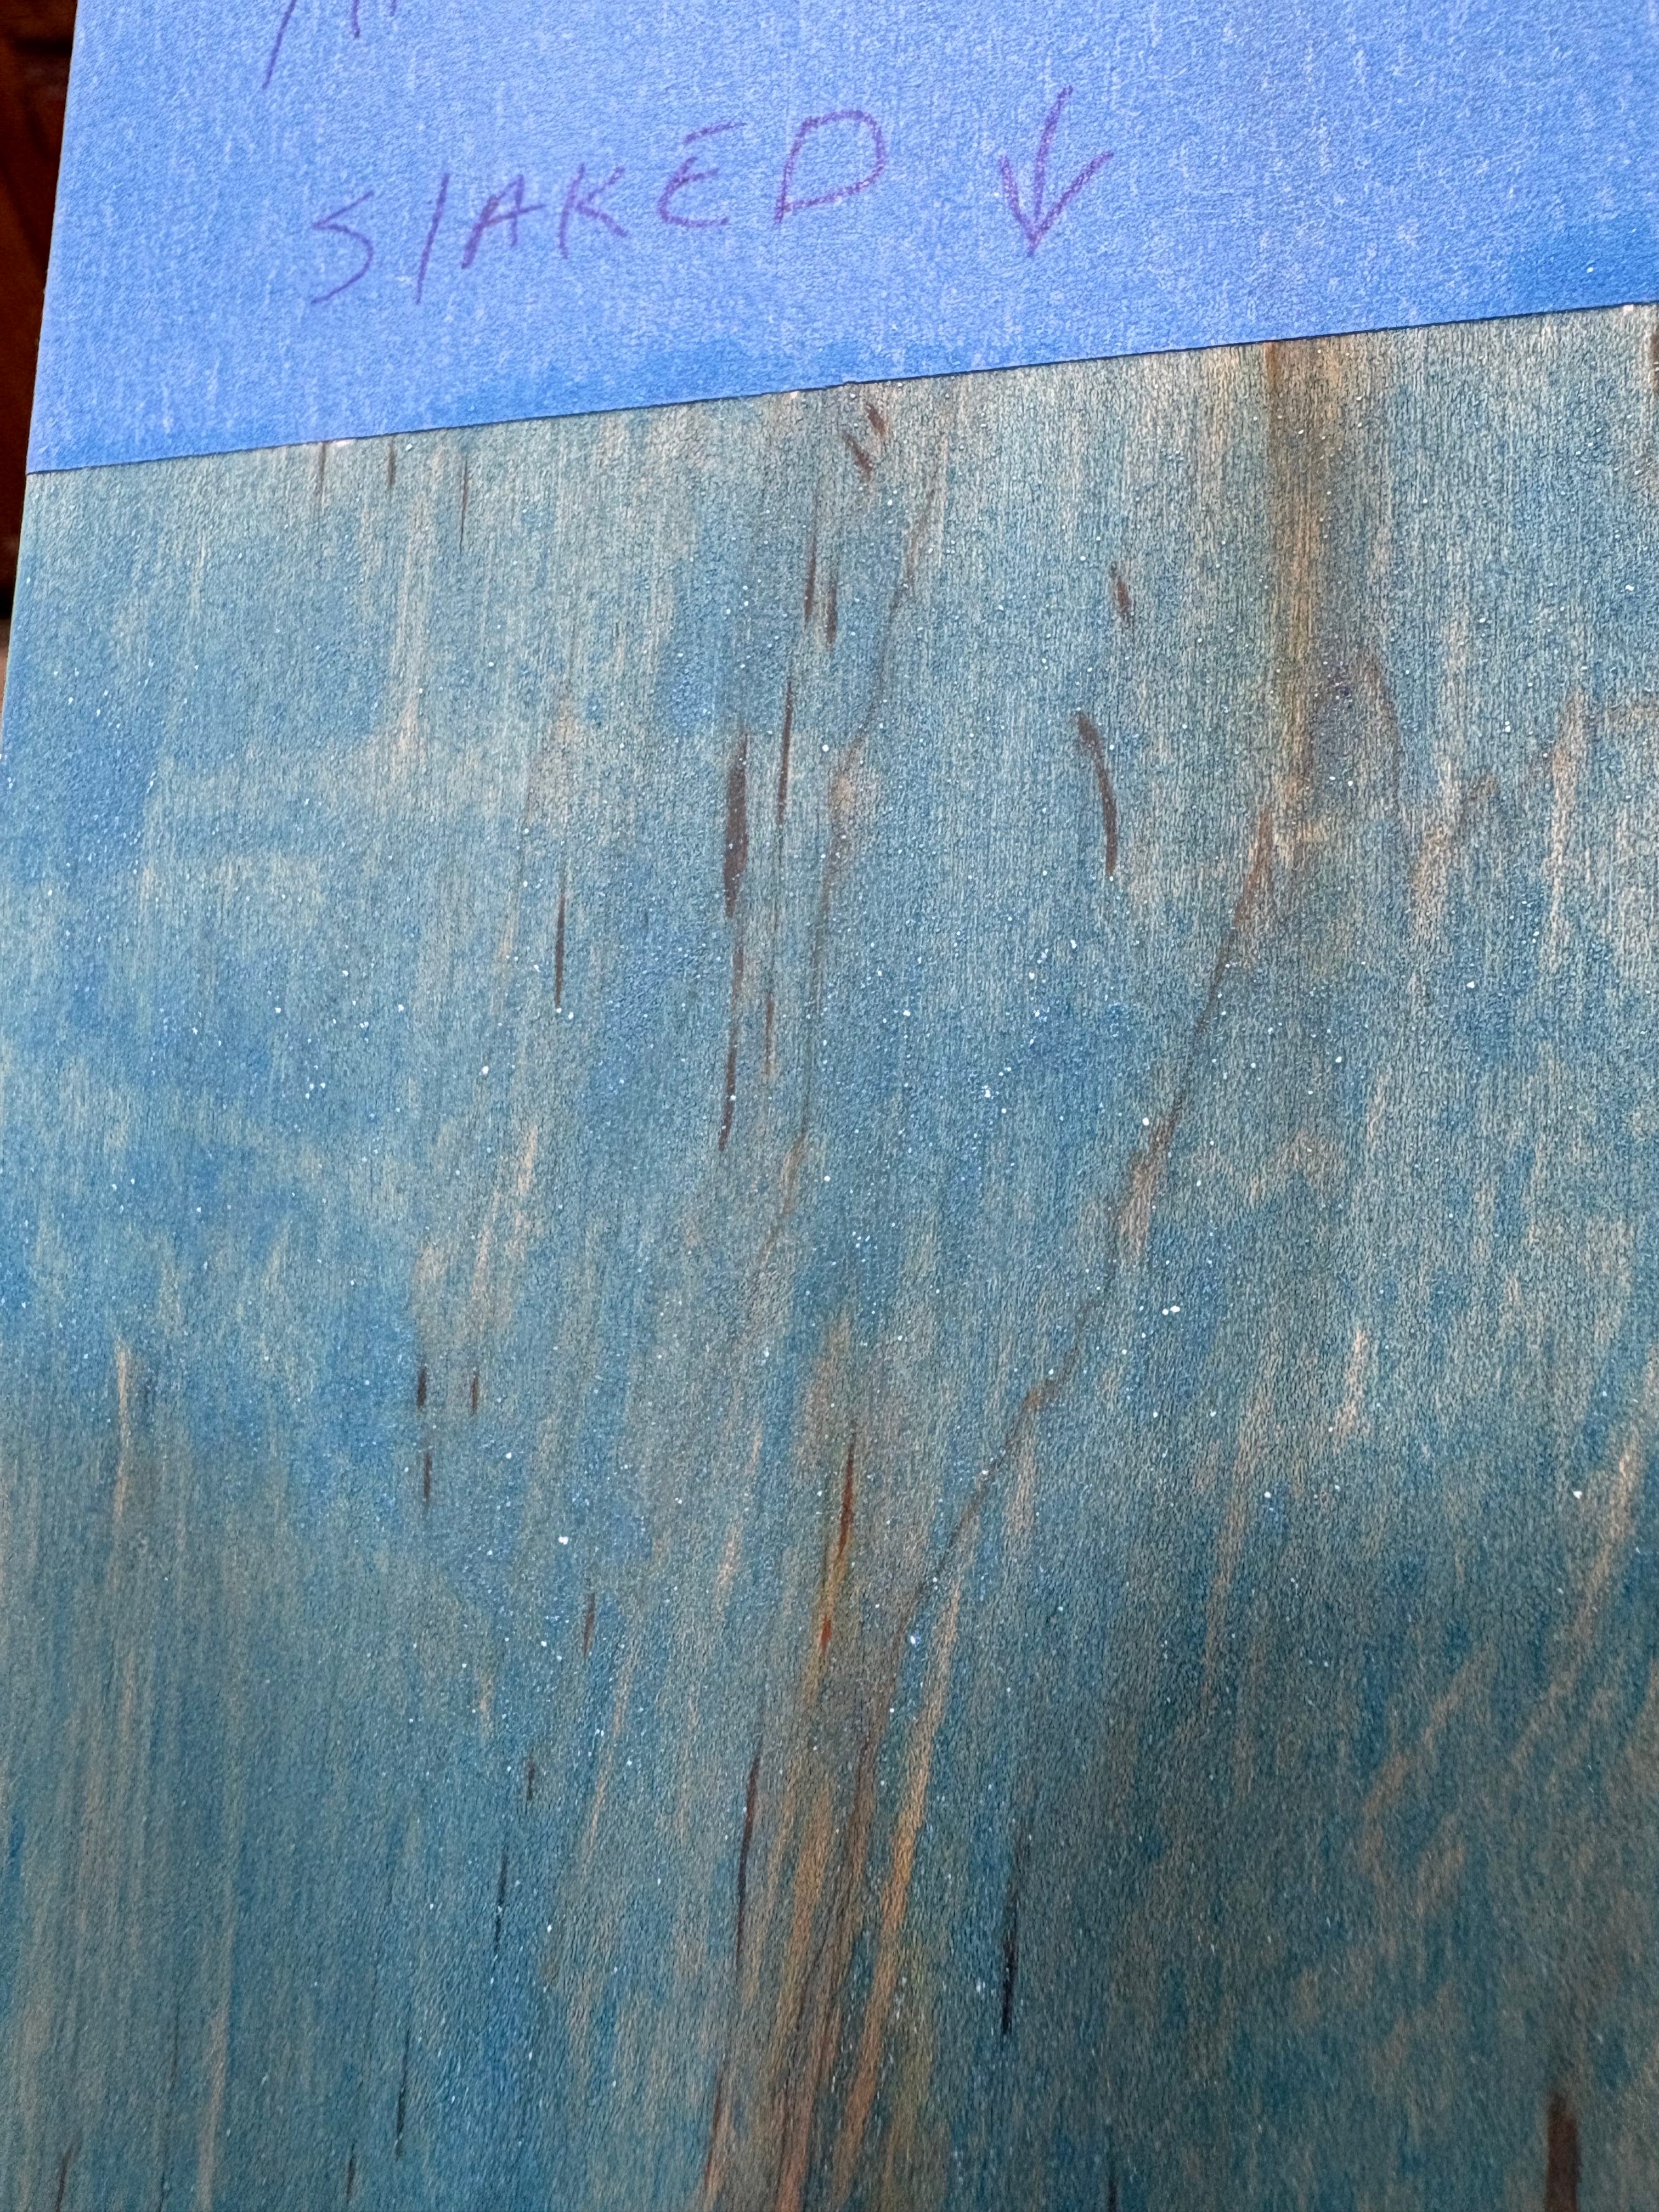
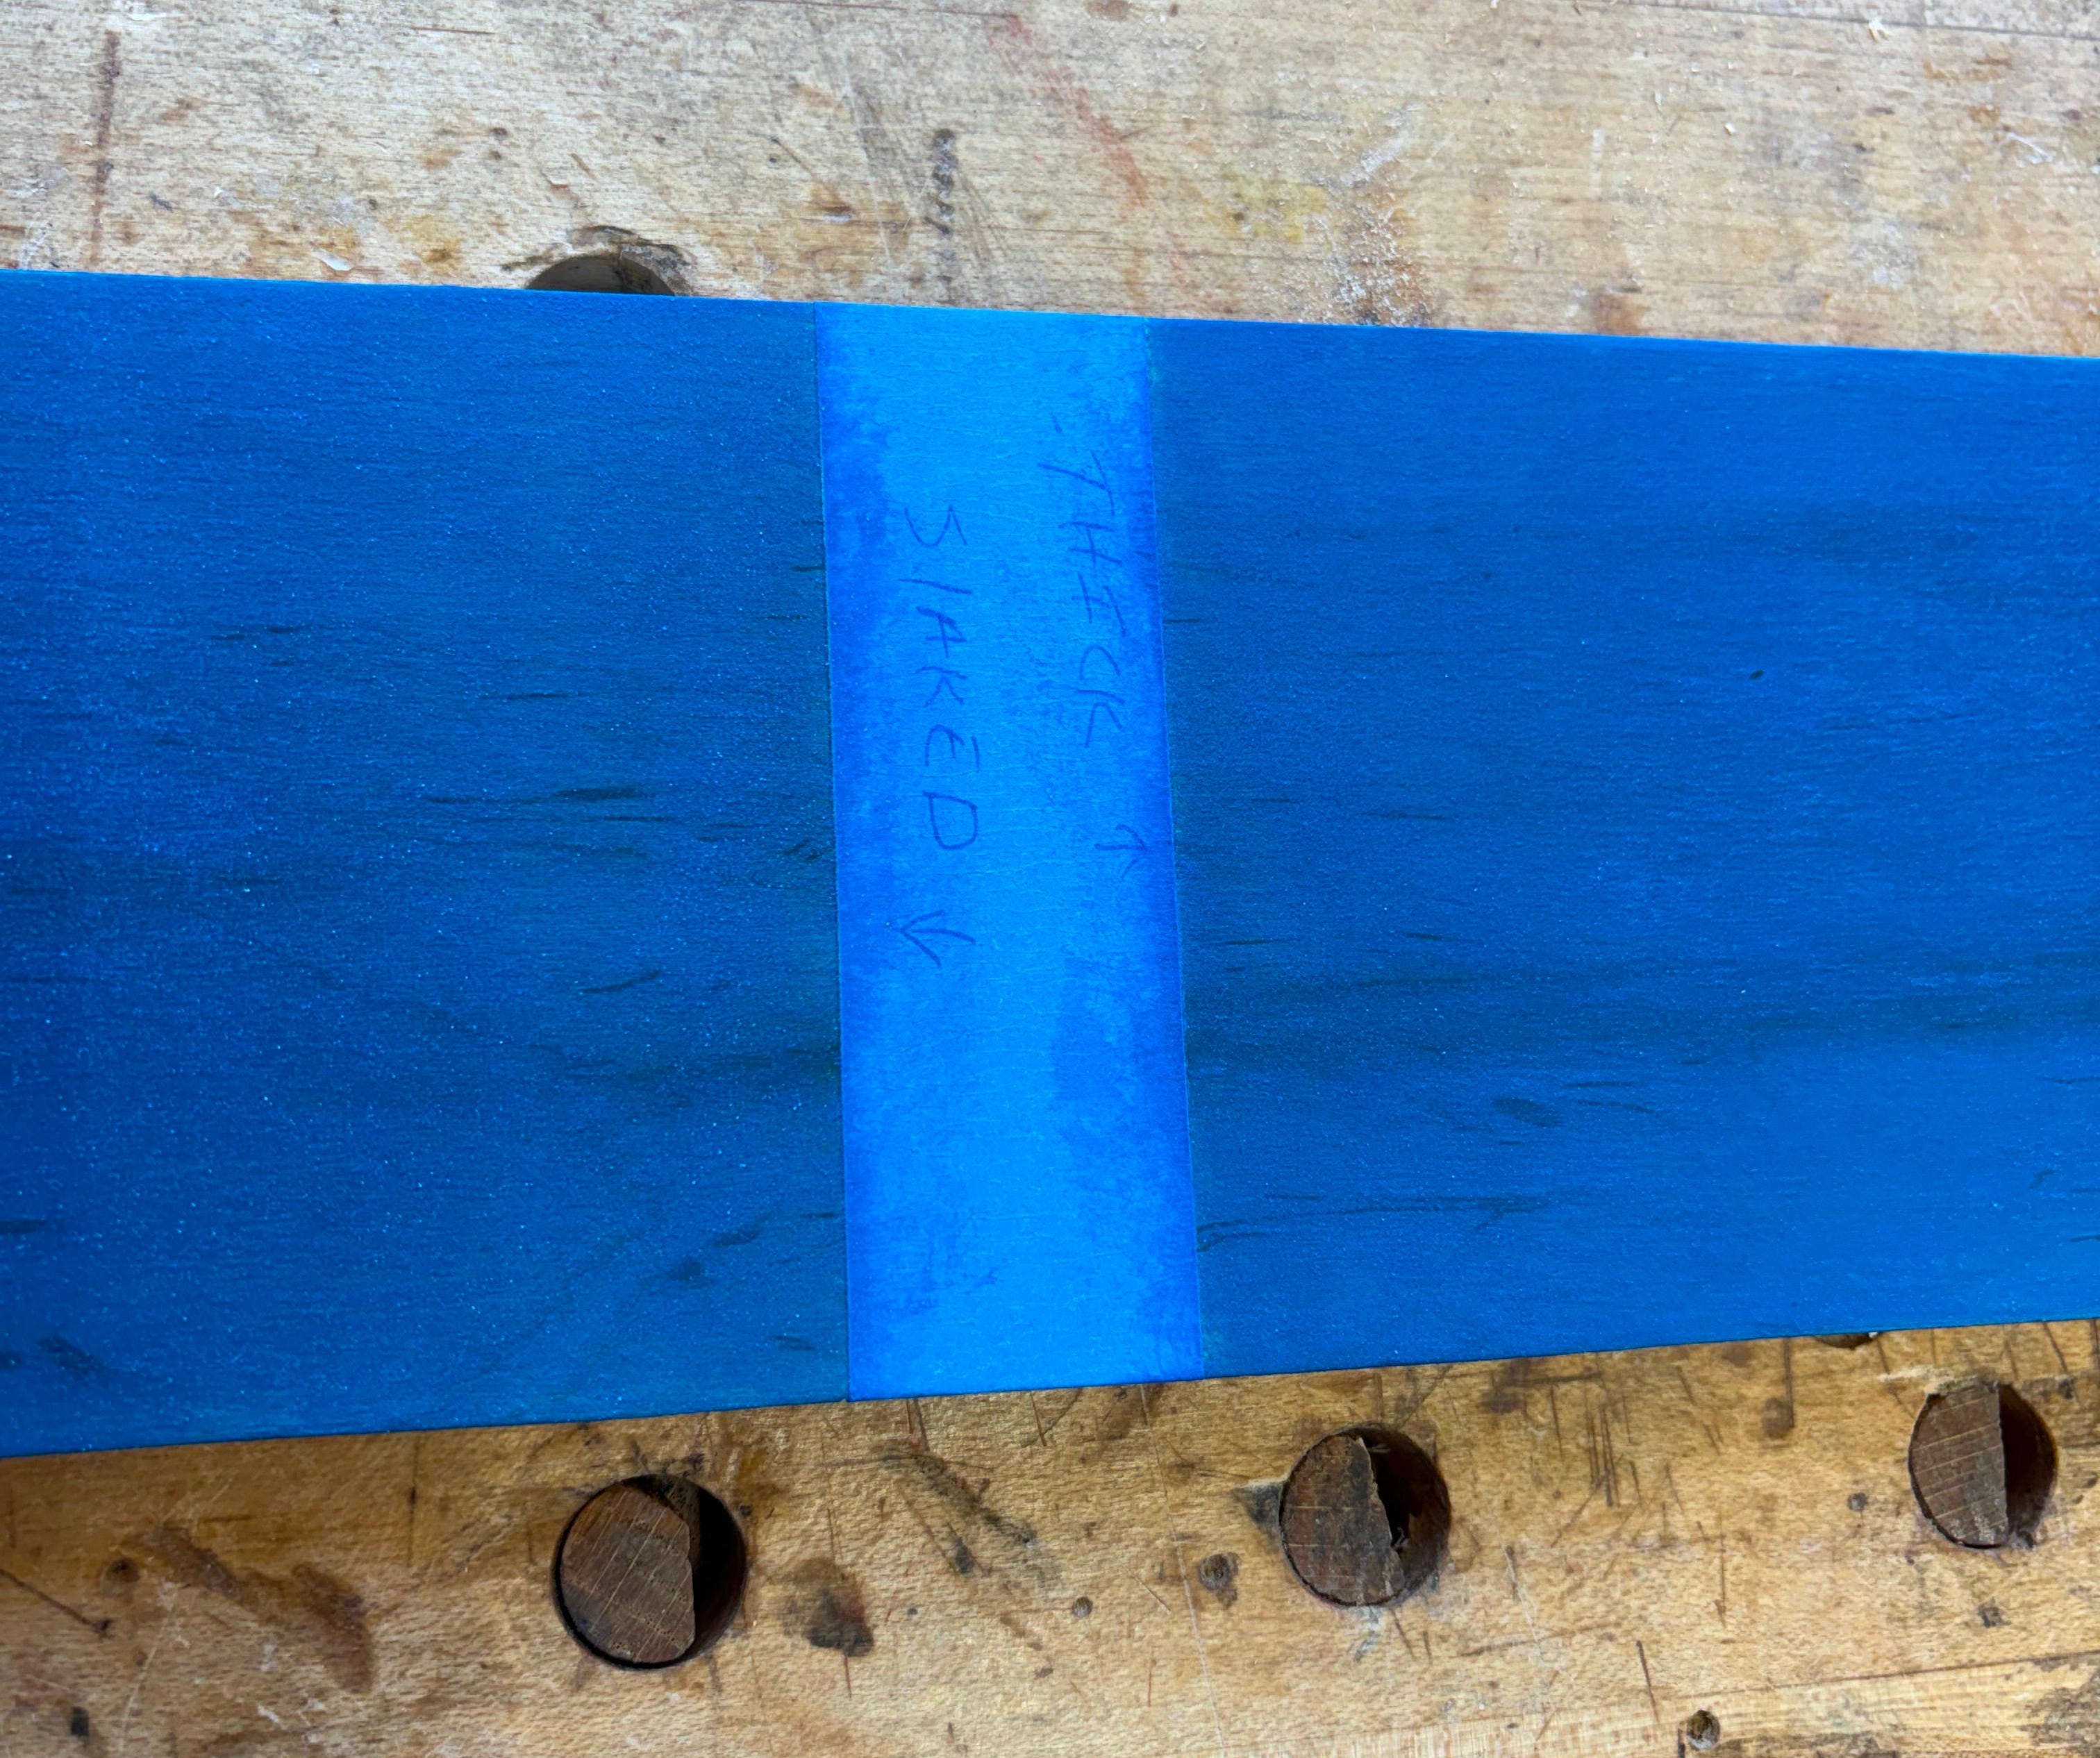
I milled a scrap piece of ambrosia maple, sanded it to 120 grit, and cleaned the surface. I taped off the rough middle and marked my sides “thick” and “slaked”.
I had 200g of quark left from my previous paint project, so I split in evenly for two batches and scaled the pigment and lime from that.
For the slaked batch, I added 1/3 of my pigment to 1 tbsp of water and mixed it in as well as I could and let it sit for 30 mins. Here’s how it looked:
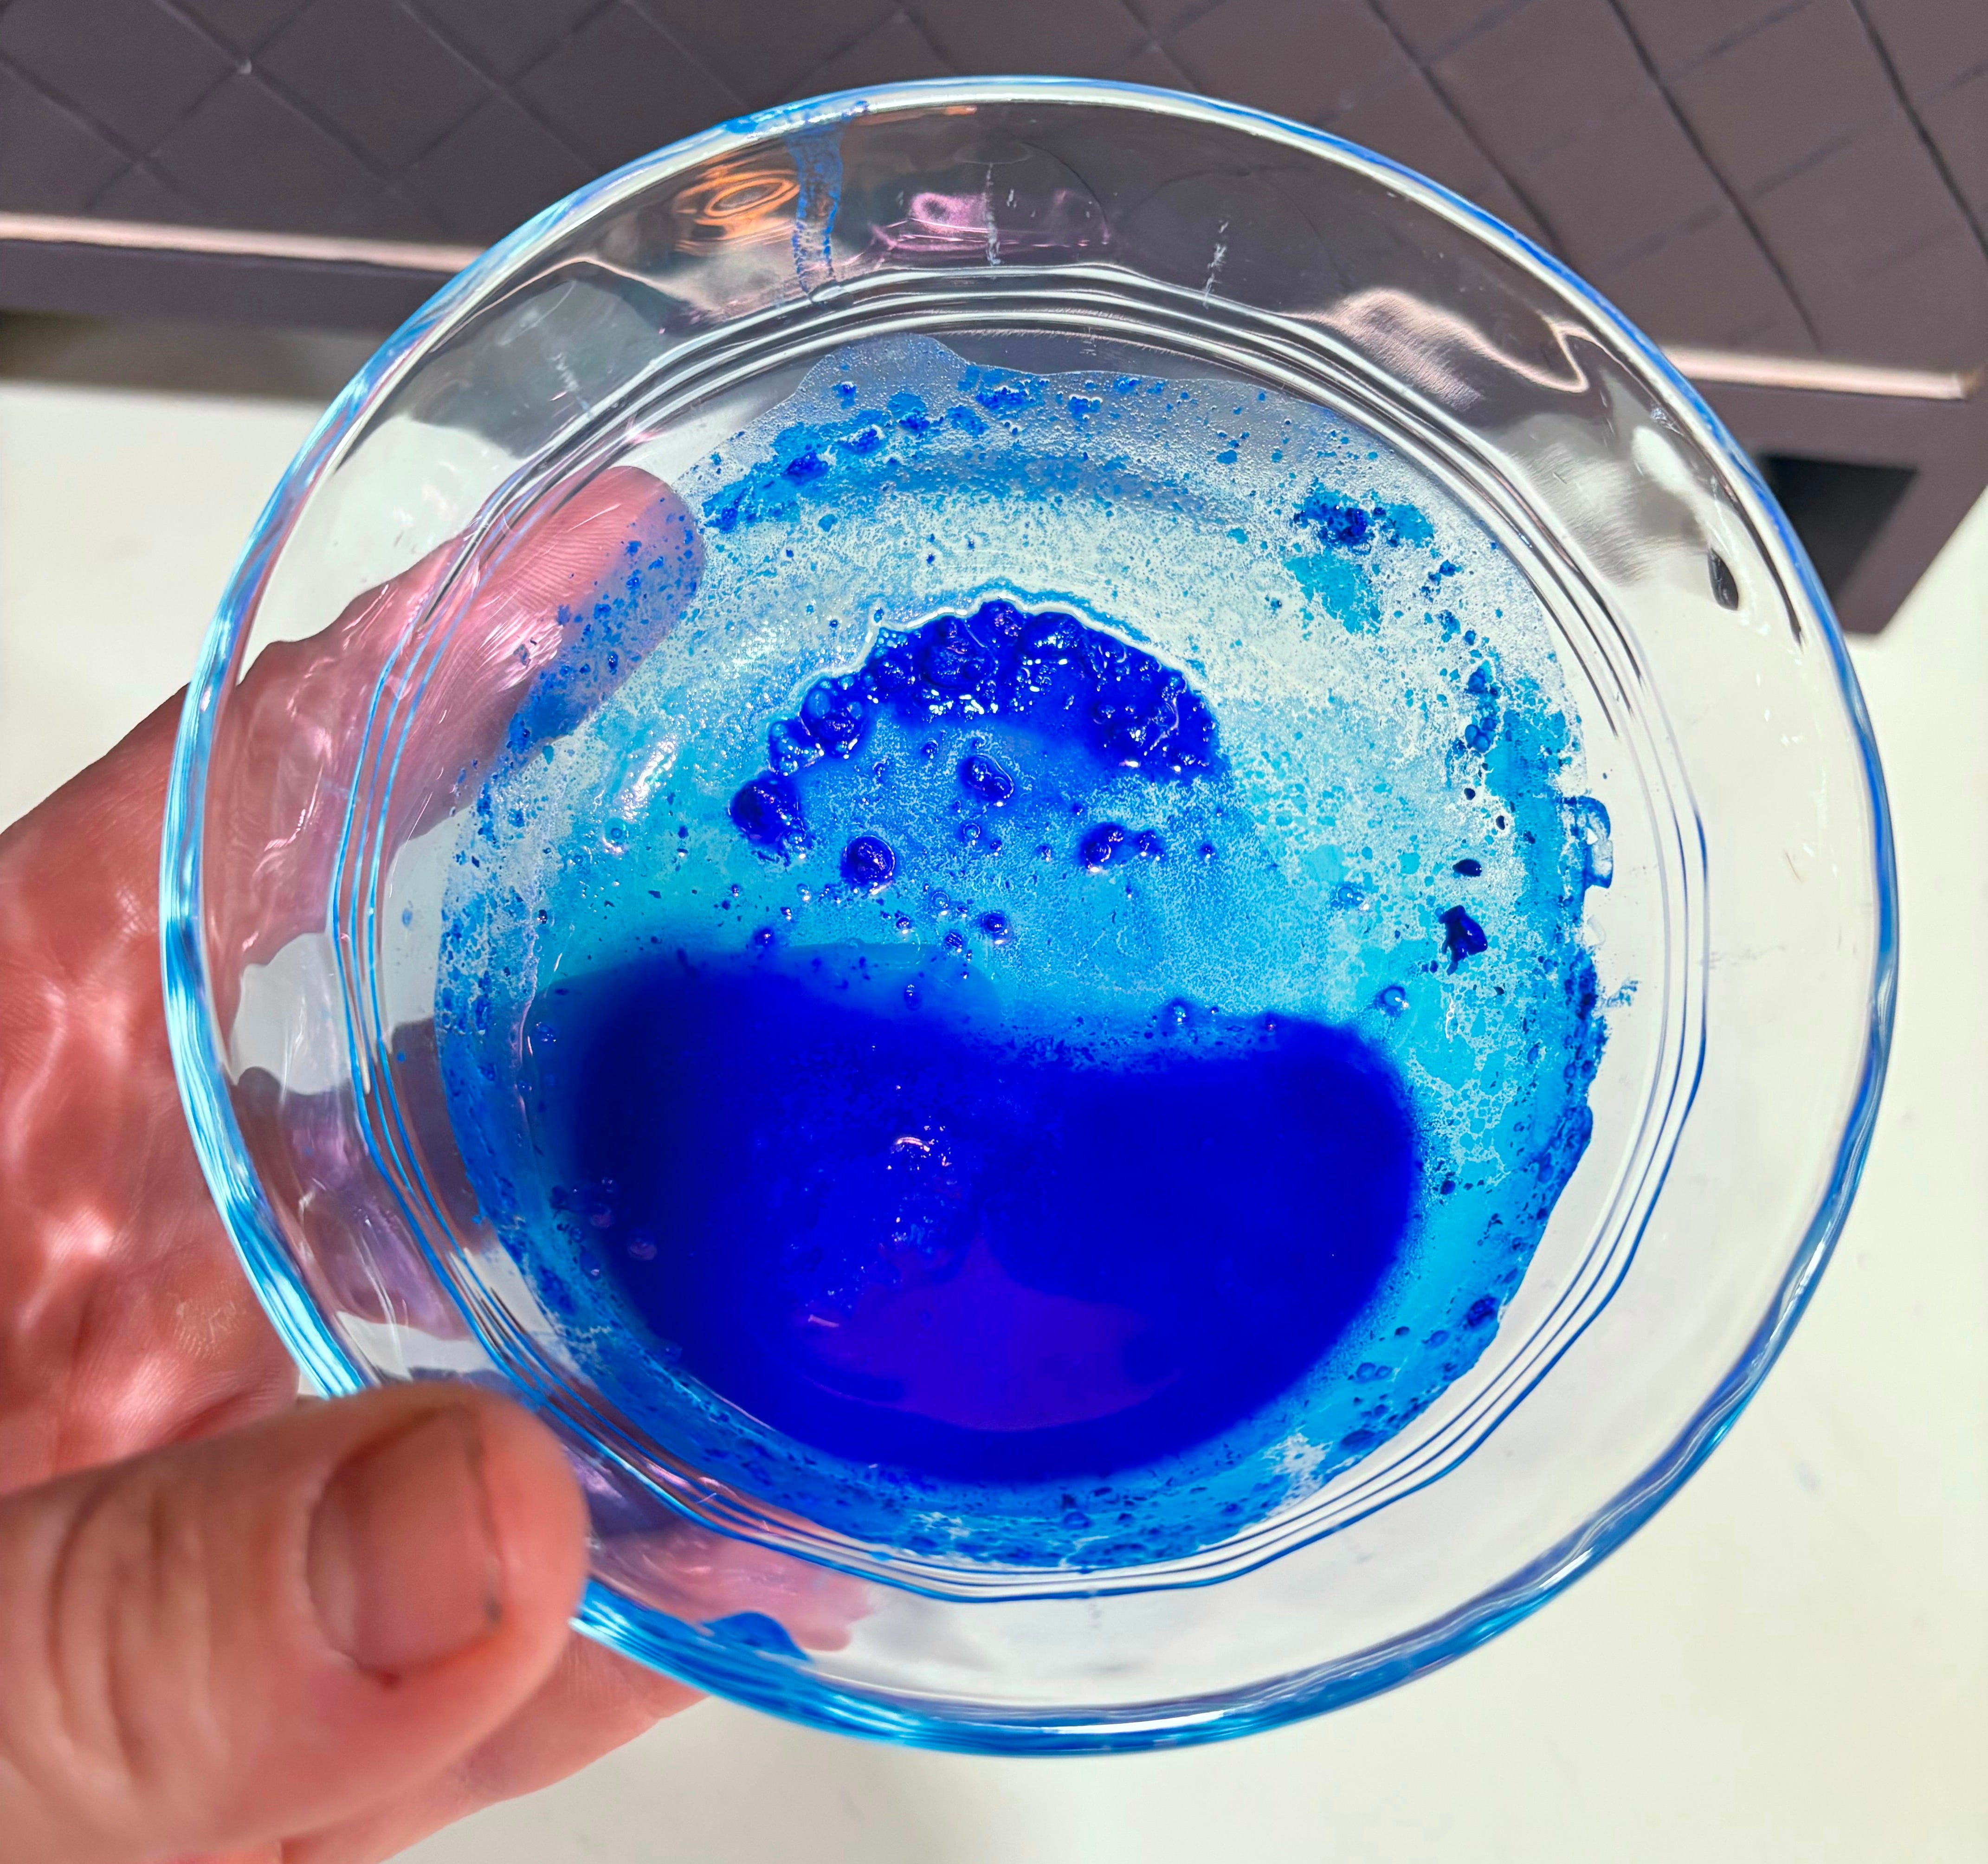
Still lots of clumps. I added another 1/3 but this time used a tiny whisk to mix it up before letting it sit for another 30 mins. Repeated the entire process for the final third and this is how it looked.
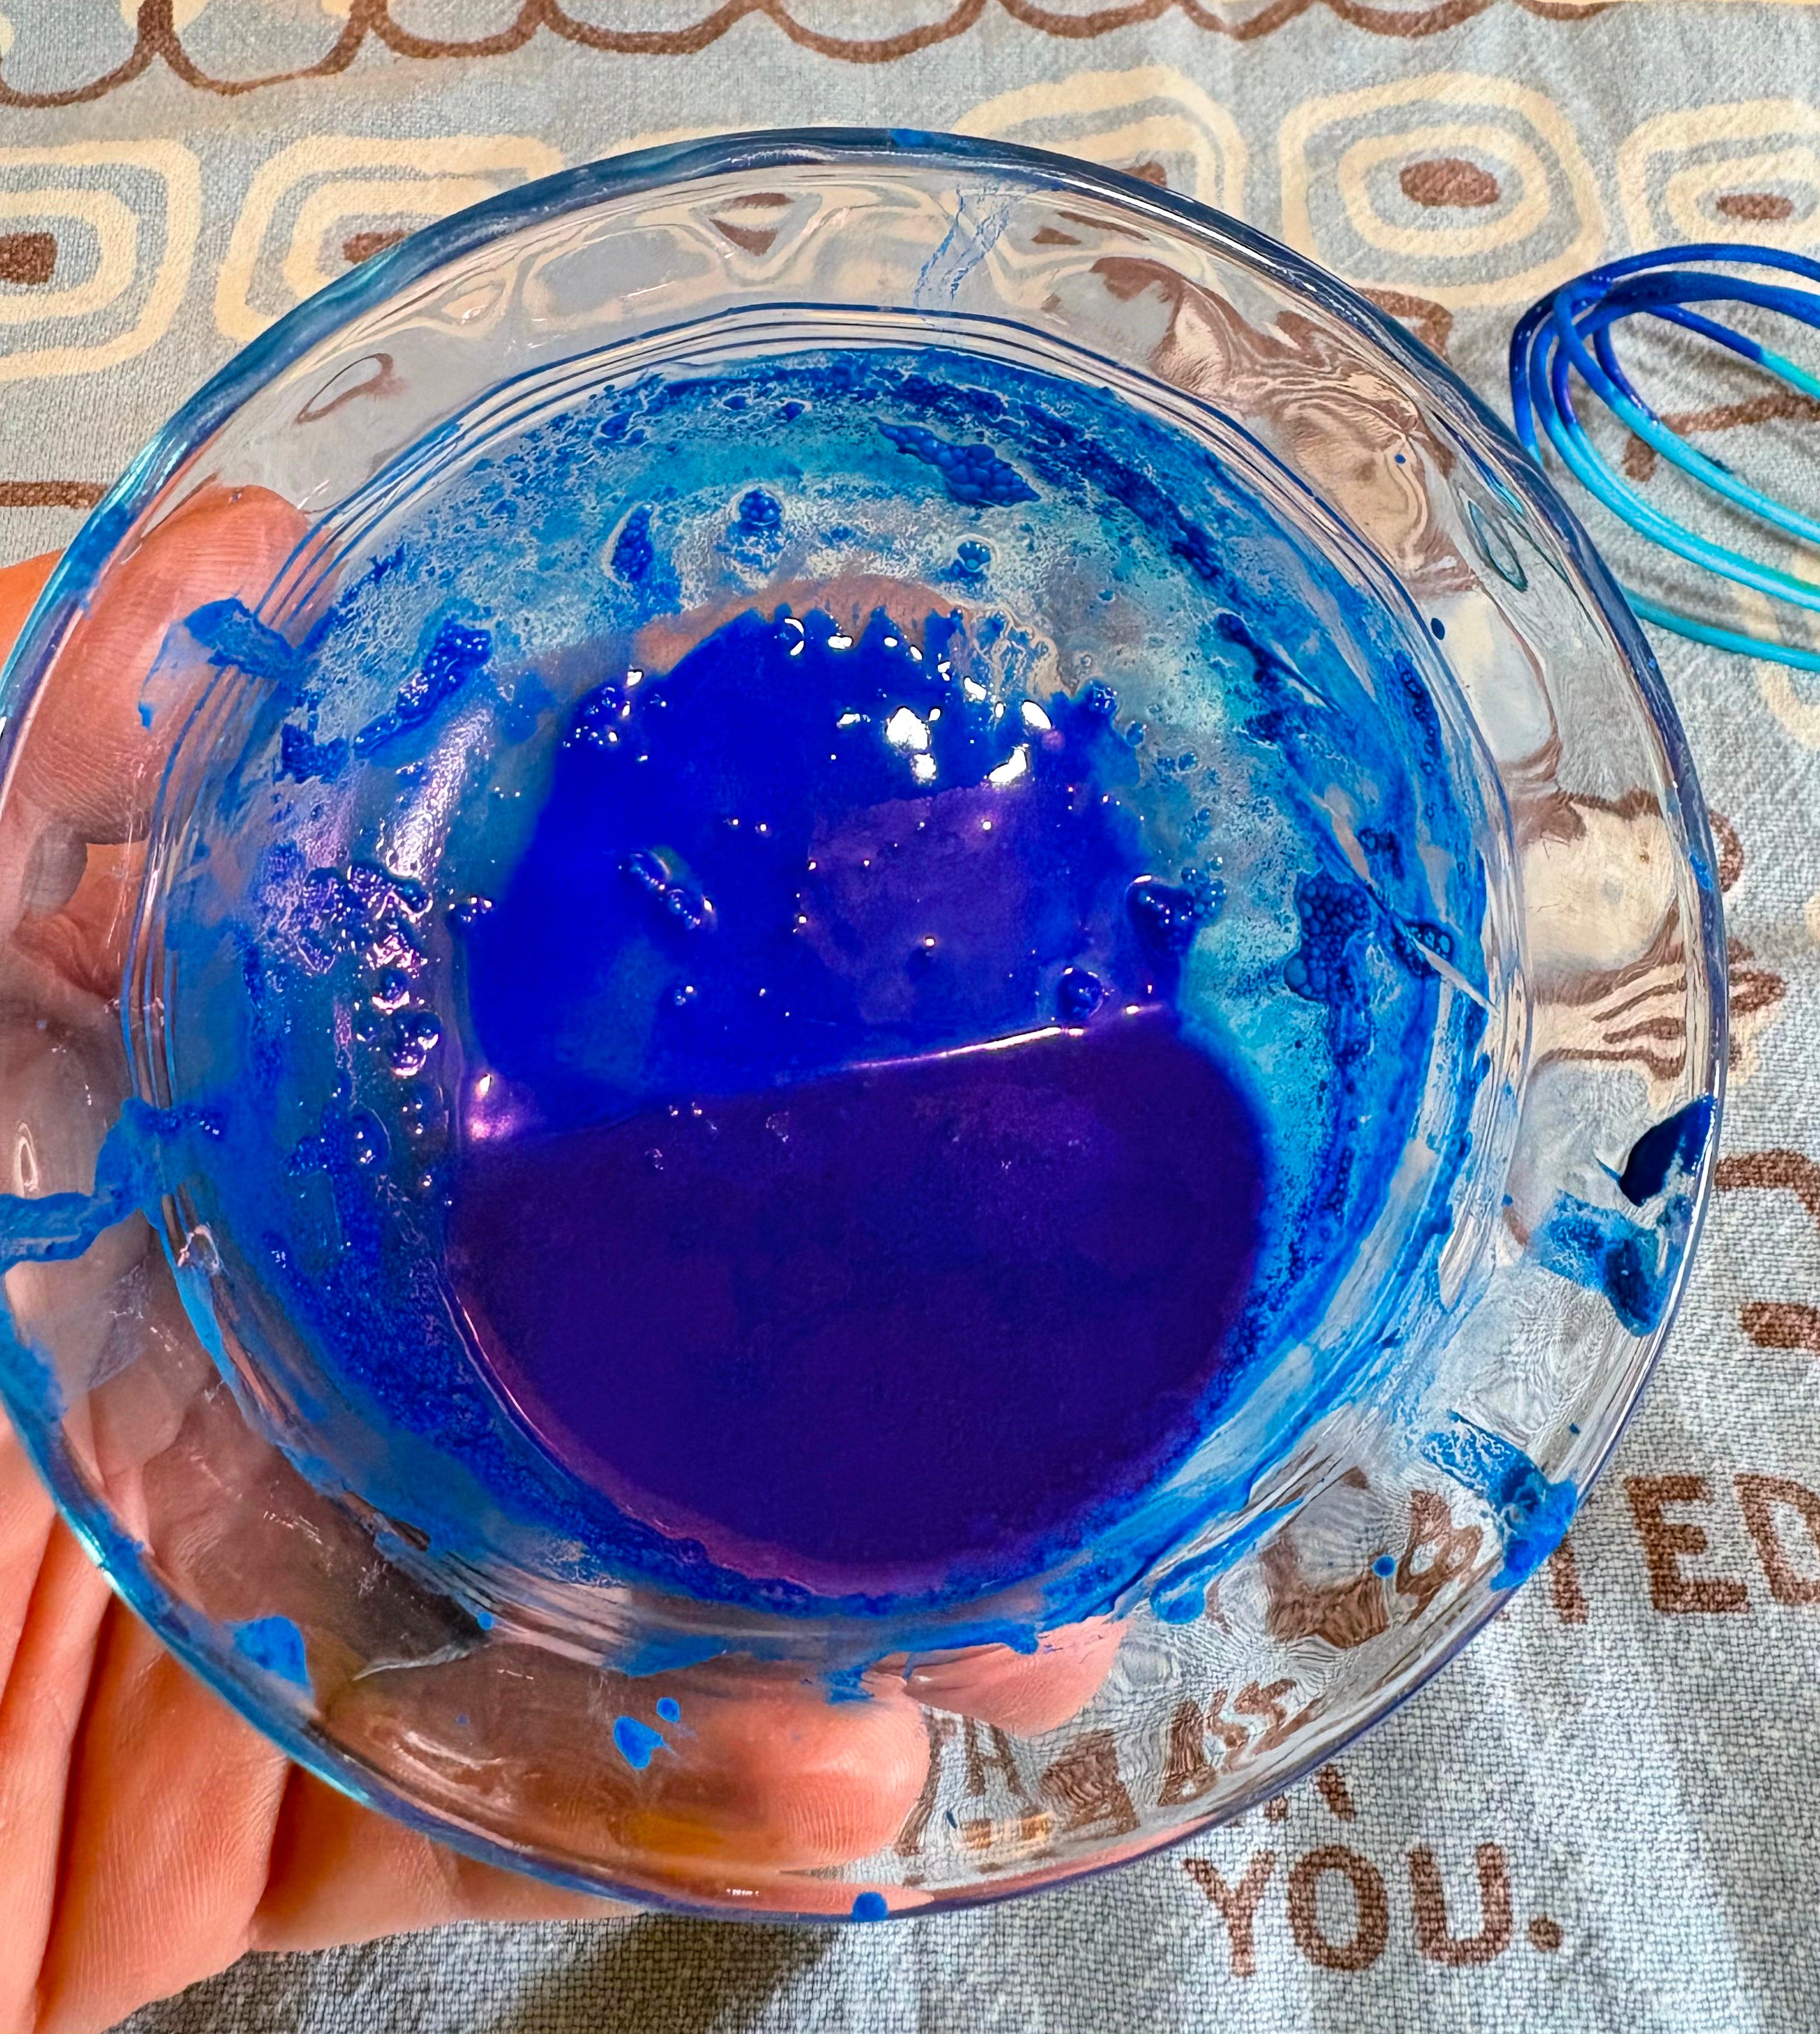
Between the whisk and the time, most of the pigment appeared to be incorporated (or at least there were fewer clumps). Some of the ‘clumps’ in the picture are actually bubbles FWIW. 30 minutes between additions was likely overkill, but it was best to err on the side of overkill.
I mixed that into my quark and lime and ended up with the my typical paint consistency.
For the ‘thicker’ paint, I just added my quark, pigment, and lime directly to the magic bullet and mixed.
Brief aside on quark: I live in Oklahoma, so my dairy options for quark are quite limited. Highland is the prominent provider and even the various grocery store brands I can find are still made and bottled by Highland, they just slap someone else’s label on it. Highland’s milk consistently gives me lower yields of quark than what Nick has experienced in his neck of the woods, and even after extended straining and draining periods, my quark is always on the ‘wet’ side. As a result I add only about half the recommended water (sometimes less). This quark had been in my fridge for 3-4 days and was still on the wet side, so I went with zero added water (for a 40% of full batch recipe),. I expected to maybe add a little water, but it mixed well and got me a very thick consistency1.
Time to Paint!
I painted on the first coat of each and let it dry. After it dried, I followed my typical process of lightly sanding the surfaces with a worn out 320g sanding sponge. This works well enough to knock down and raised grain and remove dust nibs. I also painted my test boards in the house to further avoid any lingering dust in the air (trying to isolate variables).


Coverage was pretty good for a first coat, but the slaked lime had lots of white bumps on the surface.
I let it dry and came back for a second coat, and checked on the containers for settling. The thick paint was still showing signs of settling, but it was minimal compared to the Monte Carlo green from my last post. The slaked had also settled, but less so (you can see a faint white area developing compared to the white band on the thick paint).


After some mixing/stirring, I painted on a second coat, repeating the process until I had 4 coats on the test board. The small bumps persisted throughout the painting process with both batches, they were just slightly smaller/less noticeable with the thicker paint.
Quick note RE the thick paint: I did had to add a little water between the second and third coat because the paint had started to dry out and get gloopy. This happens from time to time with homemade milk paint, most commonly when the paint is stored overnight in the fridge. Just a teaspoon or so of water and a quick blend got it back to its previous consistency.
Here is final test board after 4 coats. The slaked paint on the left has very obvious white dots throughout the board. The thick sample also has the same dots, but in far fewer number. I’m not entirely sure what it happening here.
Same sample board after a coat of soft wax (my typical top coat for milk painted pieces).
This pigment didn’t color shift too much with the soft wax, but it did appear to hide the white bits.
So what did I learn from all this?
I don’t think slaking is the way to go, given the issue with the white bumps. The thicker paint did have the same issue, but it wasn’t as pronounced. In a perfect world, you might be able to get away with doing both: slaking and making thick paint, but I’m not able to pull that off with the milk products I have at hand.
Milk paint is a natural product, and, much like wood, the variations that come along with it are what make it beautiful, but sometimes perplexing. It’s all one big experiment but the results are hard to argue with. Even in the middle of these tests, I put almost all my acrylic paints on FB marketplace for free2. There is still no match for the depth and feel of this paint, and I take some personal pride in being able to make it myself out of simple ingredients that contain zero plastics.
Much like using a well tuned and sharpened hand plane, once you’ve made your own paint there’s no going back.
I’ve heard good things about Trader Joe’s milk for making quark, so that’s on my list to test. We love some of their snacks and quick frozen meals when we are in a bind, so another reason to visit is always appreciated.
I should’ve fully committed and got rid of all of it, but my brain dreamed up a scenario where I would HAVE to have something painted ASAP and didn’t have skim milk on hand. Even as I type this, I know that’s downright silly.
Great write-up Jon! I really appreciate the structured approach and I'm very happy to see you were able to get good results!
For what it's worth, I suspect the small balls could be quark "spalling" from the milk having been industrially pasteurized / denatured prior to the quark process. And then perhaps the pigment interaction was just a coincidence. I have tried to recreate but haven't seen it yet.
FYI small black balls from an iron oxide pigment can happen, this is a known phenomenon.
Great work—the paint in the video clips looks exactly right. Curious why we all get those white bumps, but it does seem like you found a great way to make the Monte Carlo work!