
Funky Tapers
By hand and machine

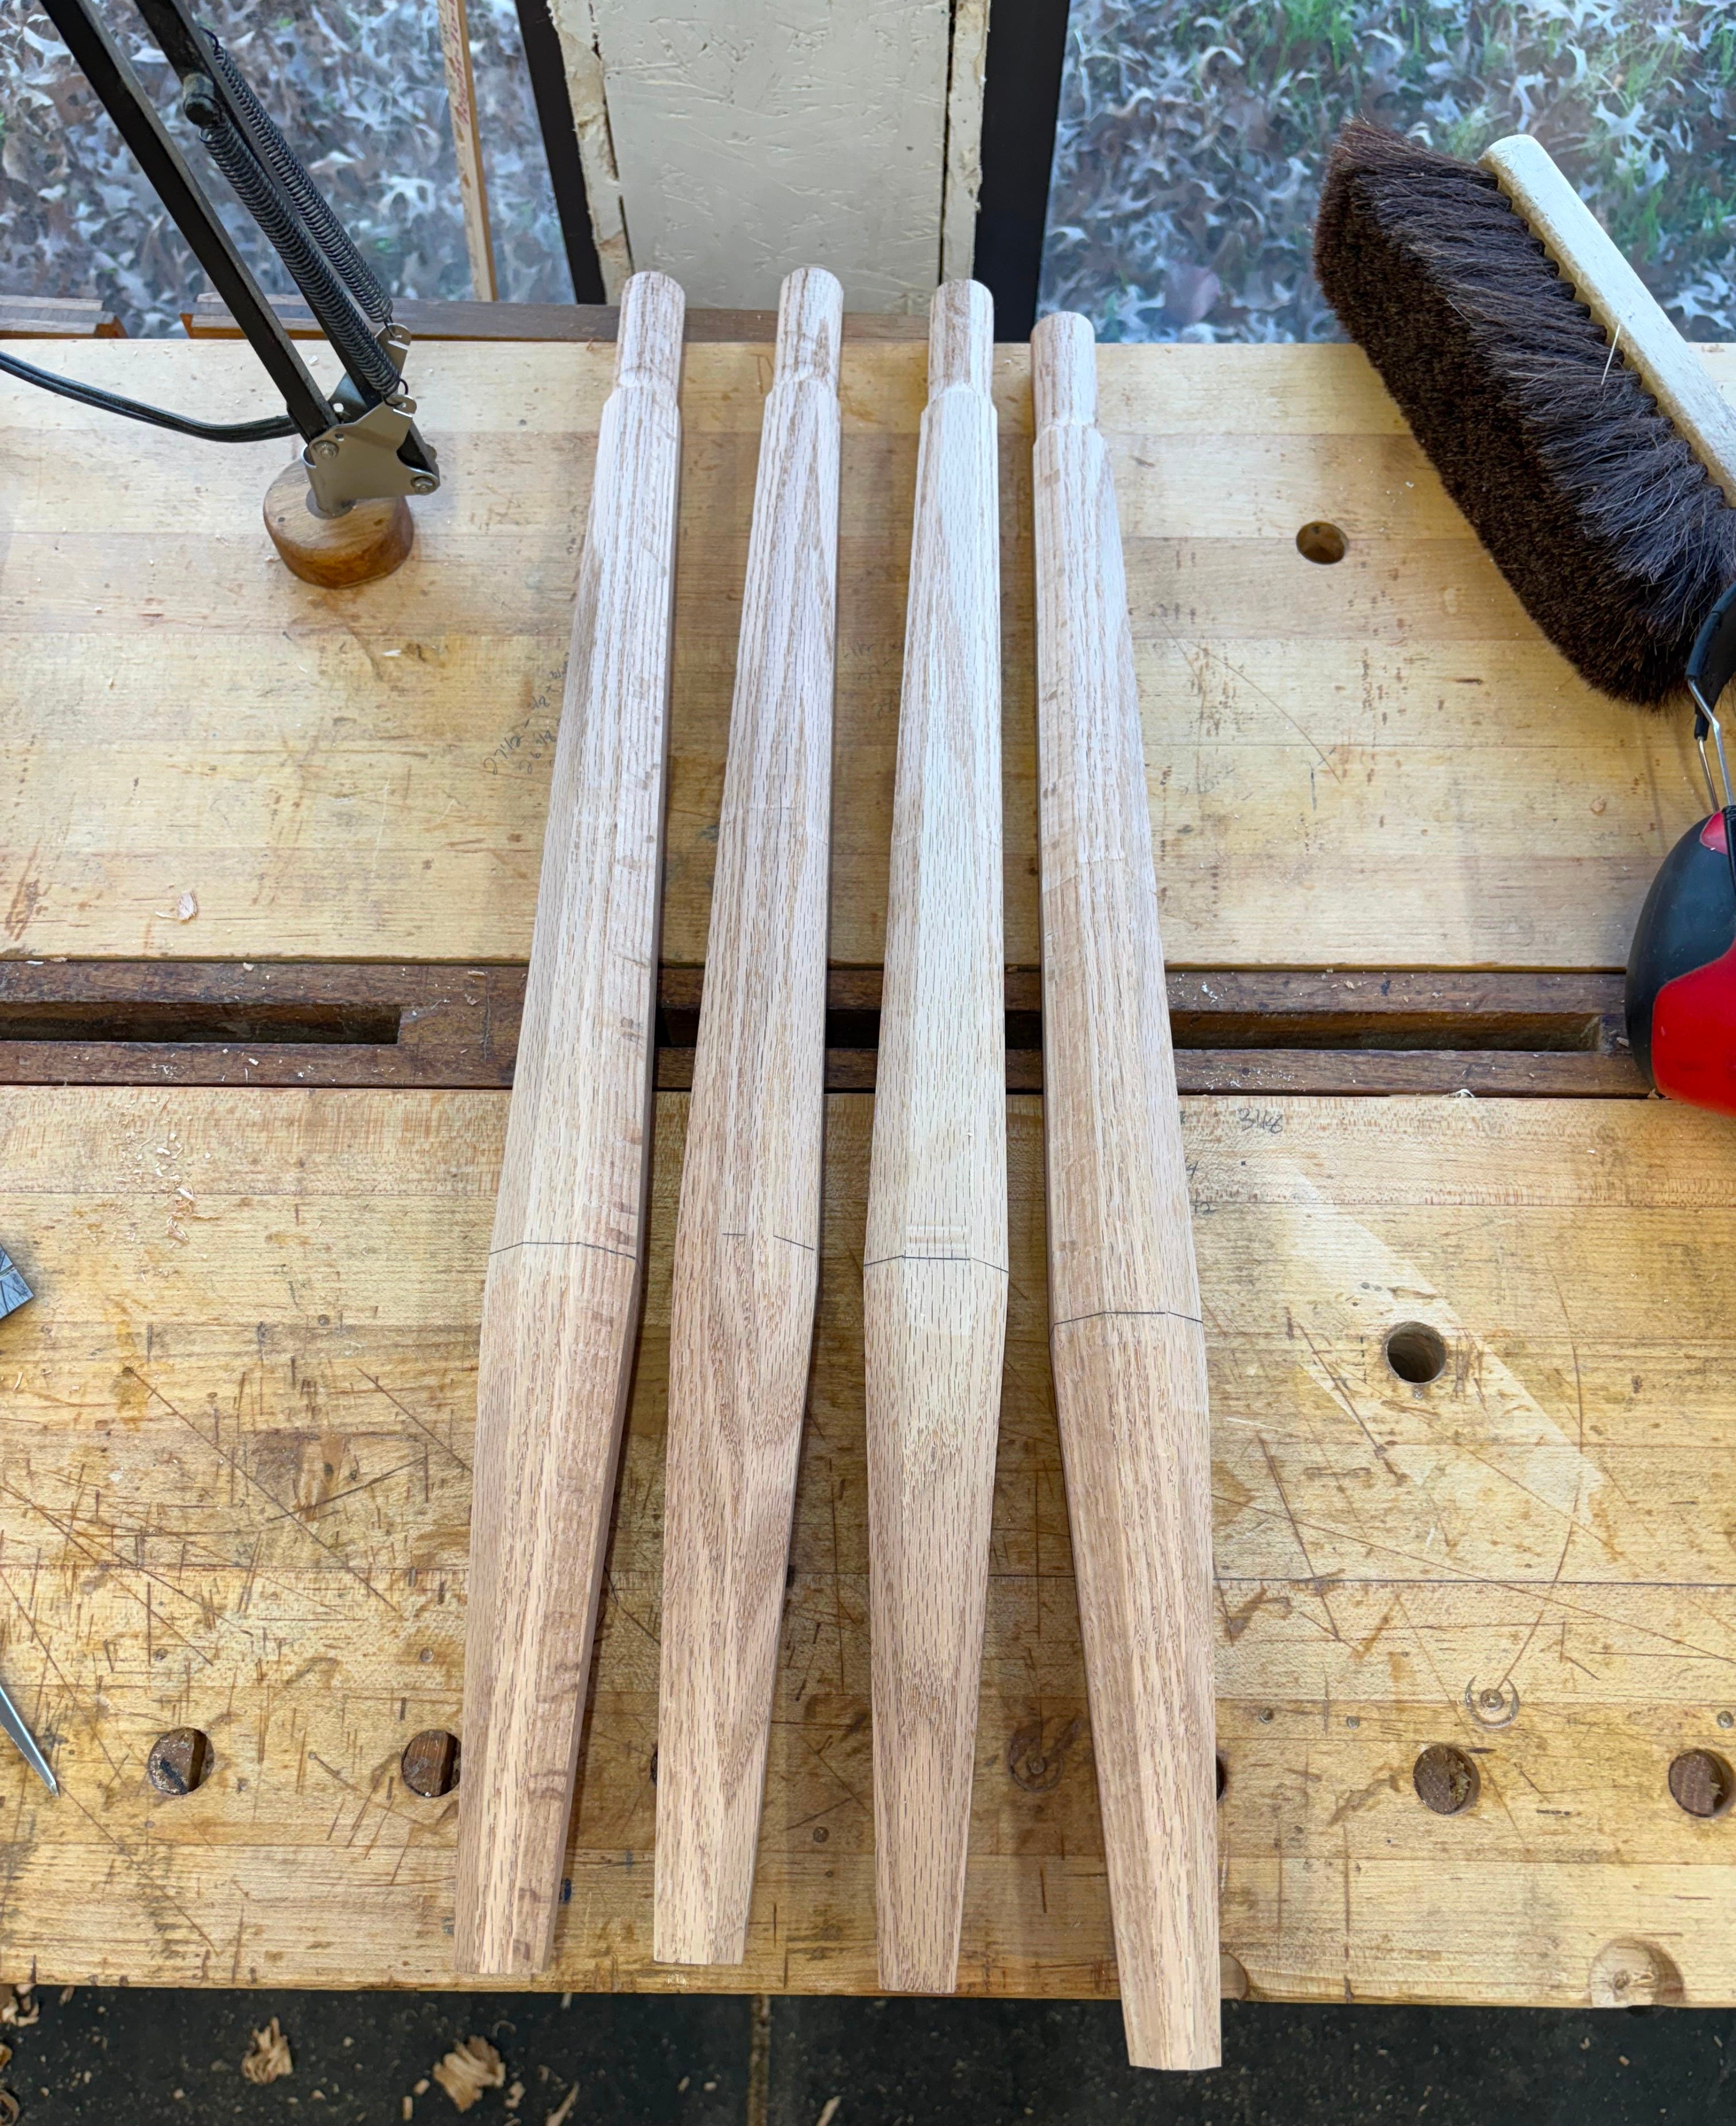
With a direction for the leg tapering, it was time to knock out 4 legs for the final stool (the initial mockups were scraps that didn’t have straight grain).
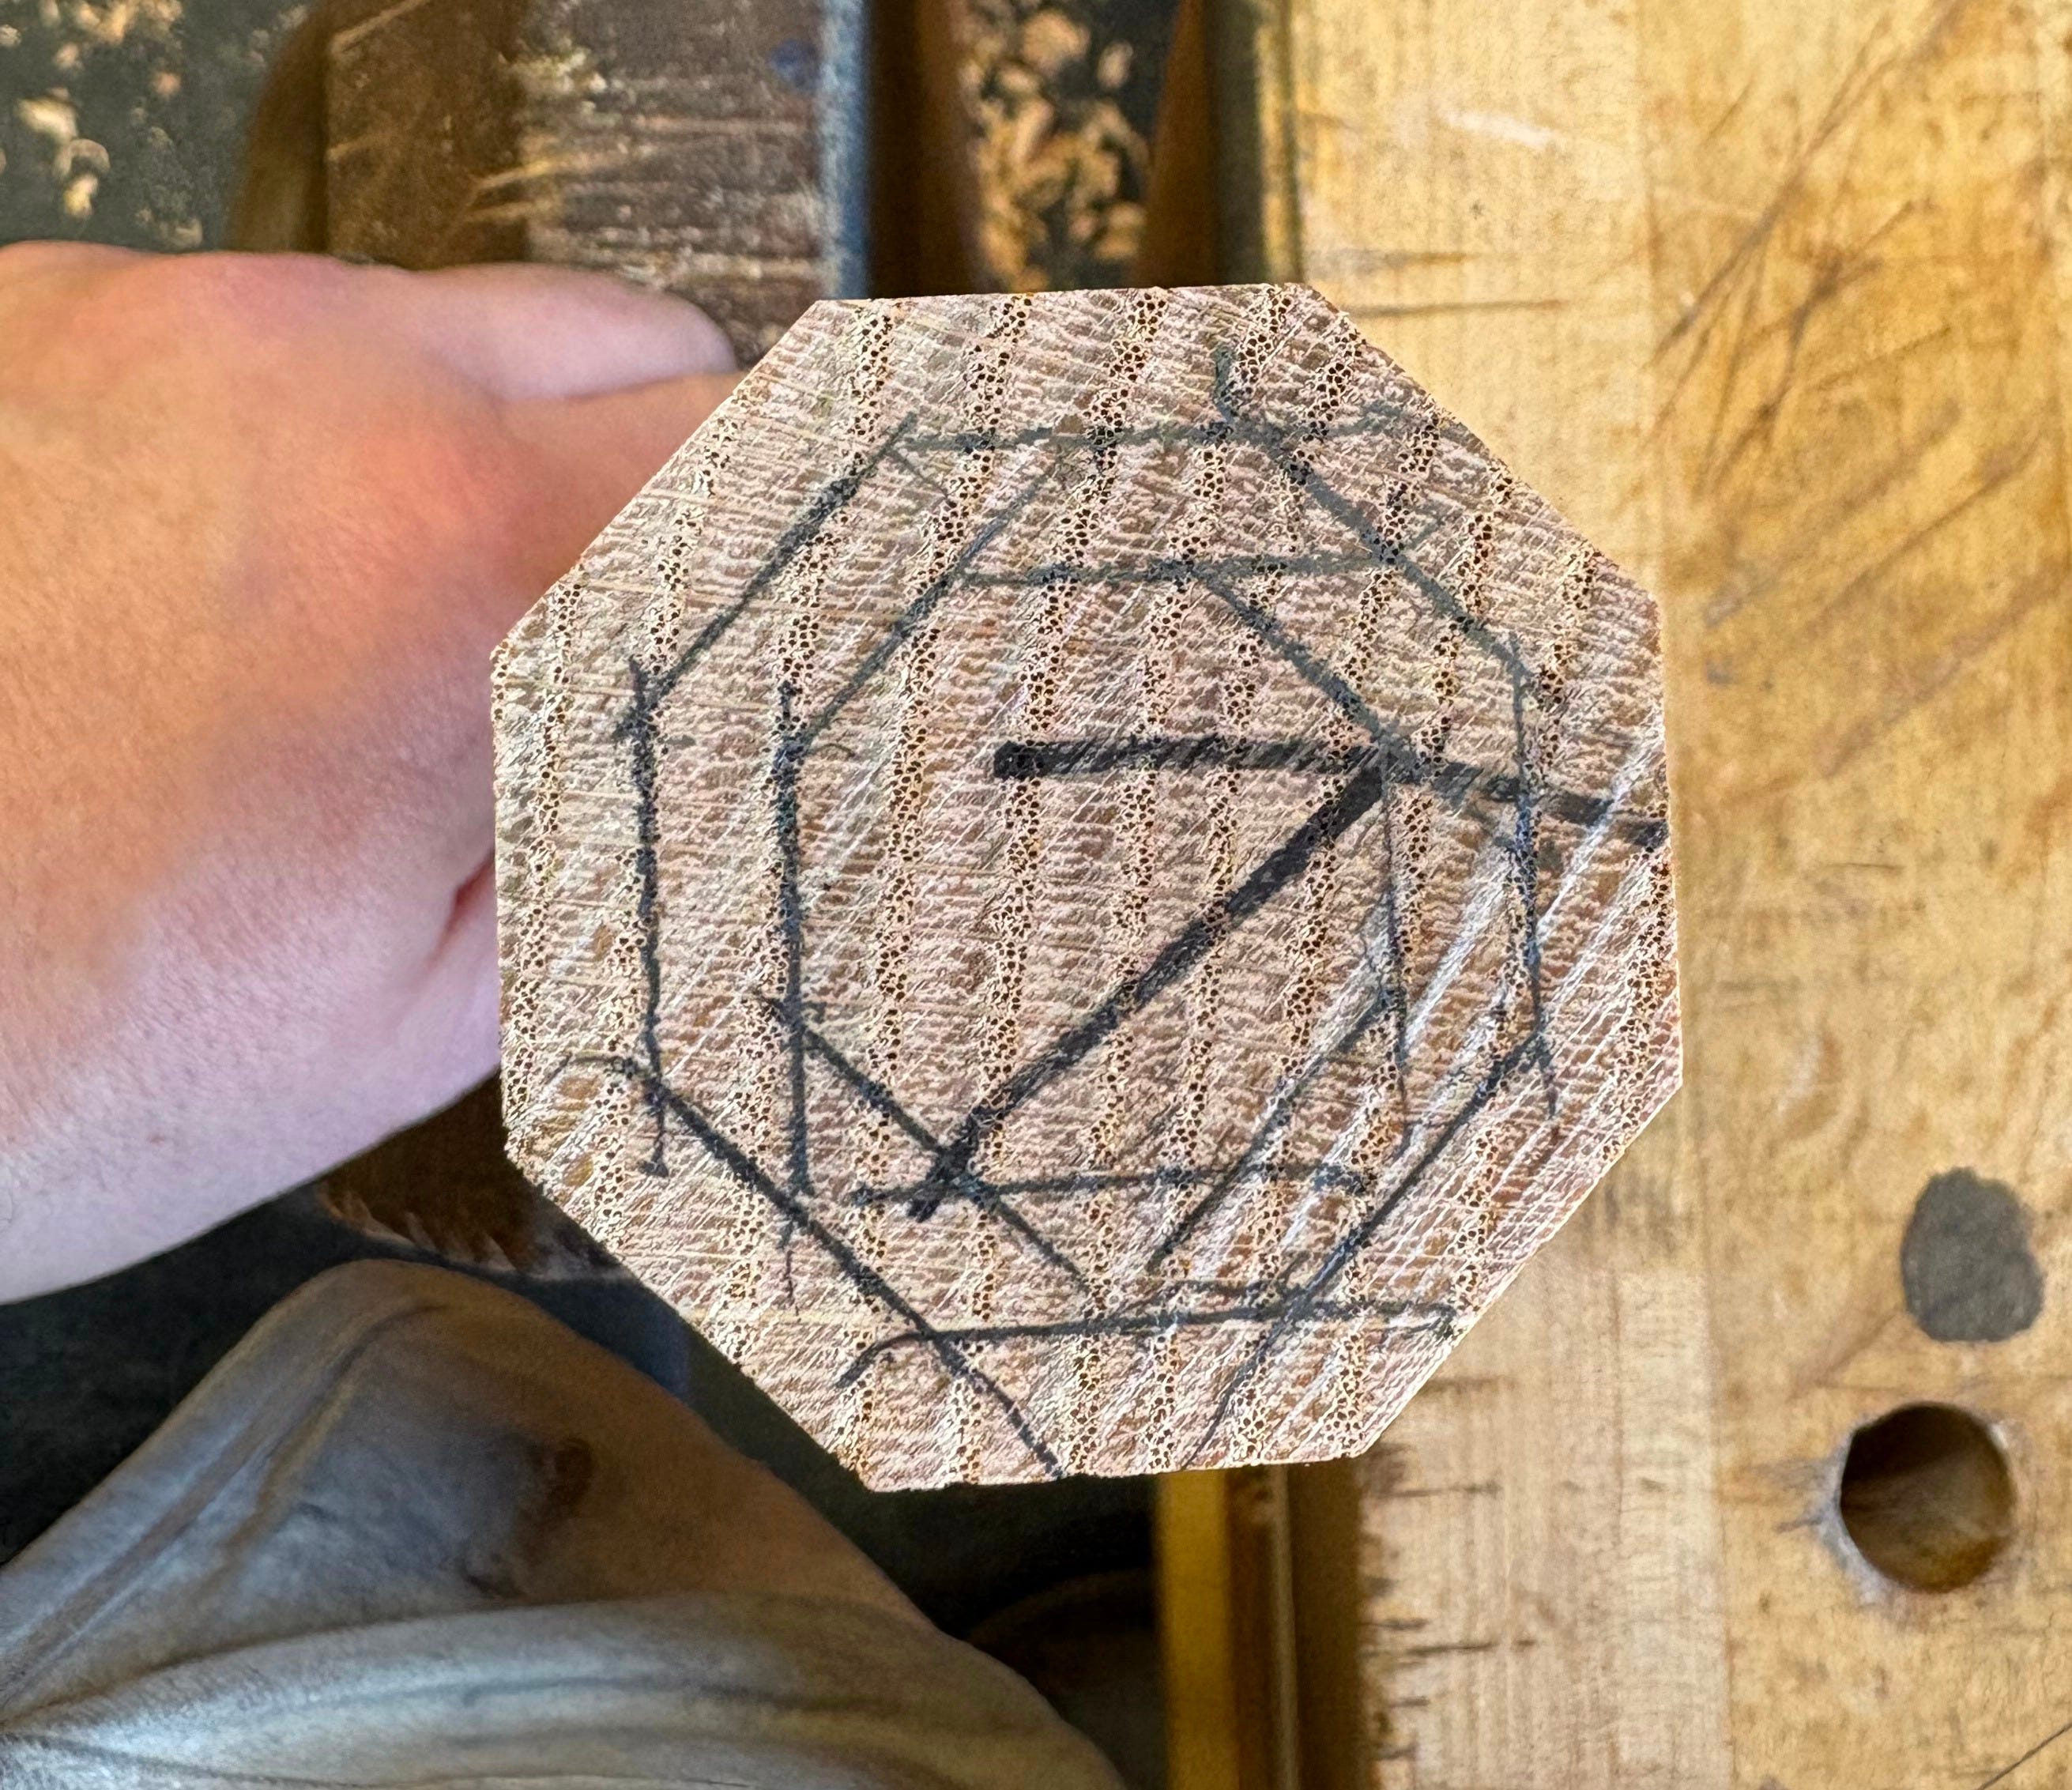
I started with 1-7/8” square blanks that were 24” long (I was shooting for a finished height of 23 to 23-1/2”, but only got 22-3/4”) and cut them into equilateral octagons1.
Tapering by Hand.
Make 2 sets of marks around the tenon end of the leg: one set ~3/16” in from the edges and another 7/16” in from the edges. The first mark is just a rough midway point, but the second mark is what truly matters since it will dictate the tenon size. I want a 1” tenon, and I have a 1-7/8” thick leg, so I need to remove 7/16” from each face to get there.
Break the leg into thirds, and then split the upper 2/3rds of the leg into thirds again (only the upper 2/3rds of the leg will be receiving a taper at first).
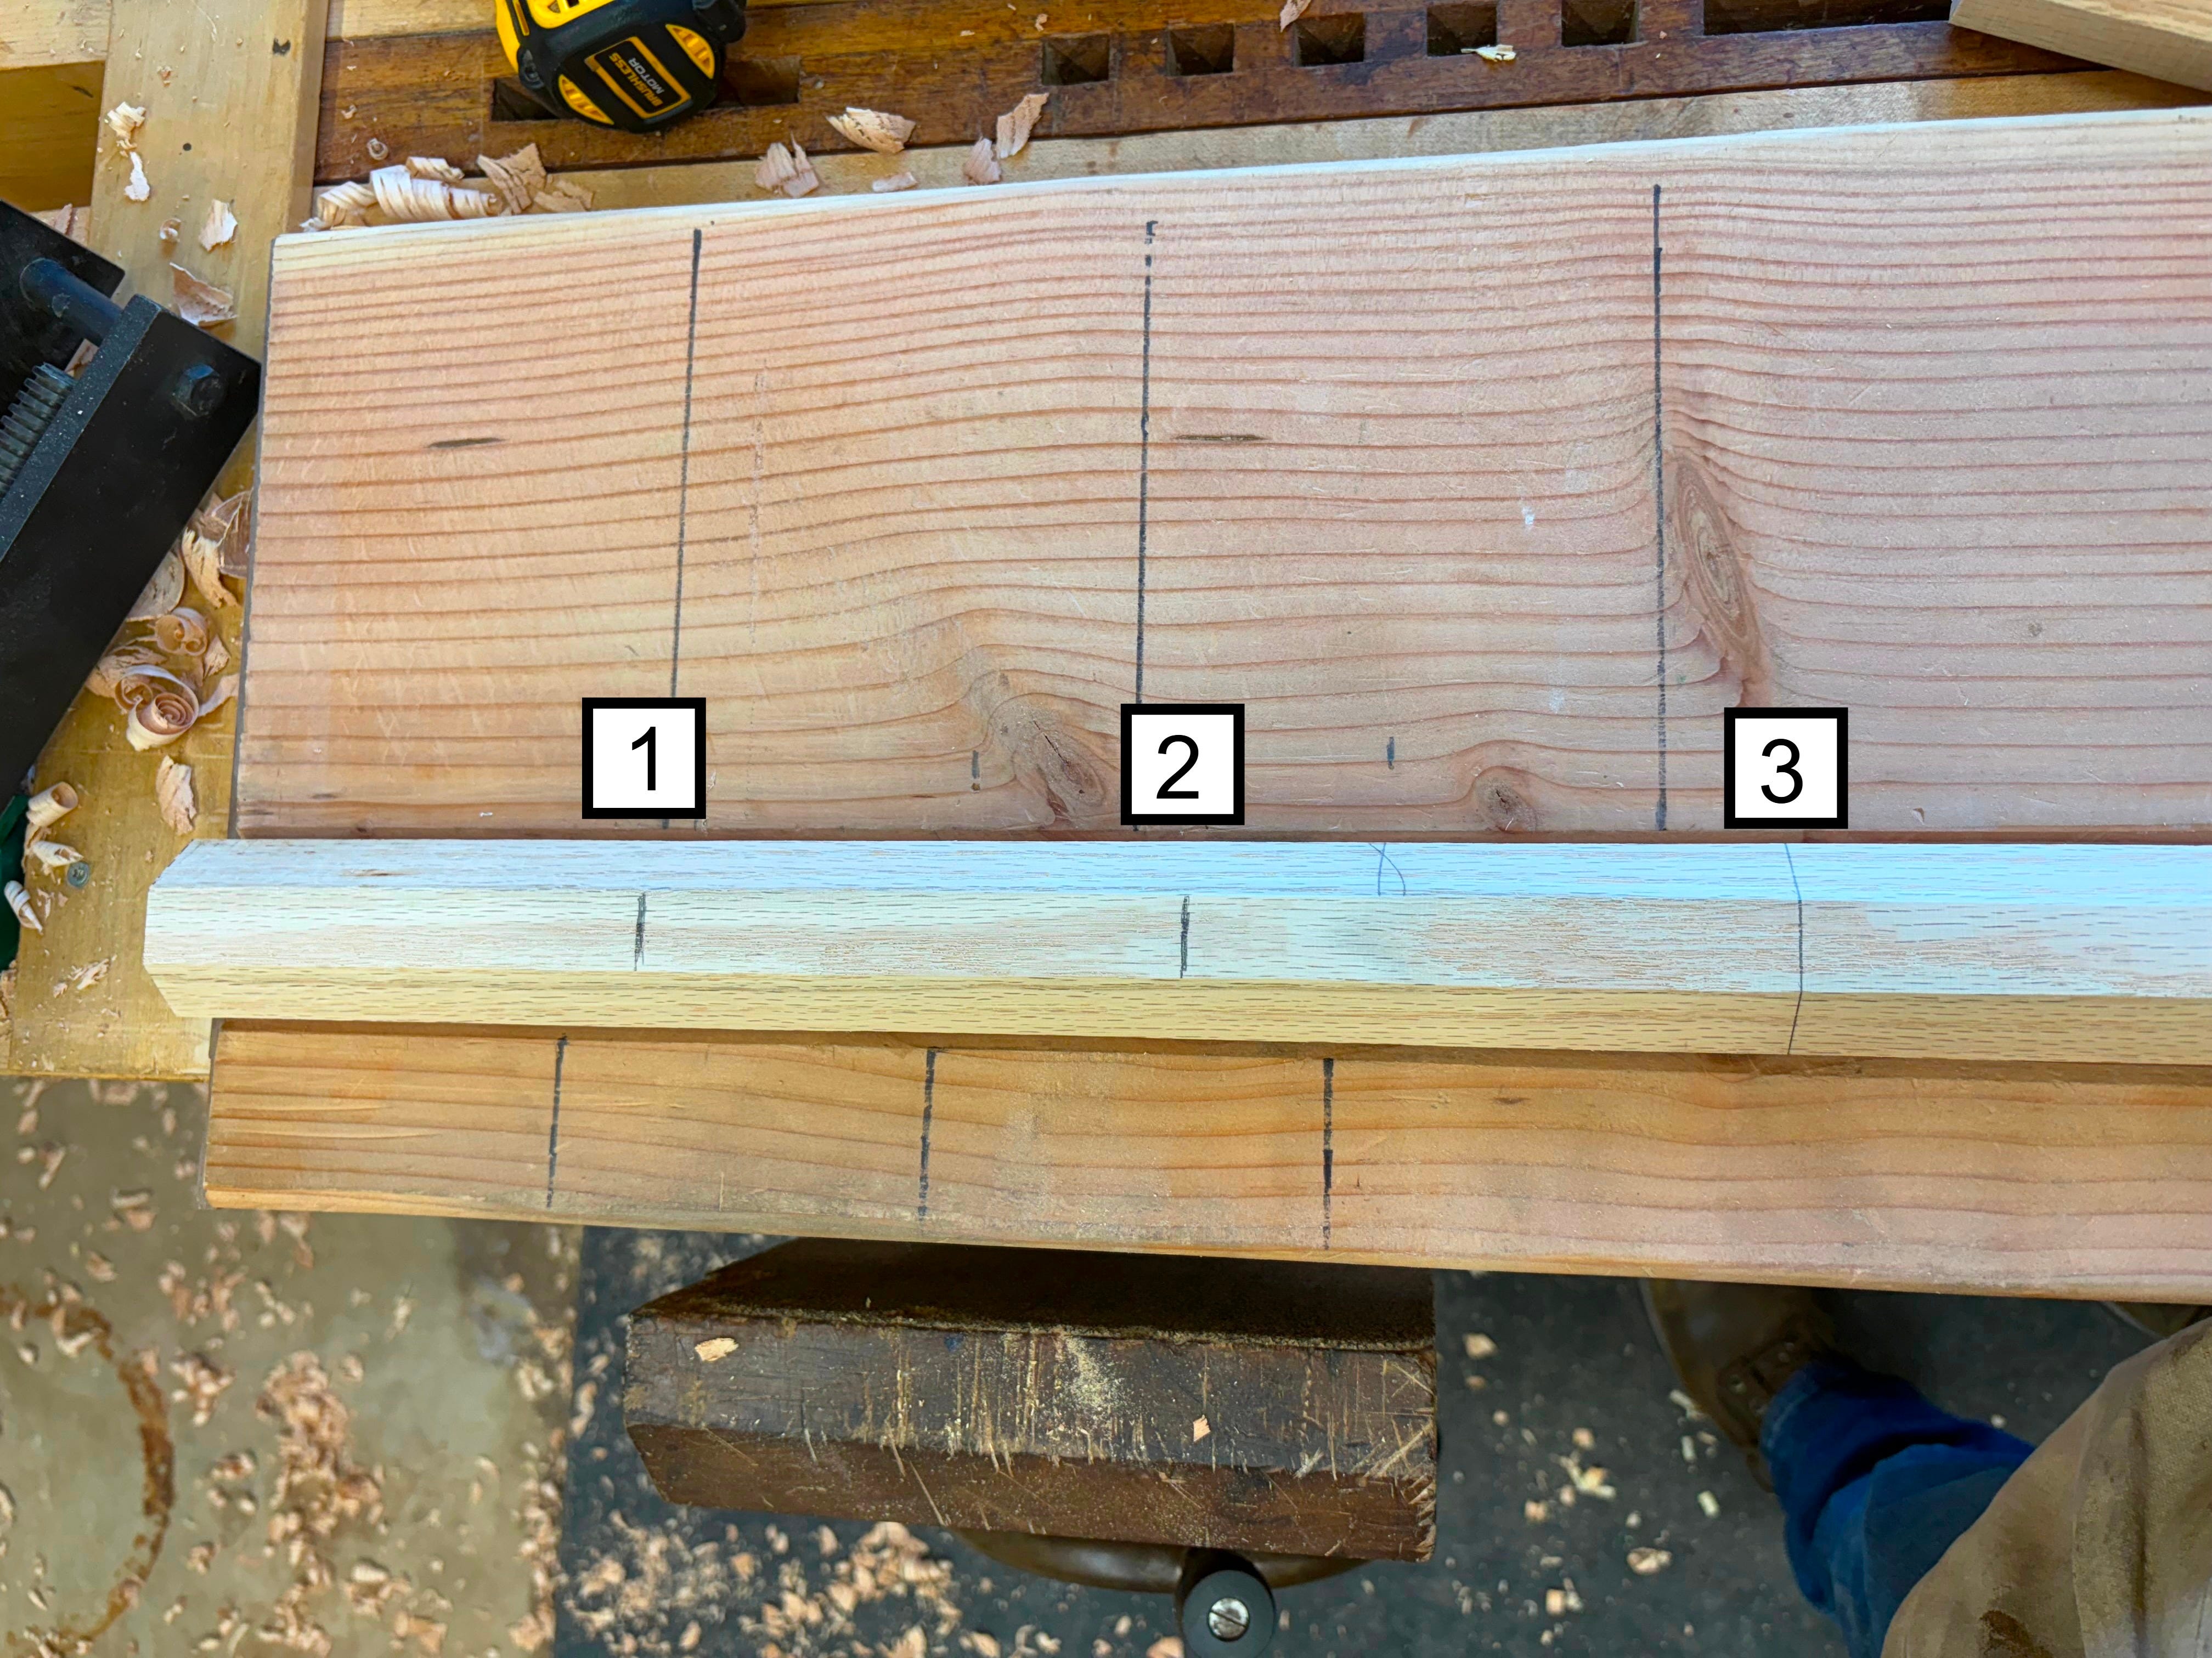
With a heavy set jack plane and a planing cradle (or carvers vise), take tapering cuts until you hit the first line on the end grain. You do this by taking one swipe starting at ‘1’, another starting at ‘2’, and a final swipe from ‘3’. Rotate the leg and repeat. Once you’re down to the first line on the end grain, repeat the whole process again until you reach the second line. You might wonder why you are doing this process in 2 steps,. If you planed all the way down to your final line in one go, the face would get so large it would take a TON of energy, and you might lose your reference faces on the adjacent facets (or they would be so small it would he hard to consistently plane the next taper).
Tapering with a Jointer
I have a powered jointer (which I am incredibly grateful for) so I will be tapering the legs by machine. There are some youtube videos on the general process of tapering with a jointer, but nothing specifically for octagonal chair/bench/stool legs. I’ll do my best to show you how I do it.
Safety Disclaimer: The following is a description of how I taper legs on my jointer. I always use a push block and never operate the machine without the guard in place. If the operation seems/feels unsafe to you, please do NOT do it.
With a little math, you can setup a stop block and the infeed table depth to get perfectly dialed in tapers. For the stop block, you need to set it half the length of the taper from top dead center of the cutter head. Even though my leg is 24”, I’m only tapering the first 16”, so I clamped my stop block 8” away from TDC.

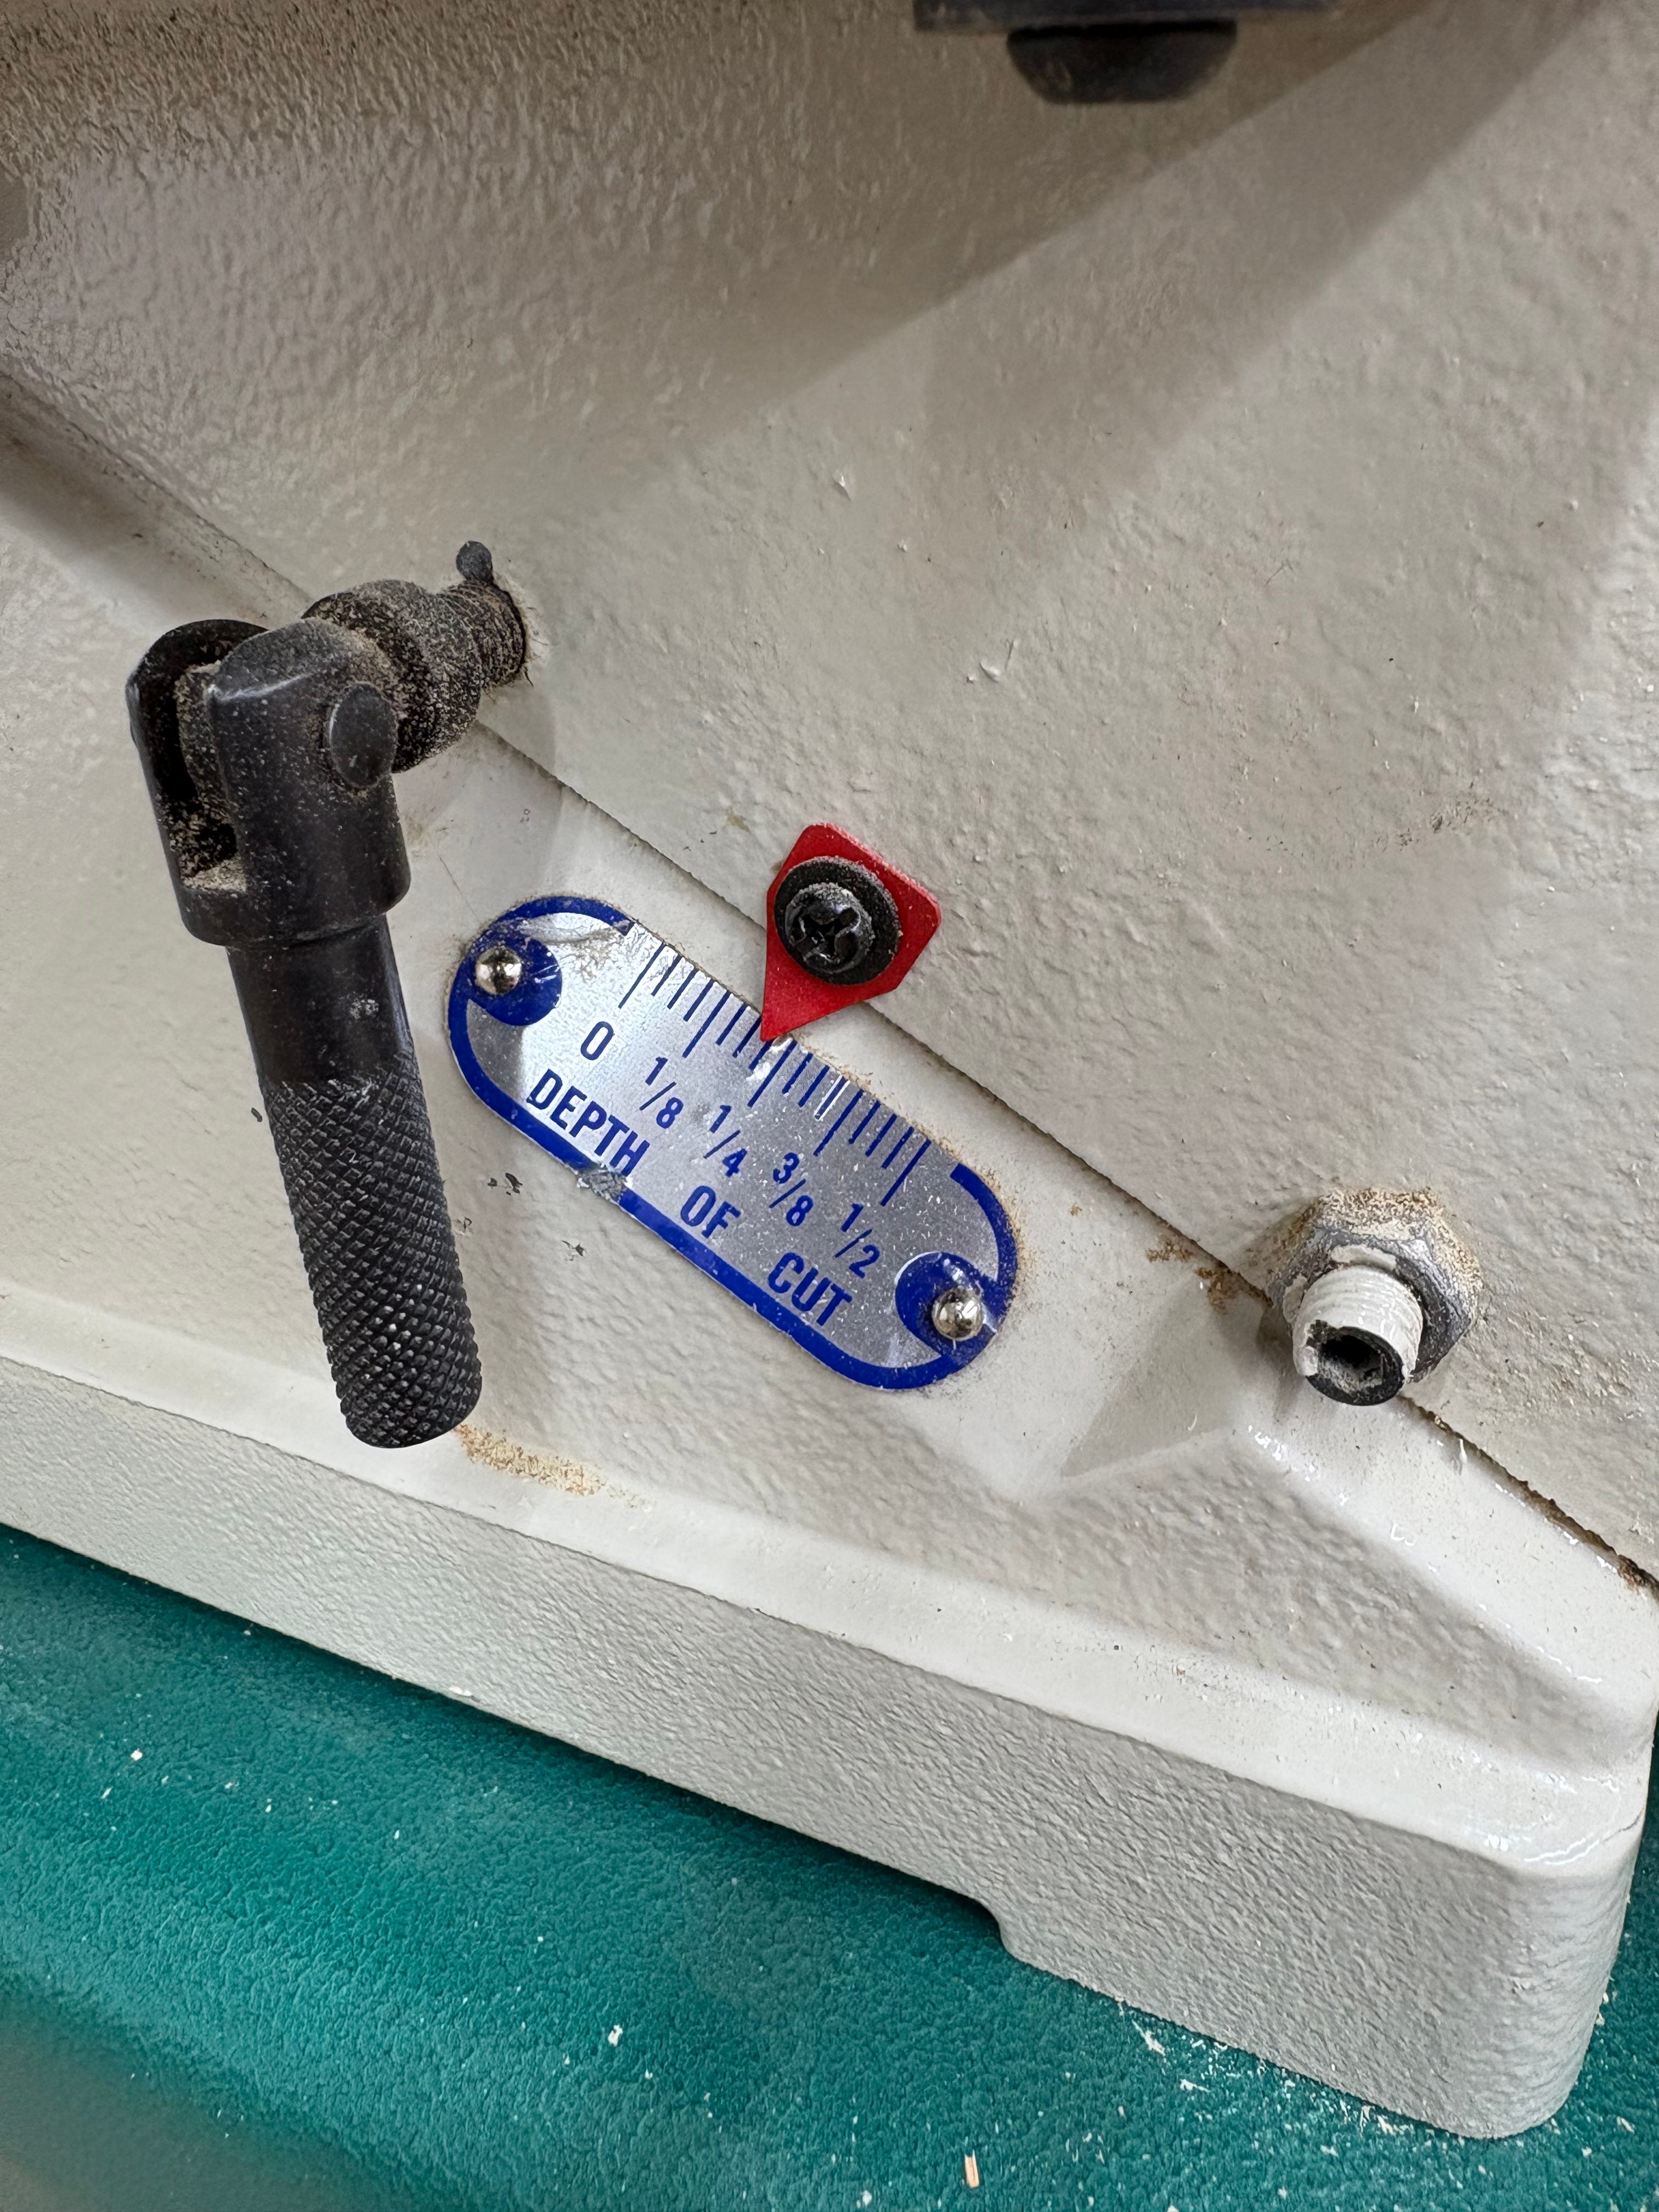
Next, I need to set the infeed table depth. I’m removing a total of 7/8”, but I will be doing that in 4 cuts (each face will pass over the cutter head two times, in total, during the operation, so that’s 4 cuts total for opposing faces. Might sound complicated, but once you see it, it will make sense, I promise). Seven-eights of an inch divided by 4 is 7/32”. That’s what I set my infeed depth at.
The first part of the operation is very easy. Feed a face of the leg across the jointer until it hits the stop block. Lift the leg up, from the rear, until the guard closes, then rotate the leg and repeat the process 7 more times.
Safety tip #1: When doing this operation, rotate the leg clockwise between passes. This ensures a flat face stays in contact with the fence for as long as possible. The final 2 passes will have cut faces pointed towards the fence (past the cutter head), so keep even steady pressure on the back half of the leg against the fence. Your hands should never cross the cutter head during this part of the operation, but I still recommend a push block. Ideally one that is tall enough for your fingers to trail along your jointers fence. Even if it were to magically disappear, your hand would hit the fence and not the cutter head.
Since you aren’t making a full length cut, it’s hard to make an error, outside of flipping the work piece end over end mid operation. You can’t cut a face too many times at this stage, and if you forgot to cut a face, it’s very obvious when look at your final piece.
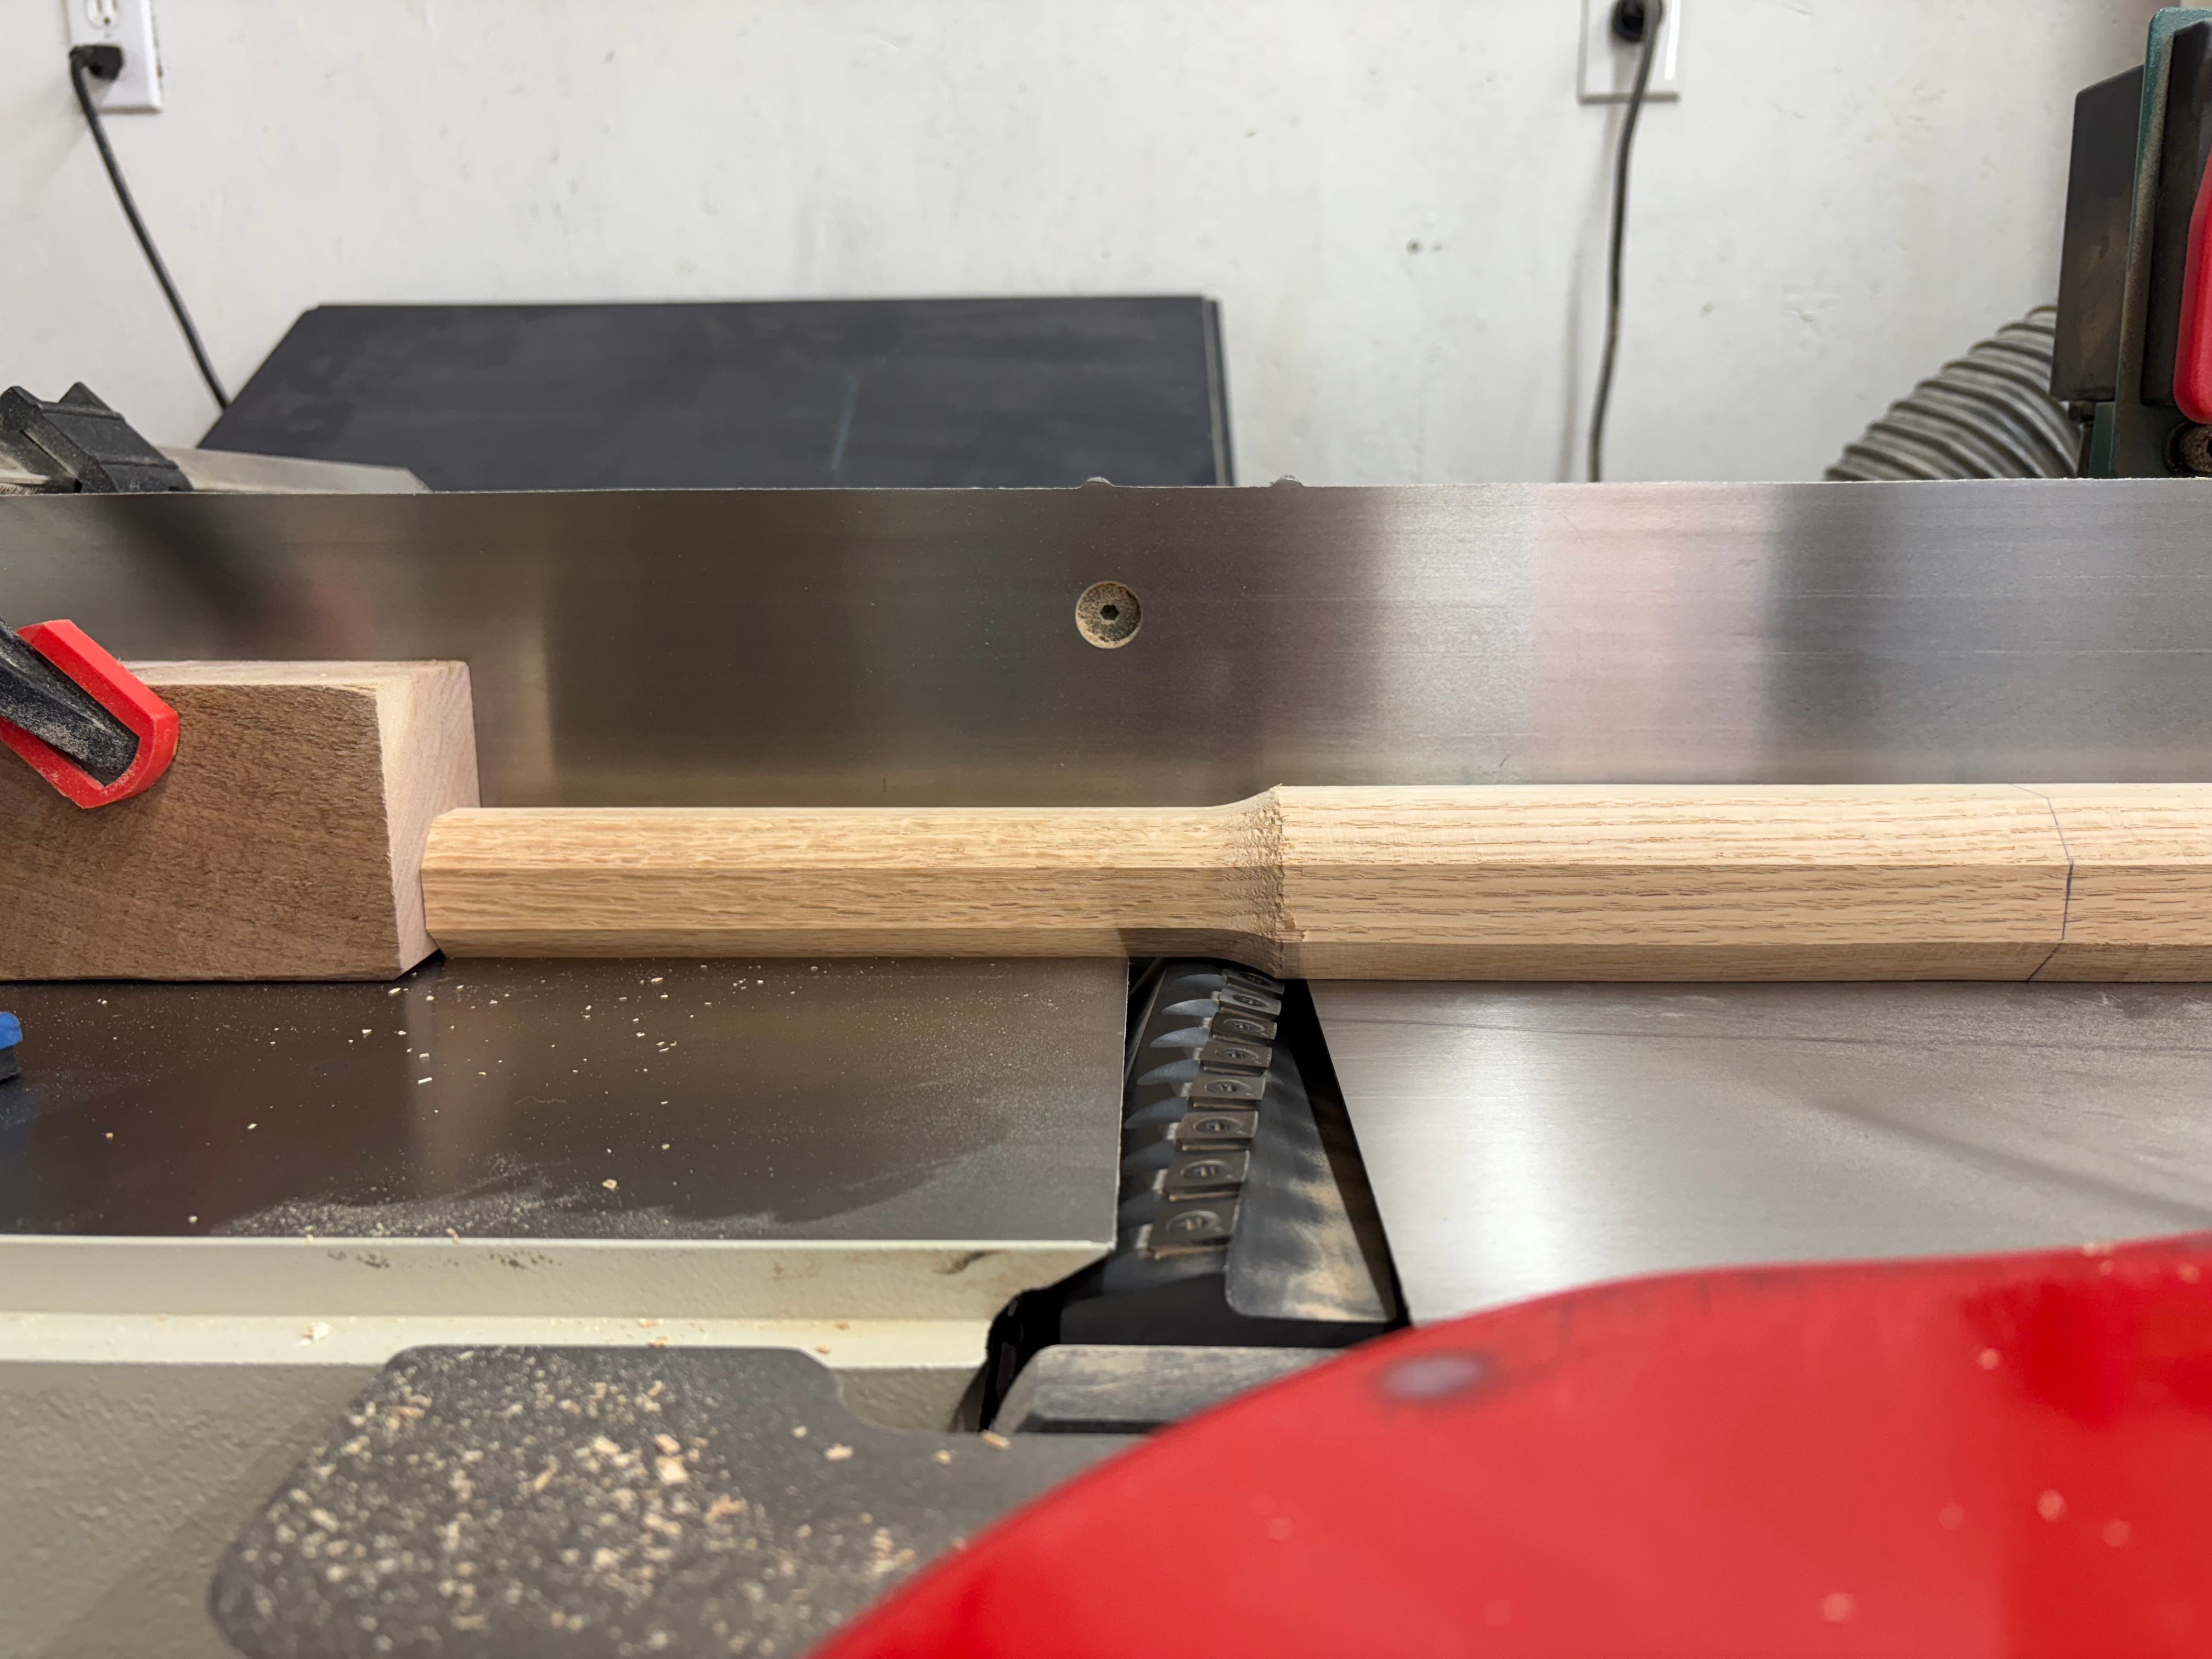
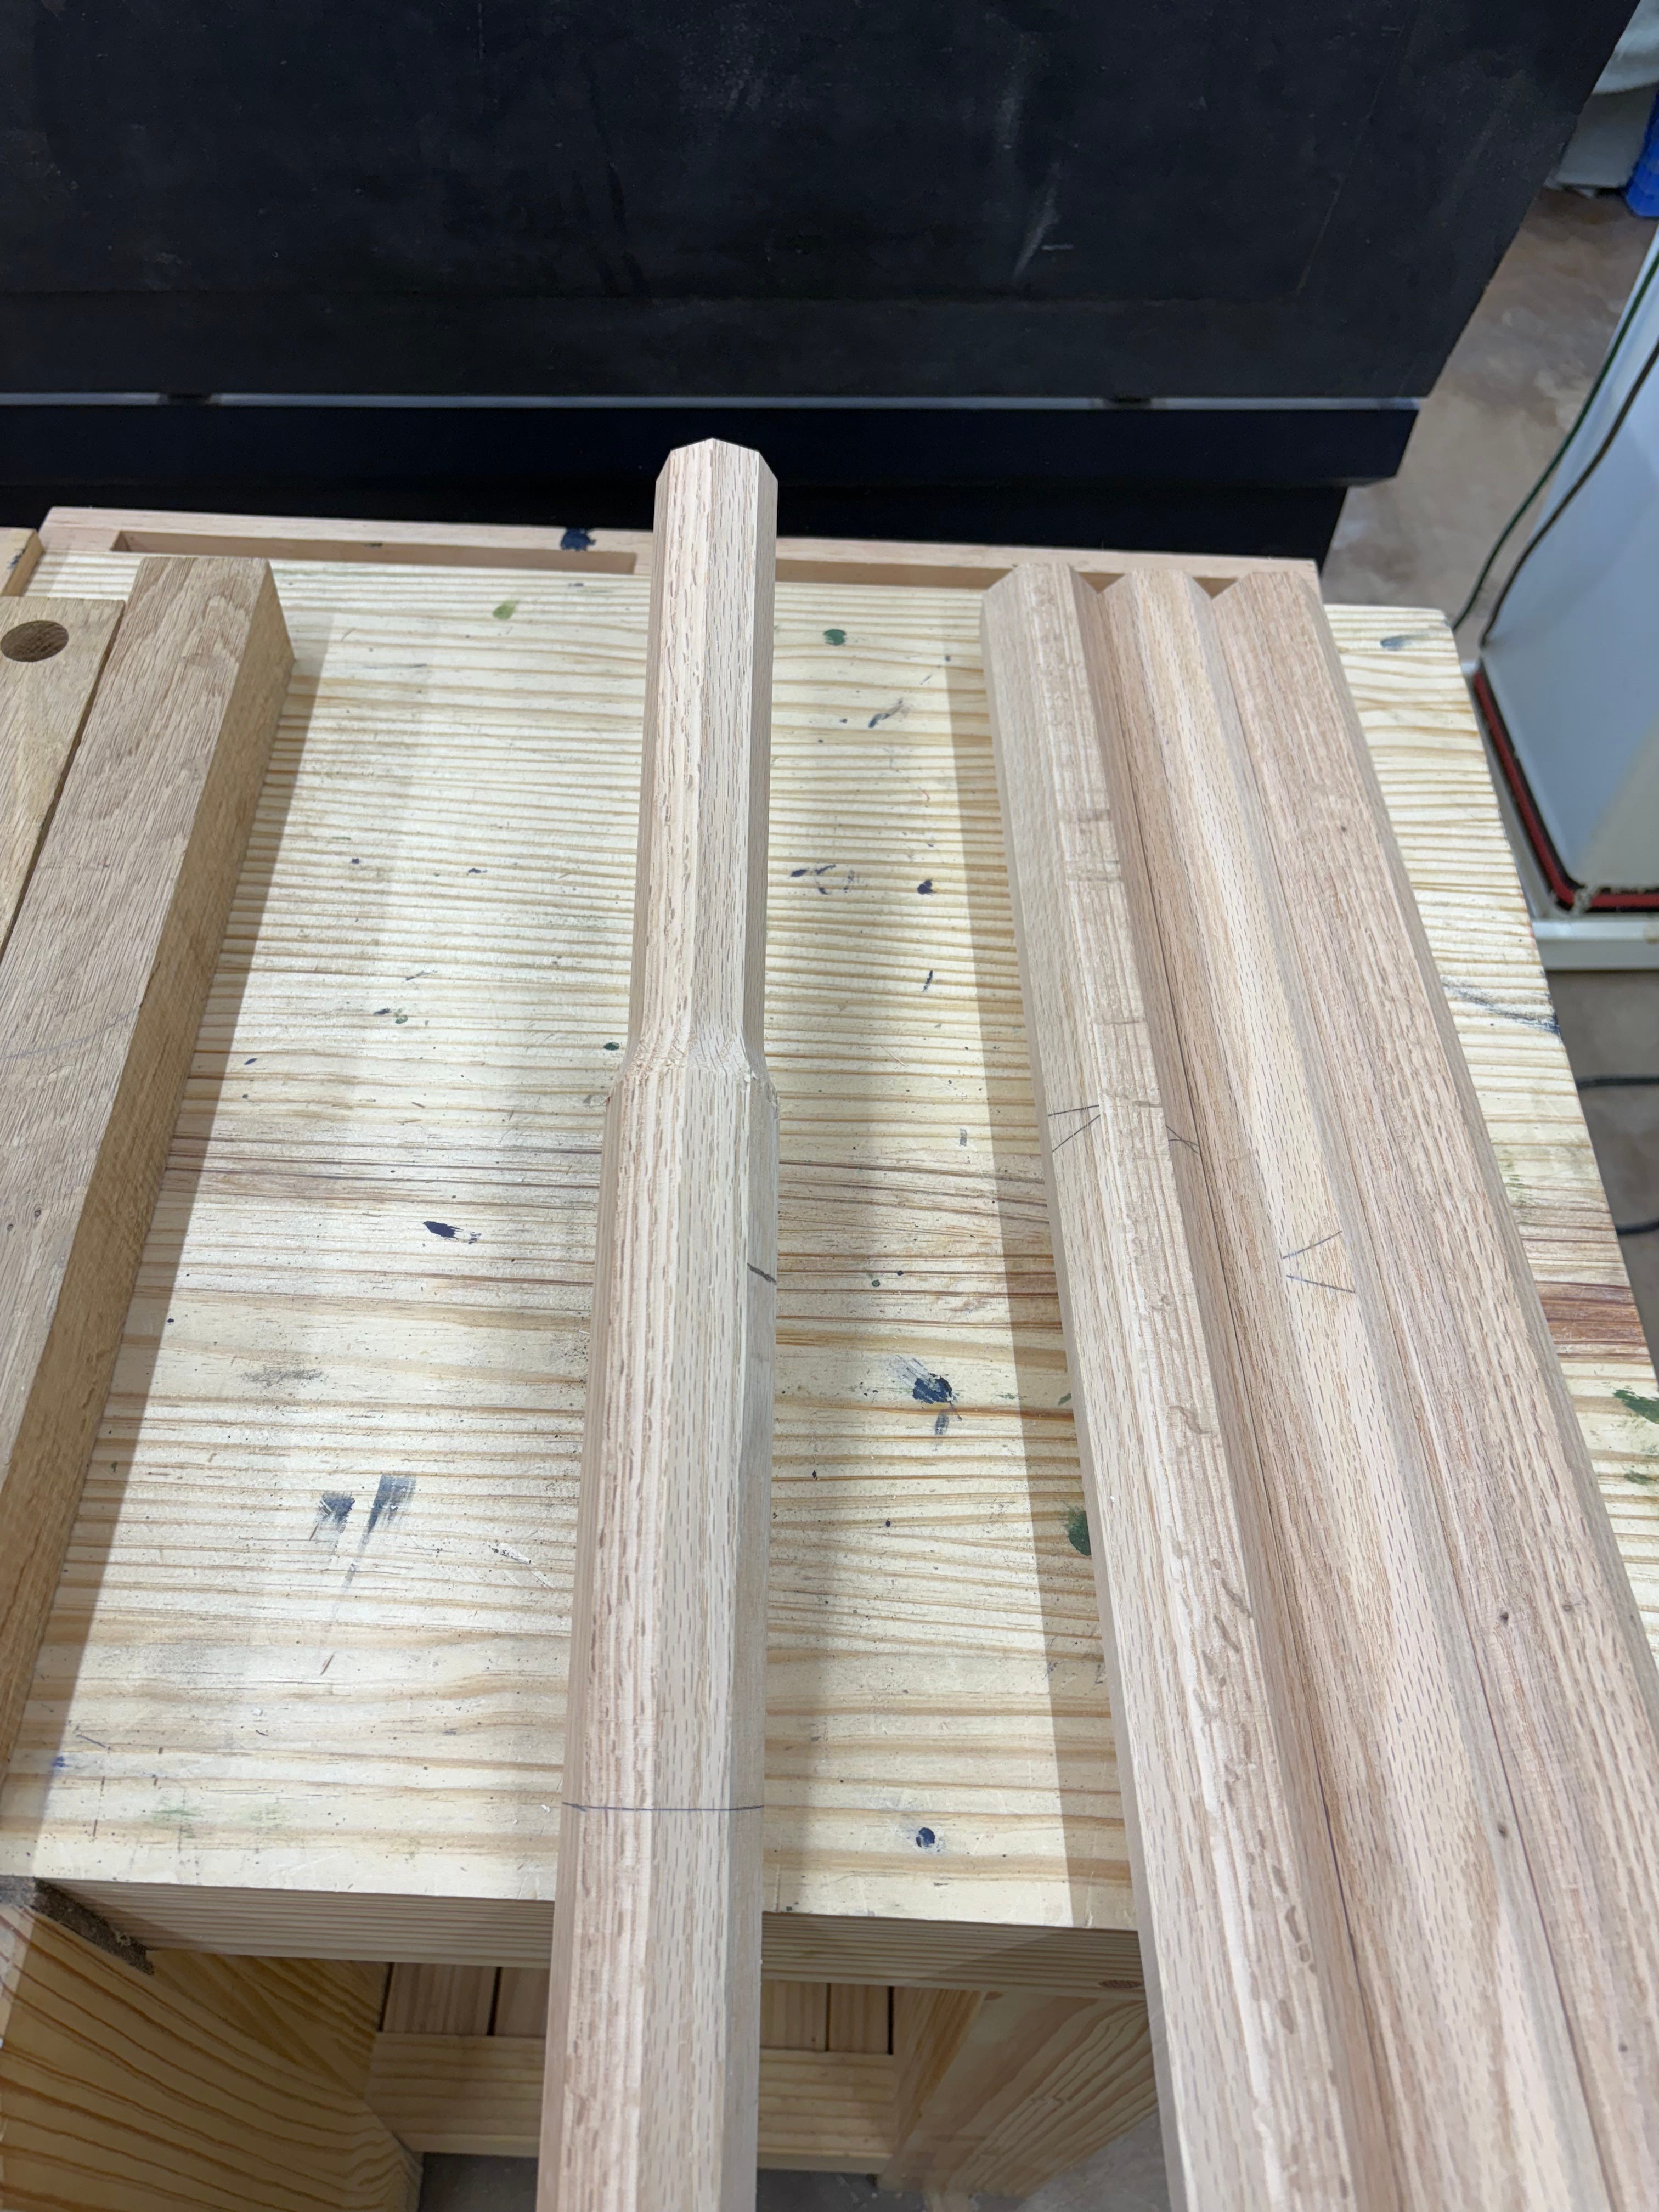
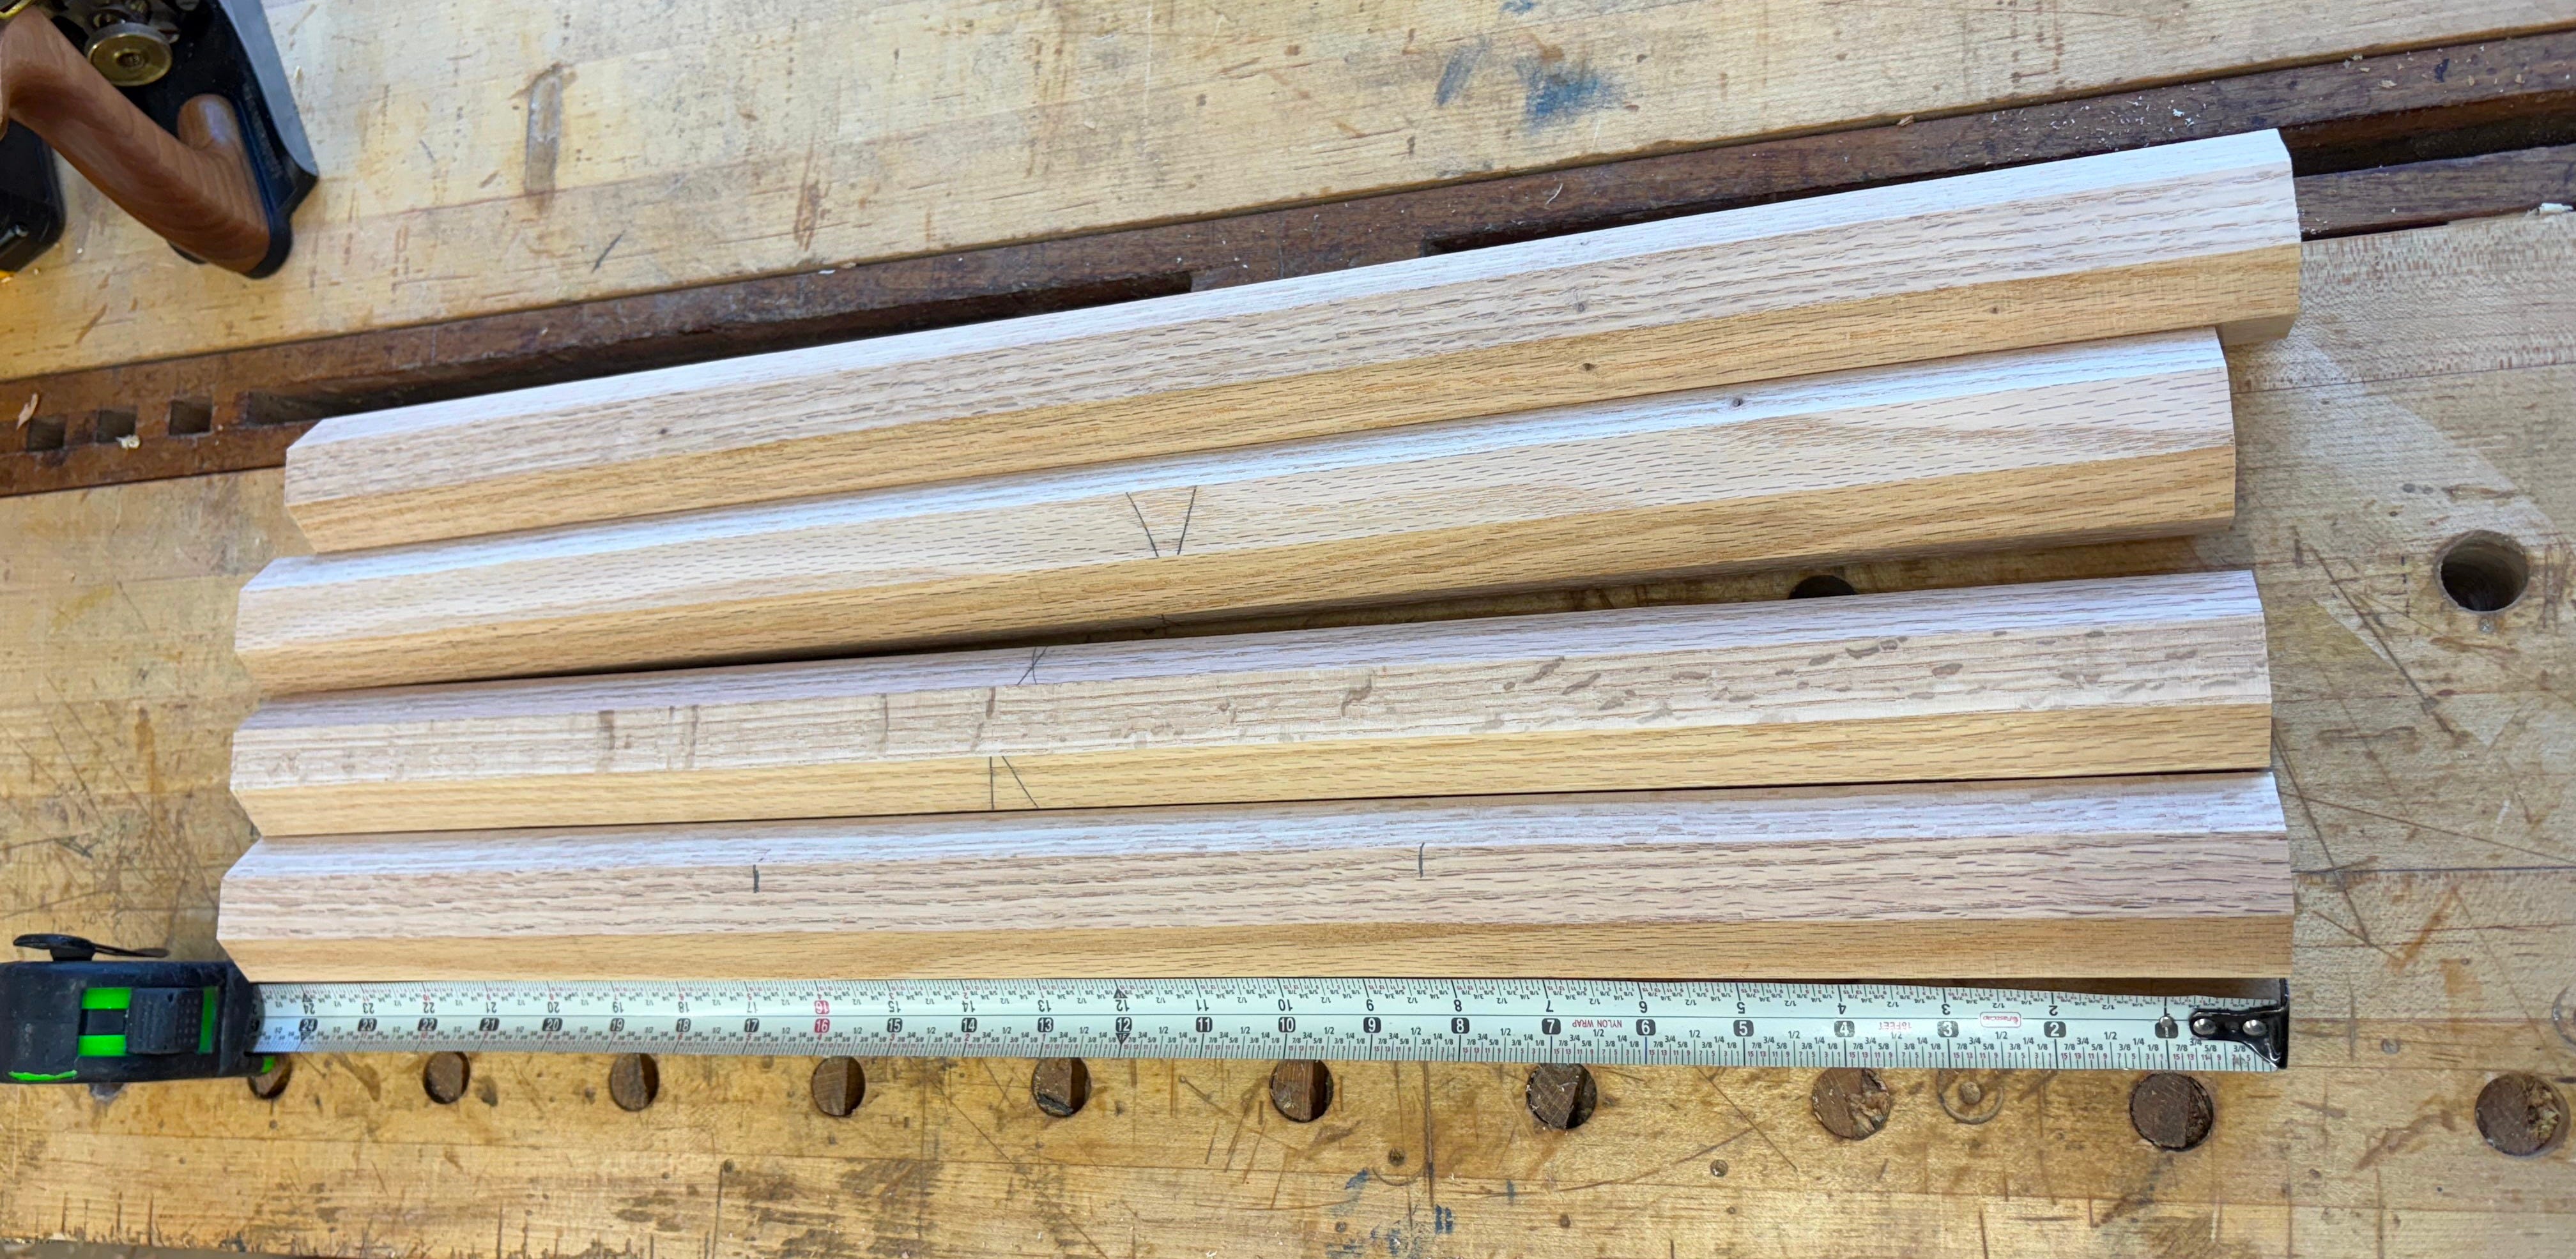
When you’re done, you should have what looks like a cudgel. Repeat this process for as many legs as you have to taper.
Once the first operation is done for ALL legs, remove the stop block. Now you will be taking a full length cut along each face of the leg. Orient the leg with the fat end pointing towards the cutter head, and, with a push block, push down on the rear of the leg. This will cause the leg to kick up. This action is what will make a tapering cut along that face of the leg.
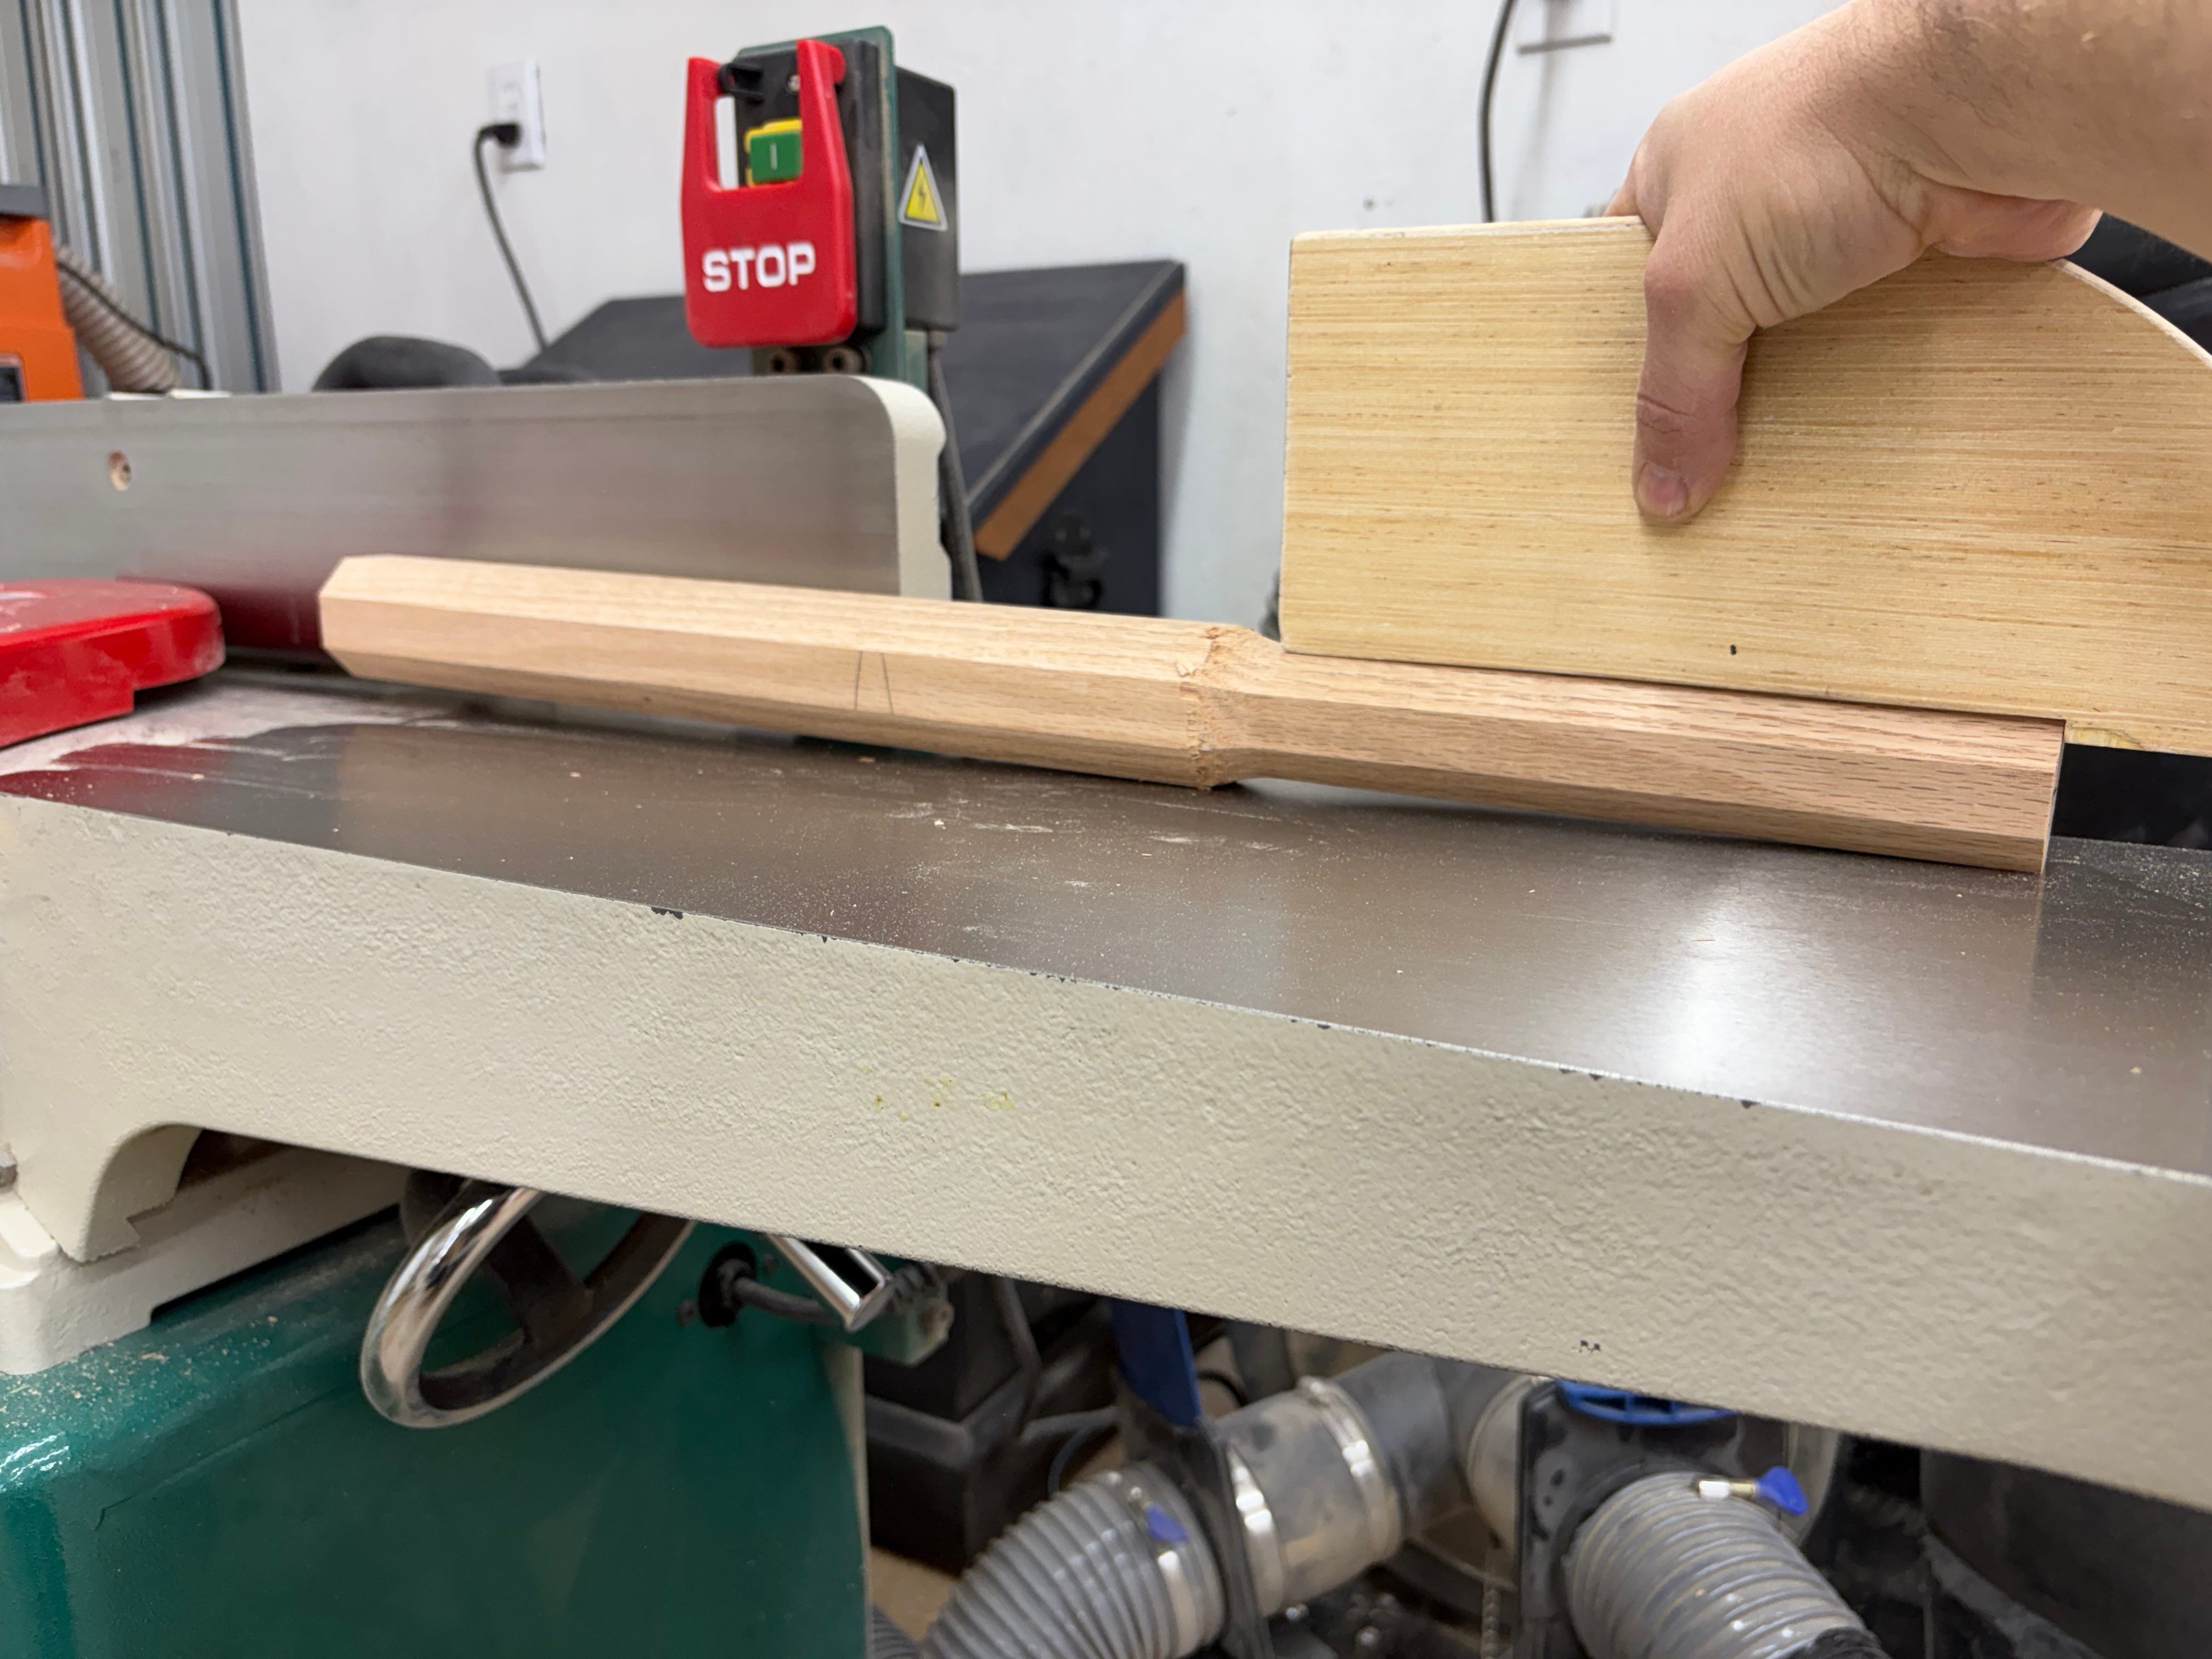
With smooth, even pressure (and your fingers trailing along your jointer’s fence) feed the entire leg across the cutter head.
Safety tip #2: For this operation, you want to rotate the work piece COUNTER-CLOCKWISE after each cut. This puts one of the flat, freshly jointed faces into contact with the fence as soon as possible (pass #3). The first 2 are a little sketchy, if I’m being honest. You don’t have a flat face to push up against the fence, but with proper body positioning and a push stick, you can keep adequate pressure on the leg and still maintain separation between your fingers and the spinning blades.
For this part of the operation, you have to keep an accurate count of (or constantly check) how many cuts you have performed per leg. When tapering, 8 is the number of cuts you will make per leg. Not 7, unless you immediately proceed to making an 8th cut. 9 is right out.2
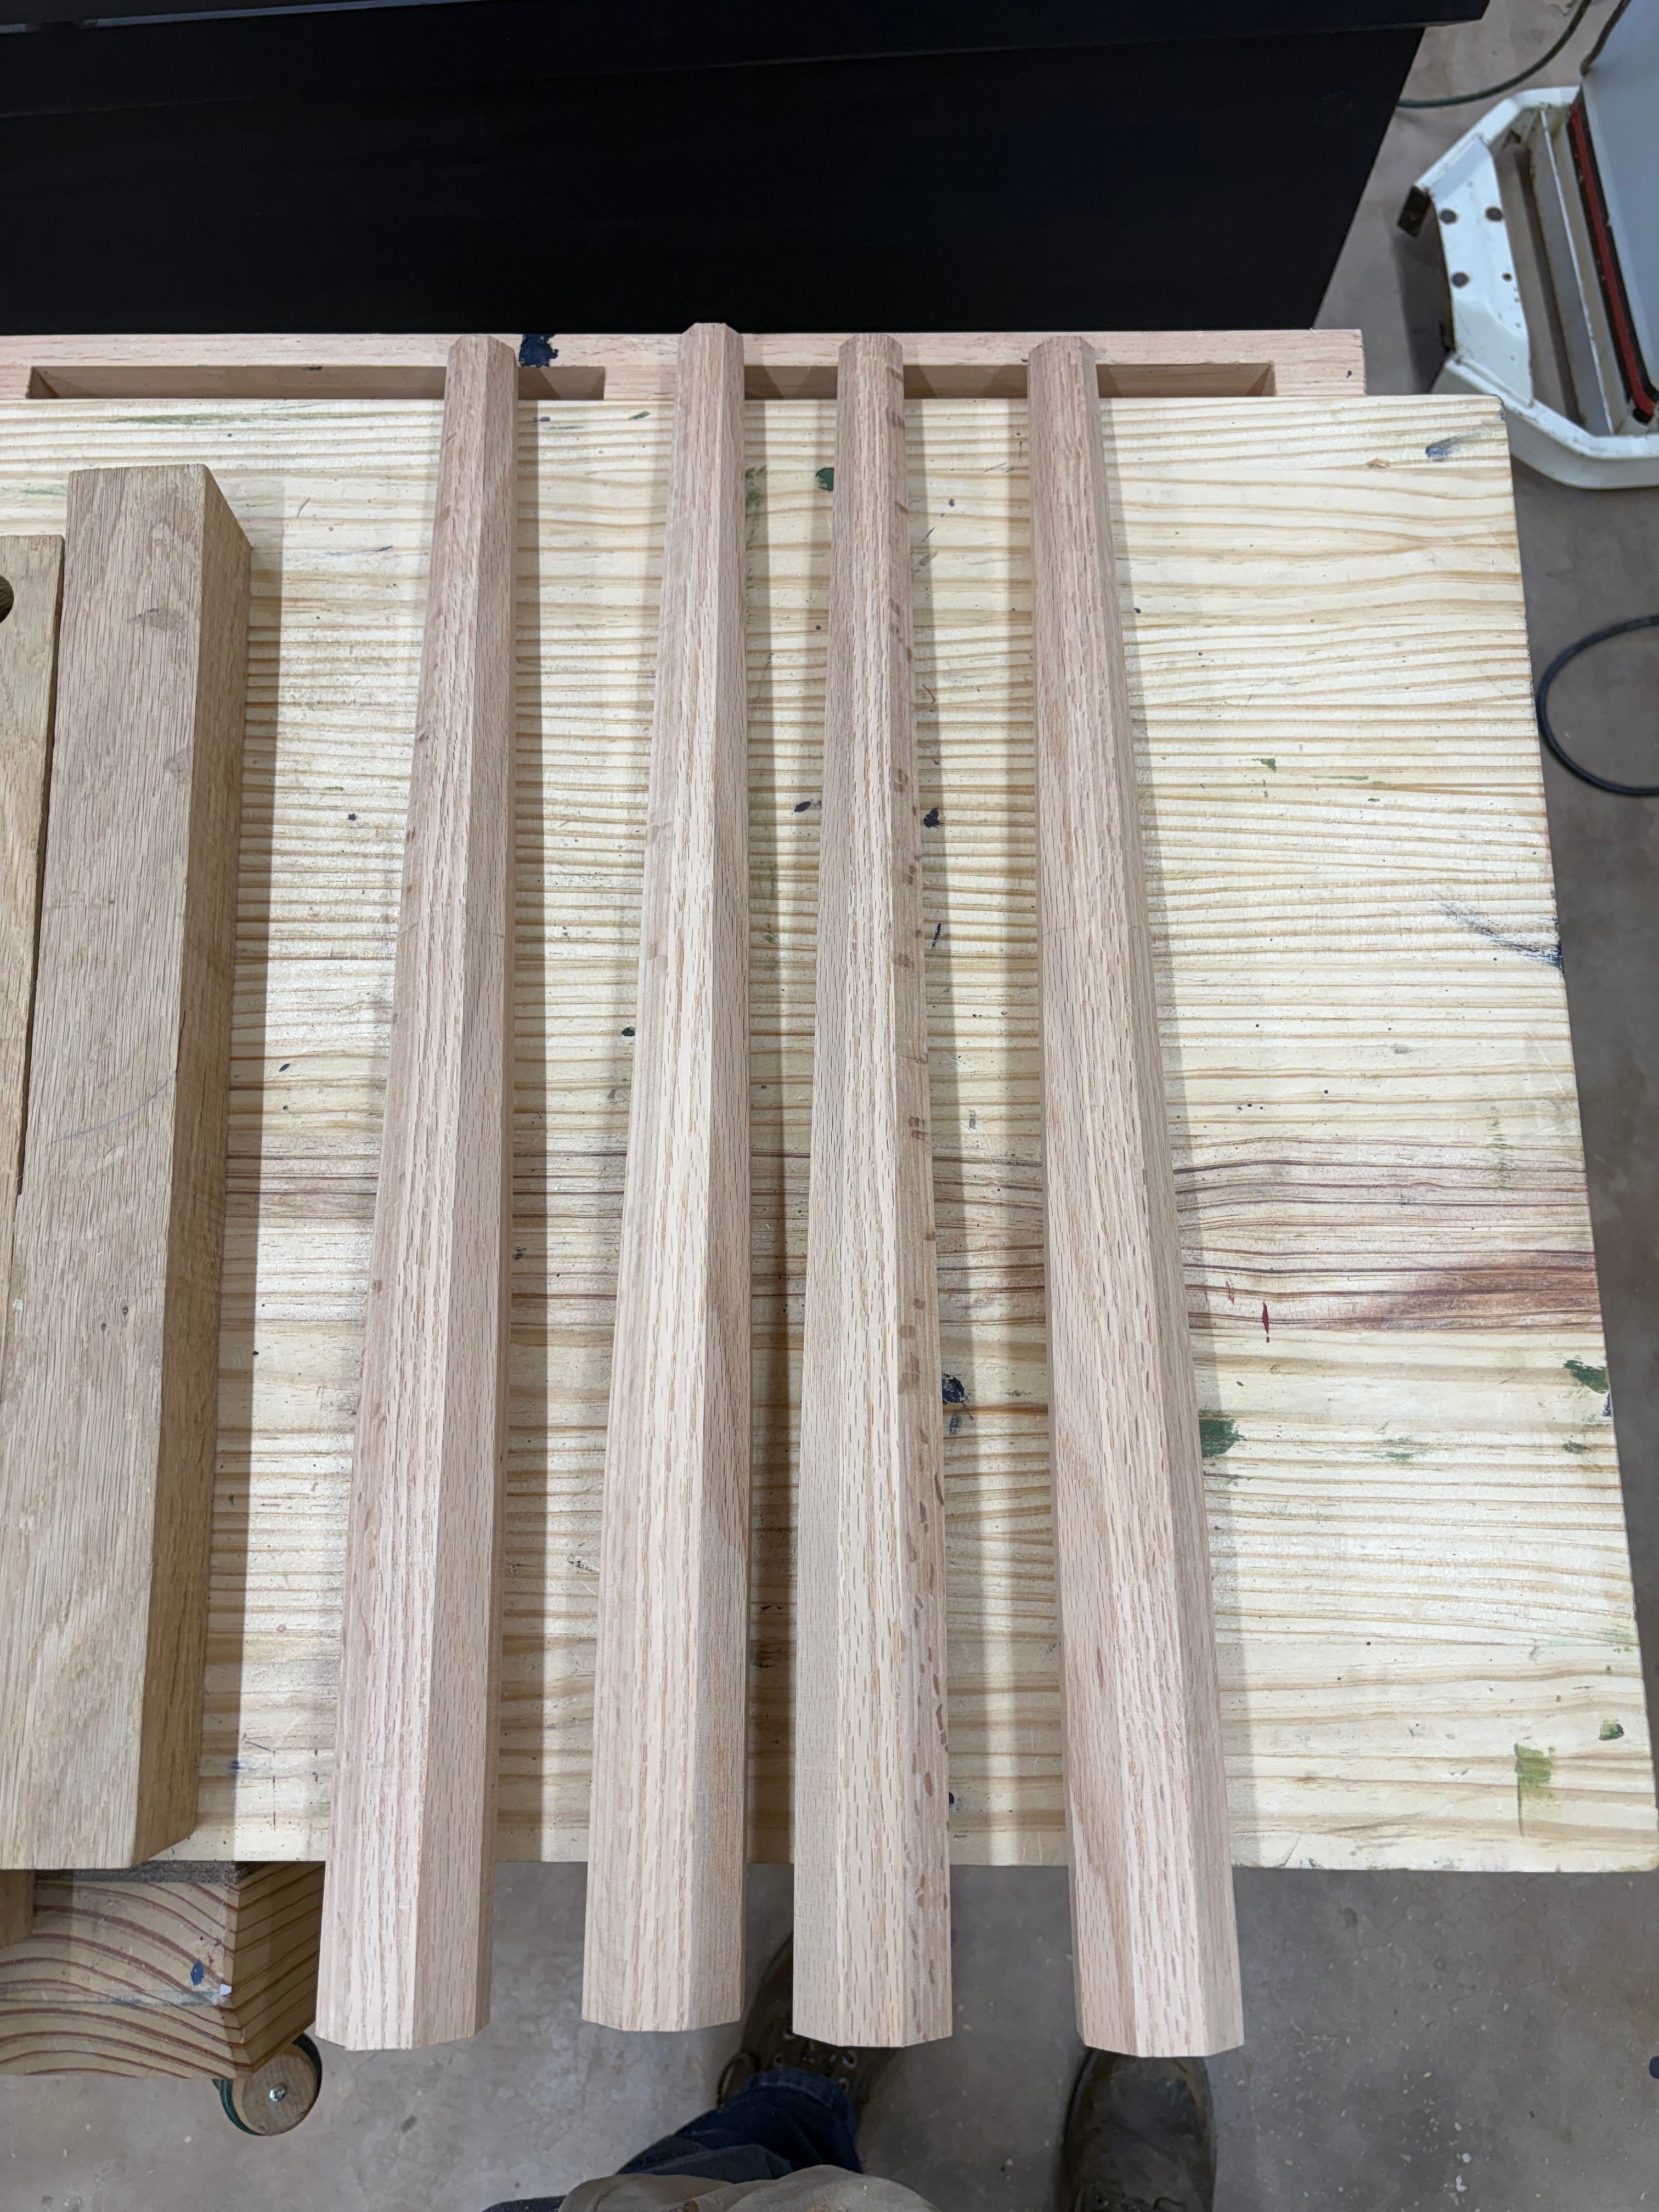
Be it by hand or machine, the tapering on these legs is only half (2/3rds?) done. For the bottom third of the leg, I did it by hand since it was relatively short/small. I tapered to 1”, so I used the same marks and process as the “Tapering by Hand” section. The only difference was I marked lines on each face of lower leg where I split it up into thirds. I wanted very crisp, clean, consistent tapers here and that was the best way, for me, to do it. I even re-marked the lines after I planed down to my midway point. It took some extra time, but I was very happy with the result.
Post is getting a little long as this point (and substack is showing me the email length limit banner), so I’ll wrap it up next week with some tips for the stretchers and how I laid out the bevels for the seat.
My preferred method is with a bandsaw jig, but using this method wonderfully demonstrated by Shea Alexander, you could also lay it out and do it with a jack plane. I could’ve sworn I had also covered it in an older post, but couldn’t find it and don’t feel the need to re-invent the wheel.
Forgive my Monty Python reference.
Here's to shapely legs!
No Monty Python reference is gratuitous! Thanks for the early morning 😃