
My Leitrim Interpretation

After figuring out design details and making a 1/2 scale model, I was ready to go full size with my take on John Surlis’ Leitrim chair.
The chair is traditionally made entirely of ash. 8/4 ash is a rarity here in OKC, but my local lumber supplier actually had some! I was able to get the legs and sticks out of it, but I’m overly paranoid of splitting seats, so I opted for cherry there. I had some scrap 8/4 red oak that was the perfect size for the back rest so I was off to the races to make my parts.
After some mild excitement when the back rest cracked during assembly1, I quickly remade it out of cherry, re-assembled the chair, and moved ahead with paint. I used an oxide green pigment, and it looks great without any tinting or shading (in my opinion)2.
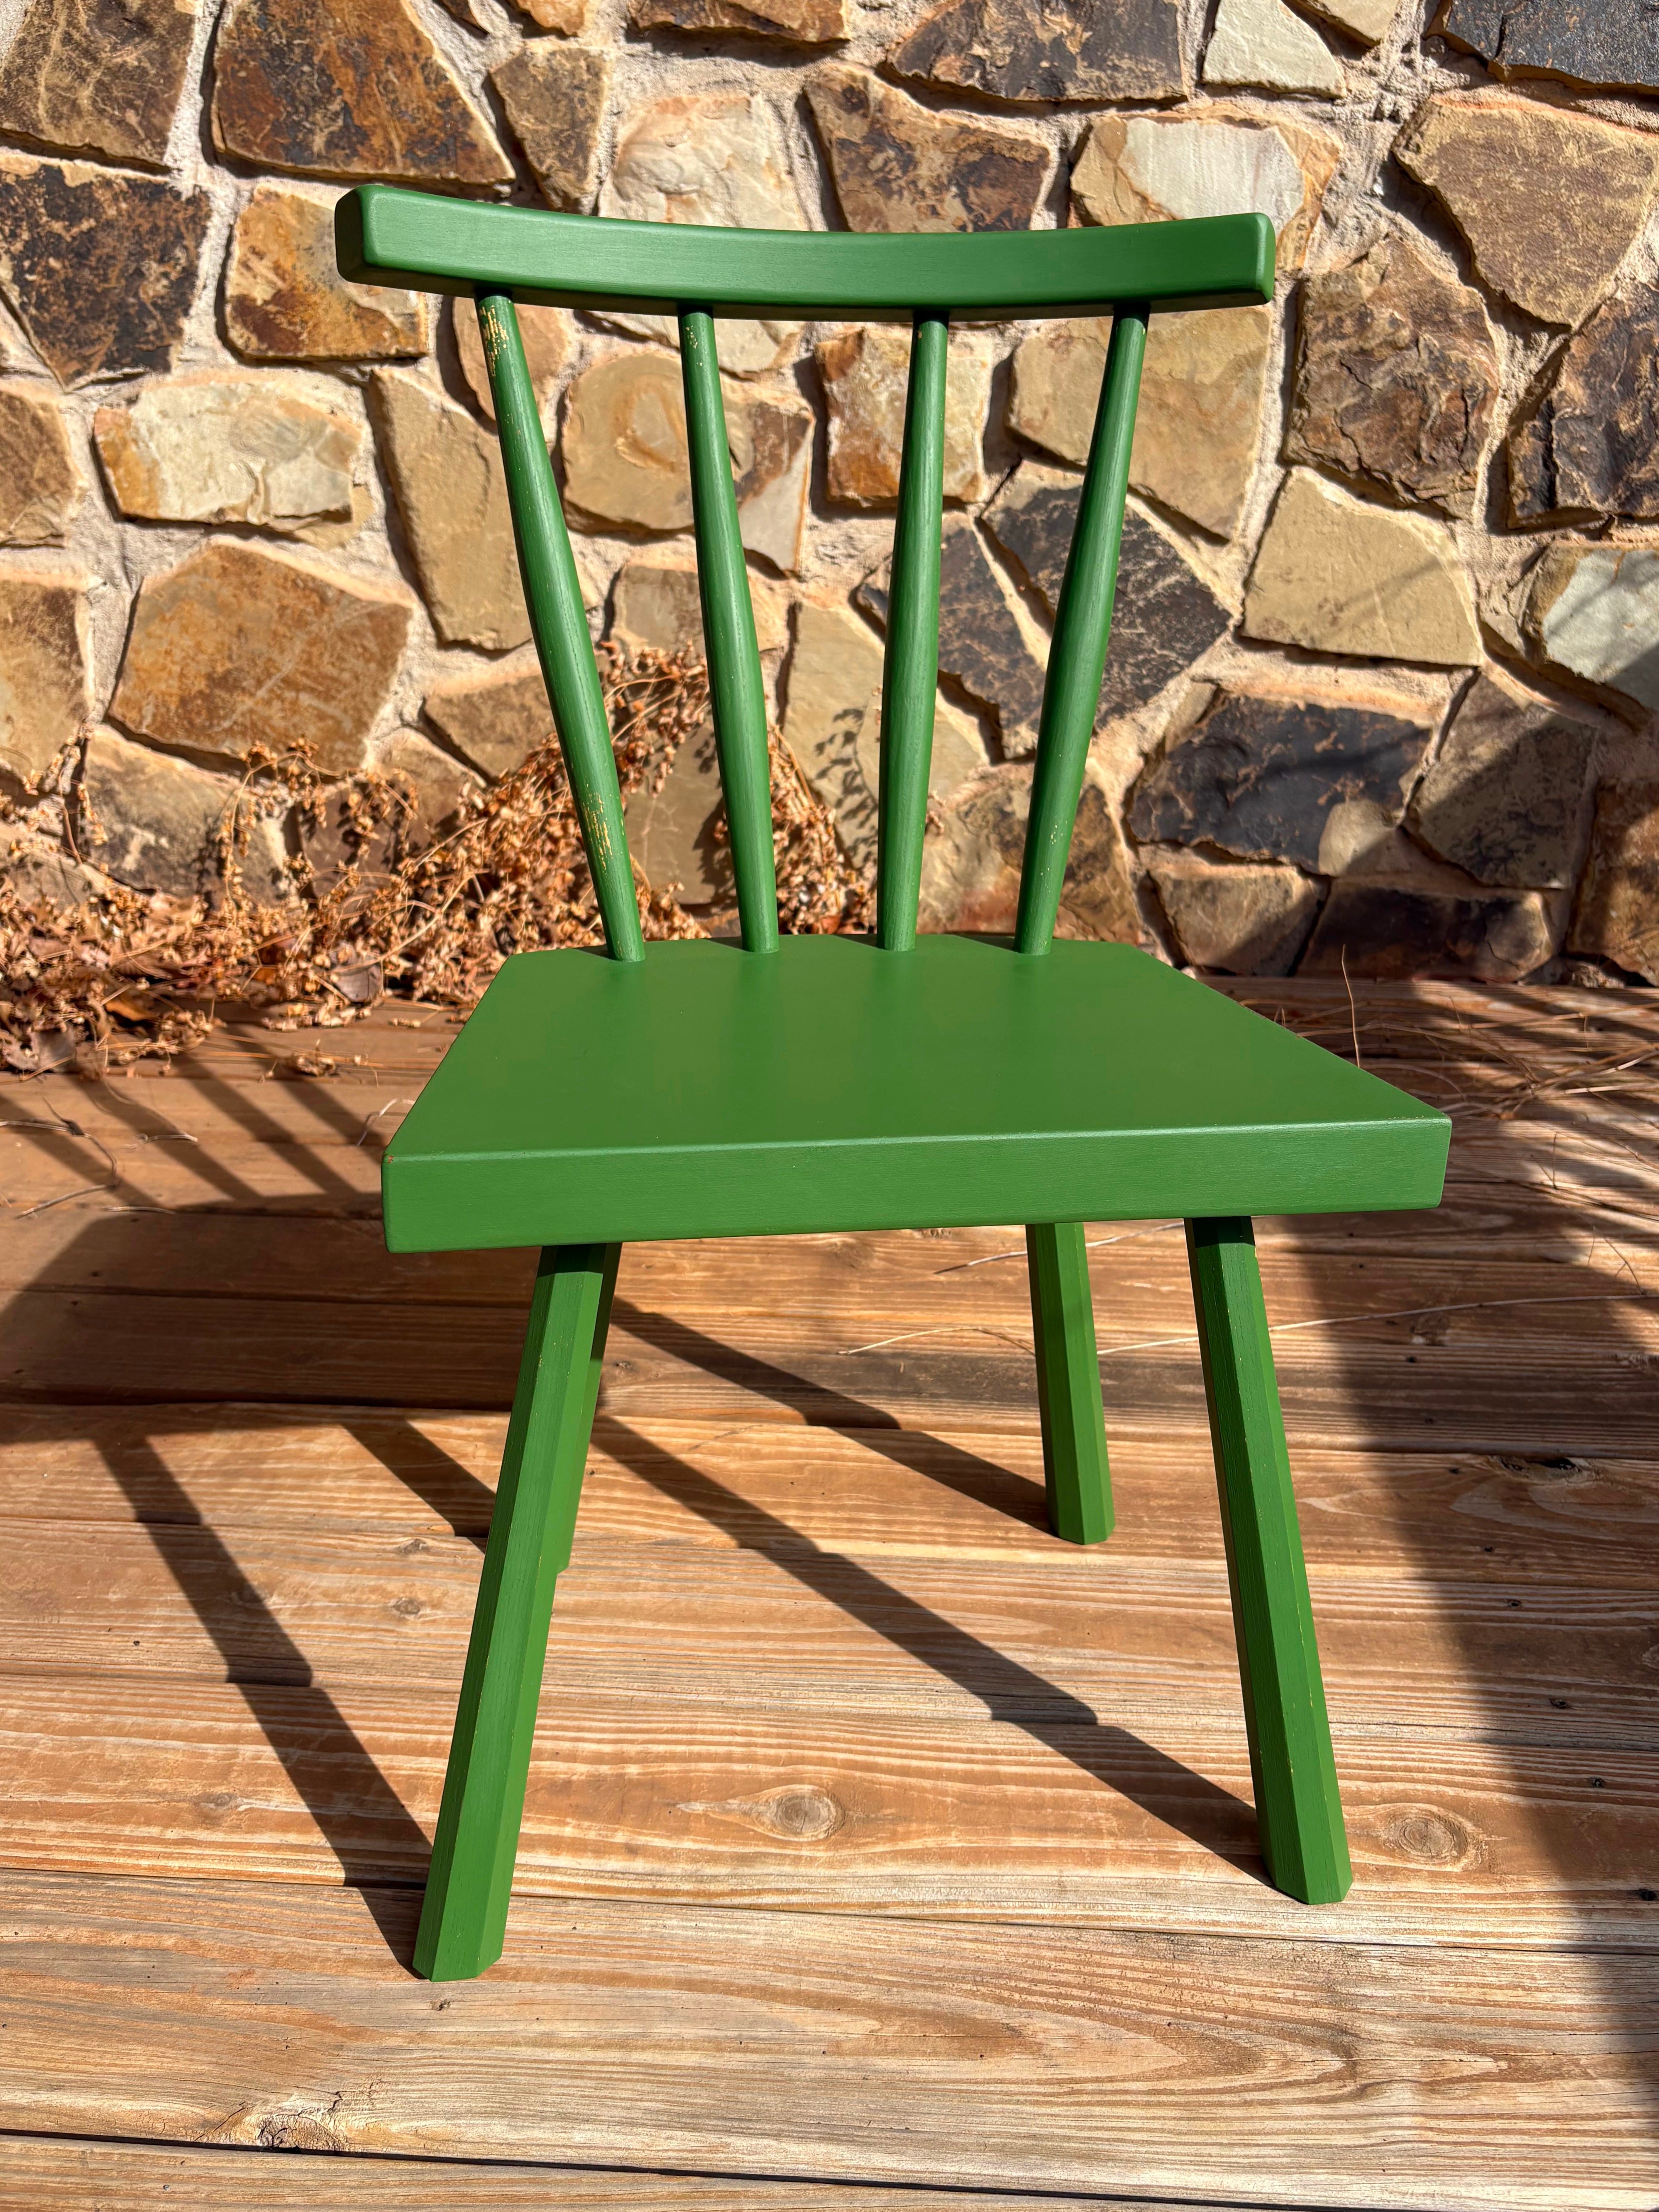
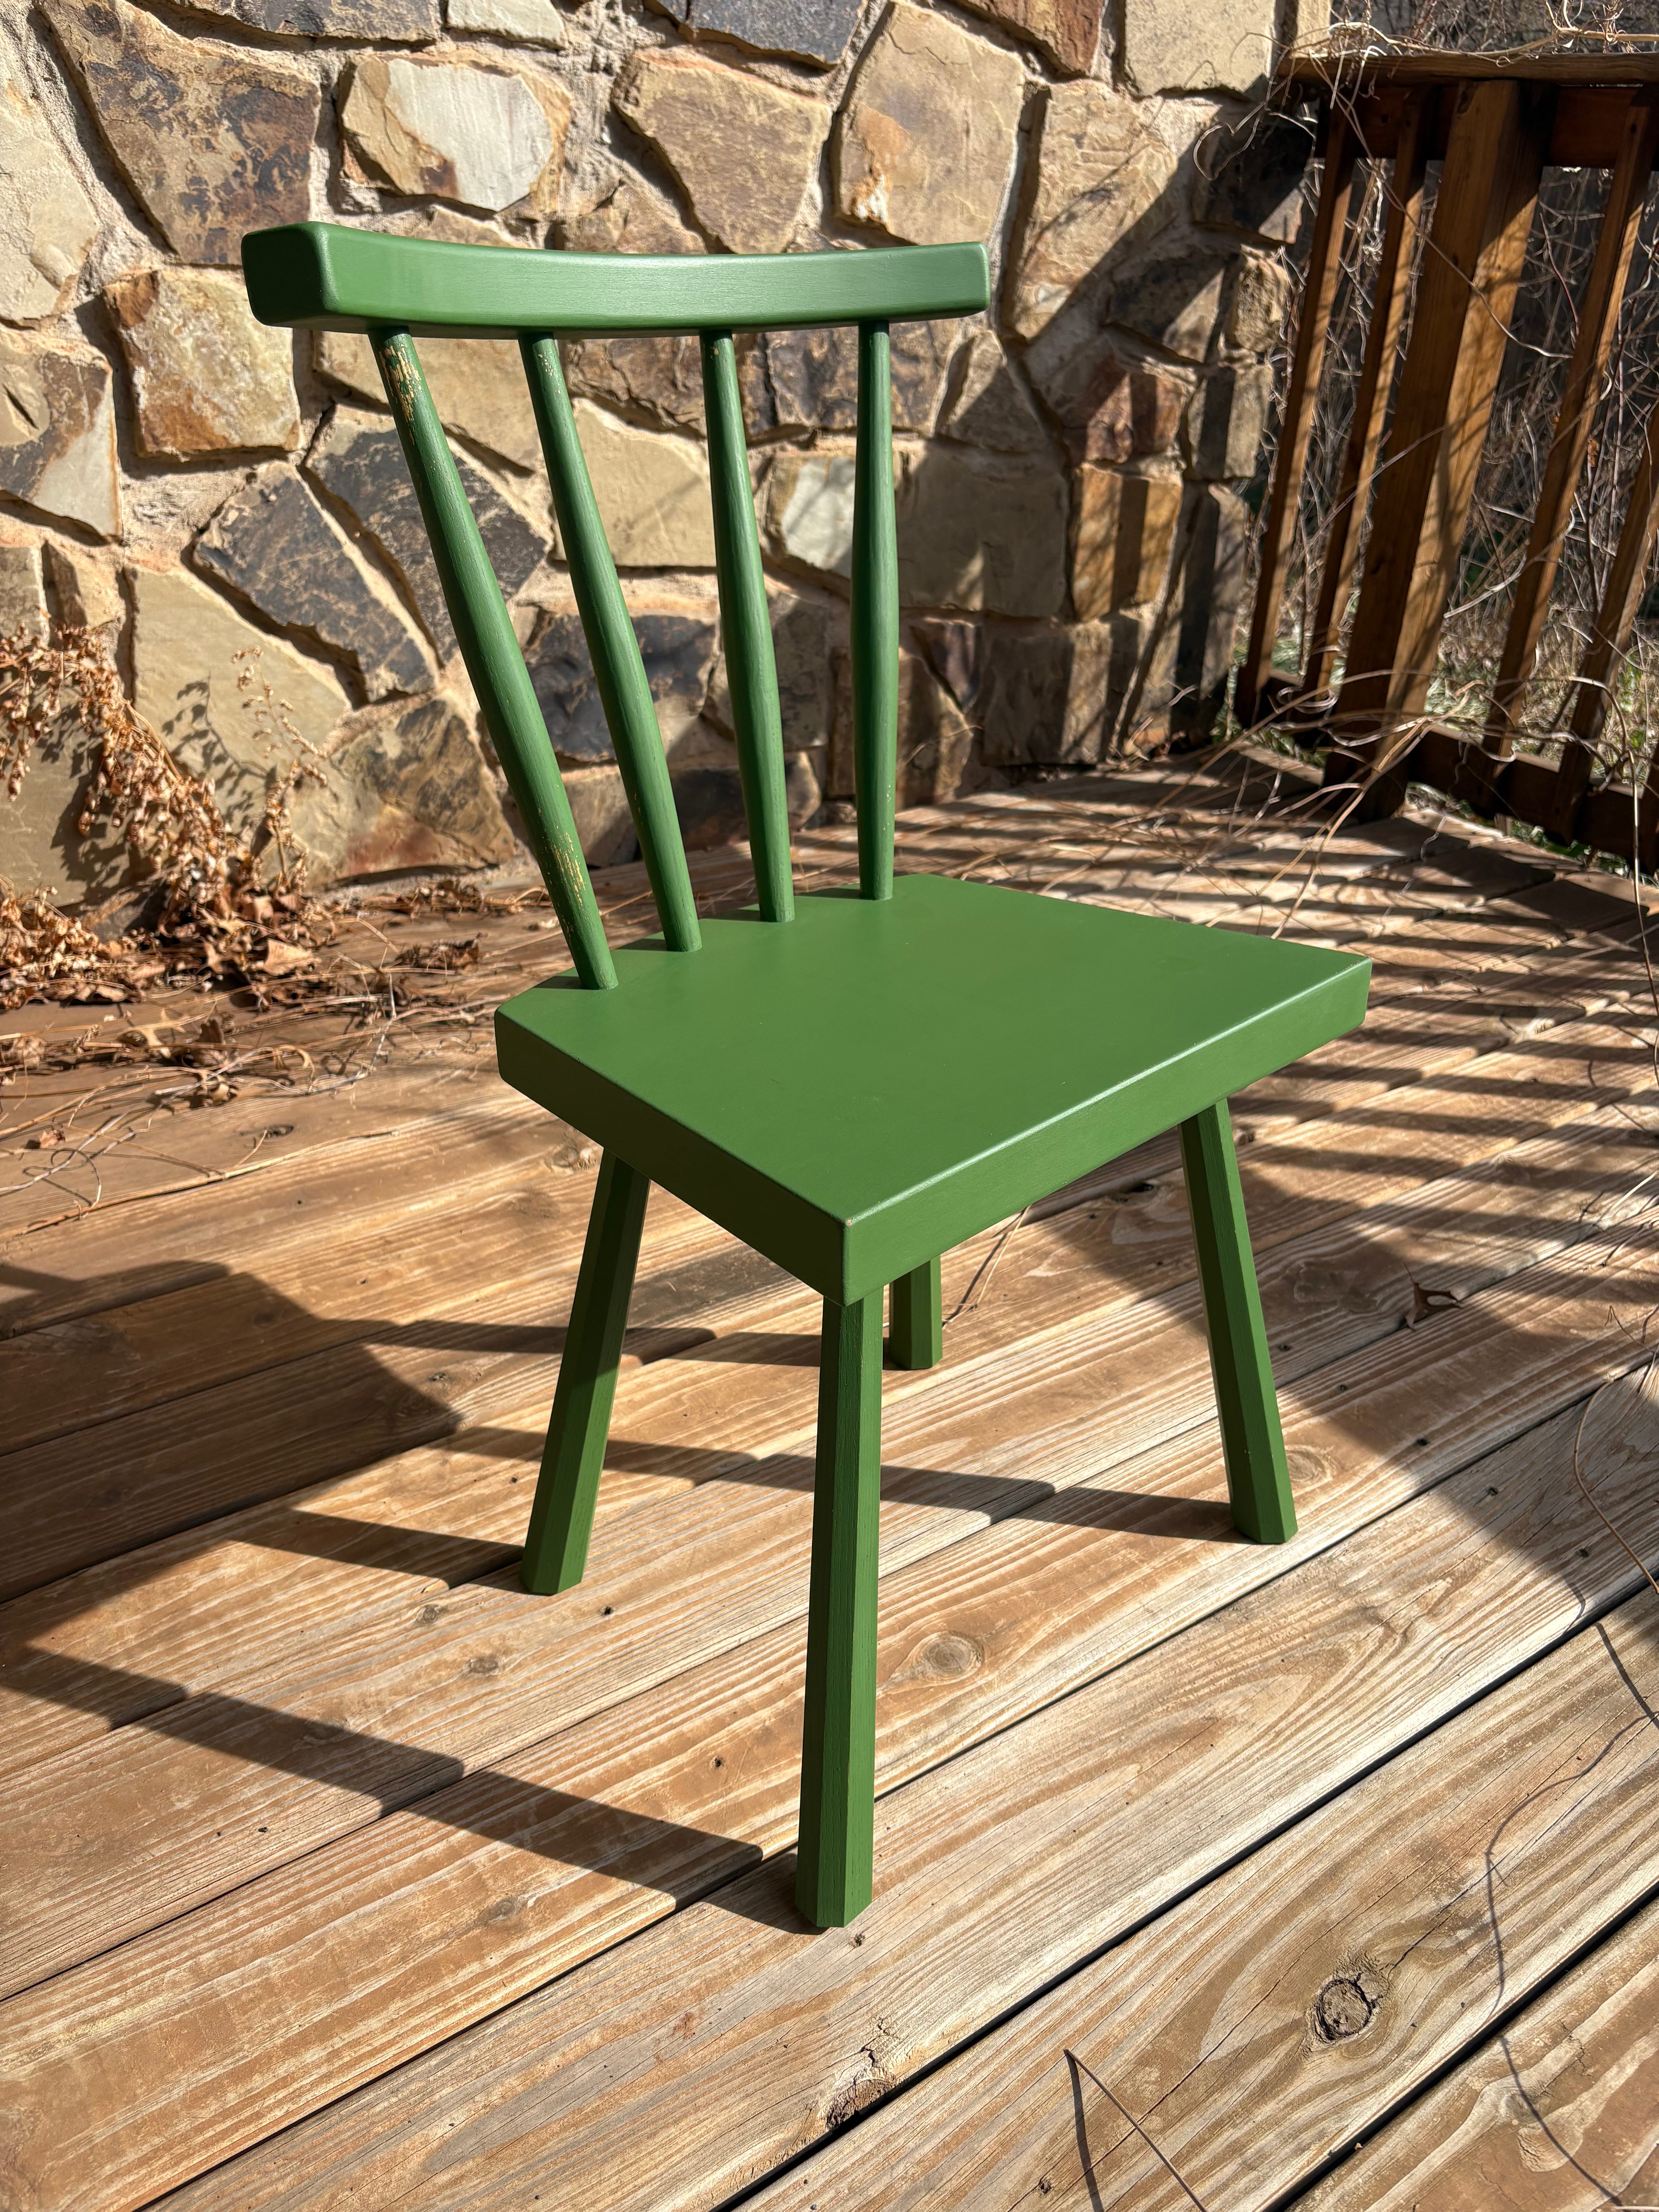
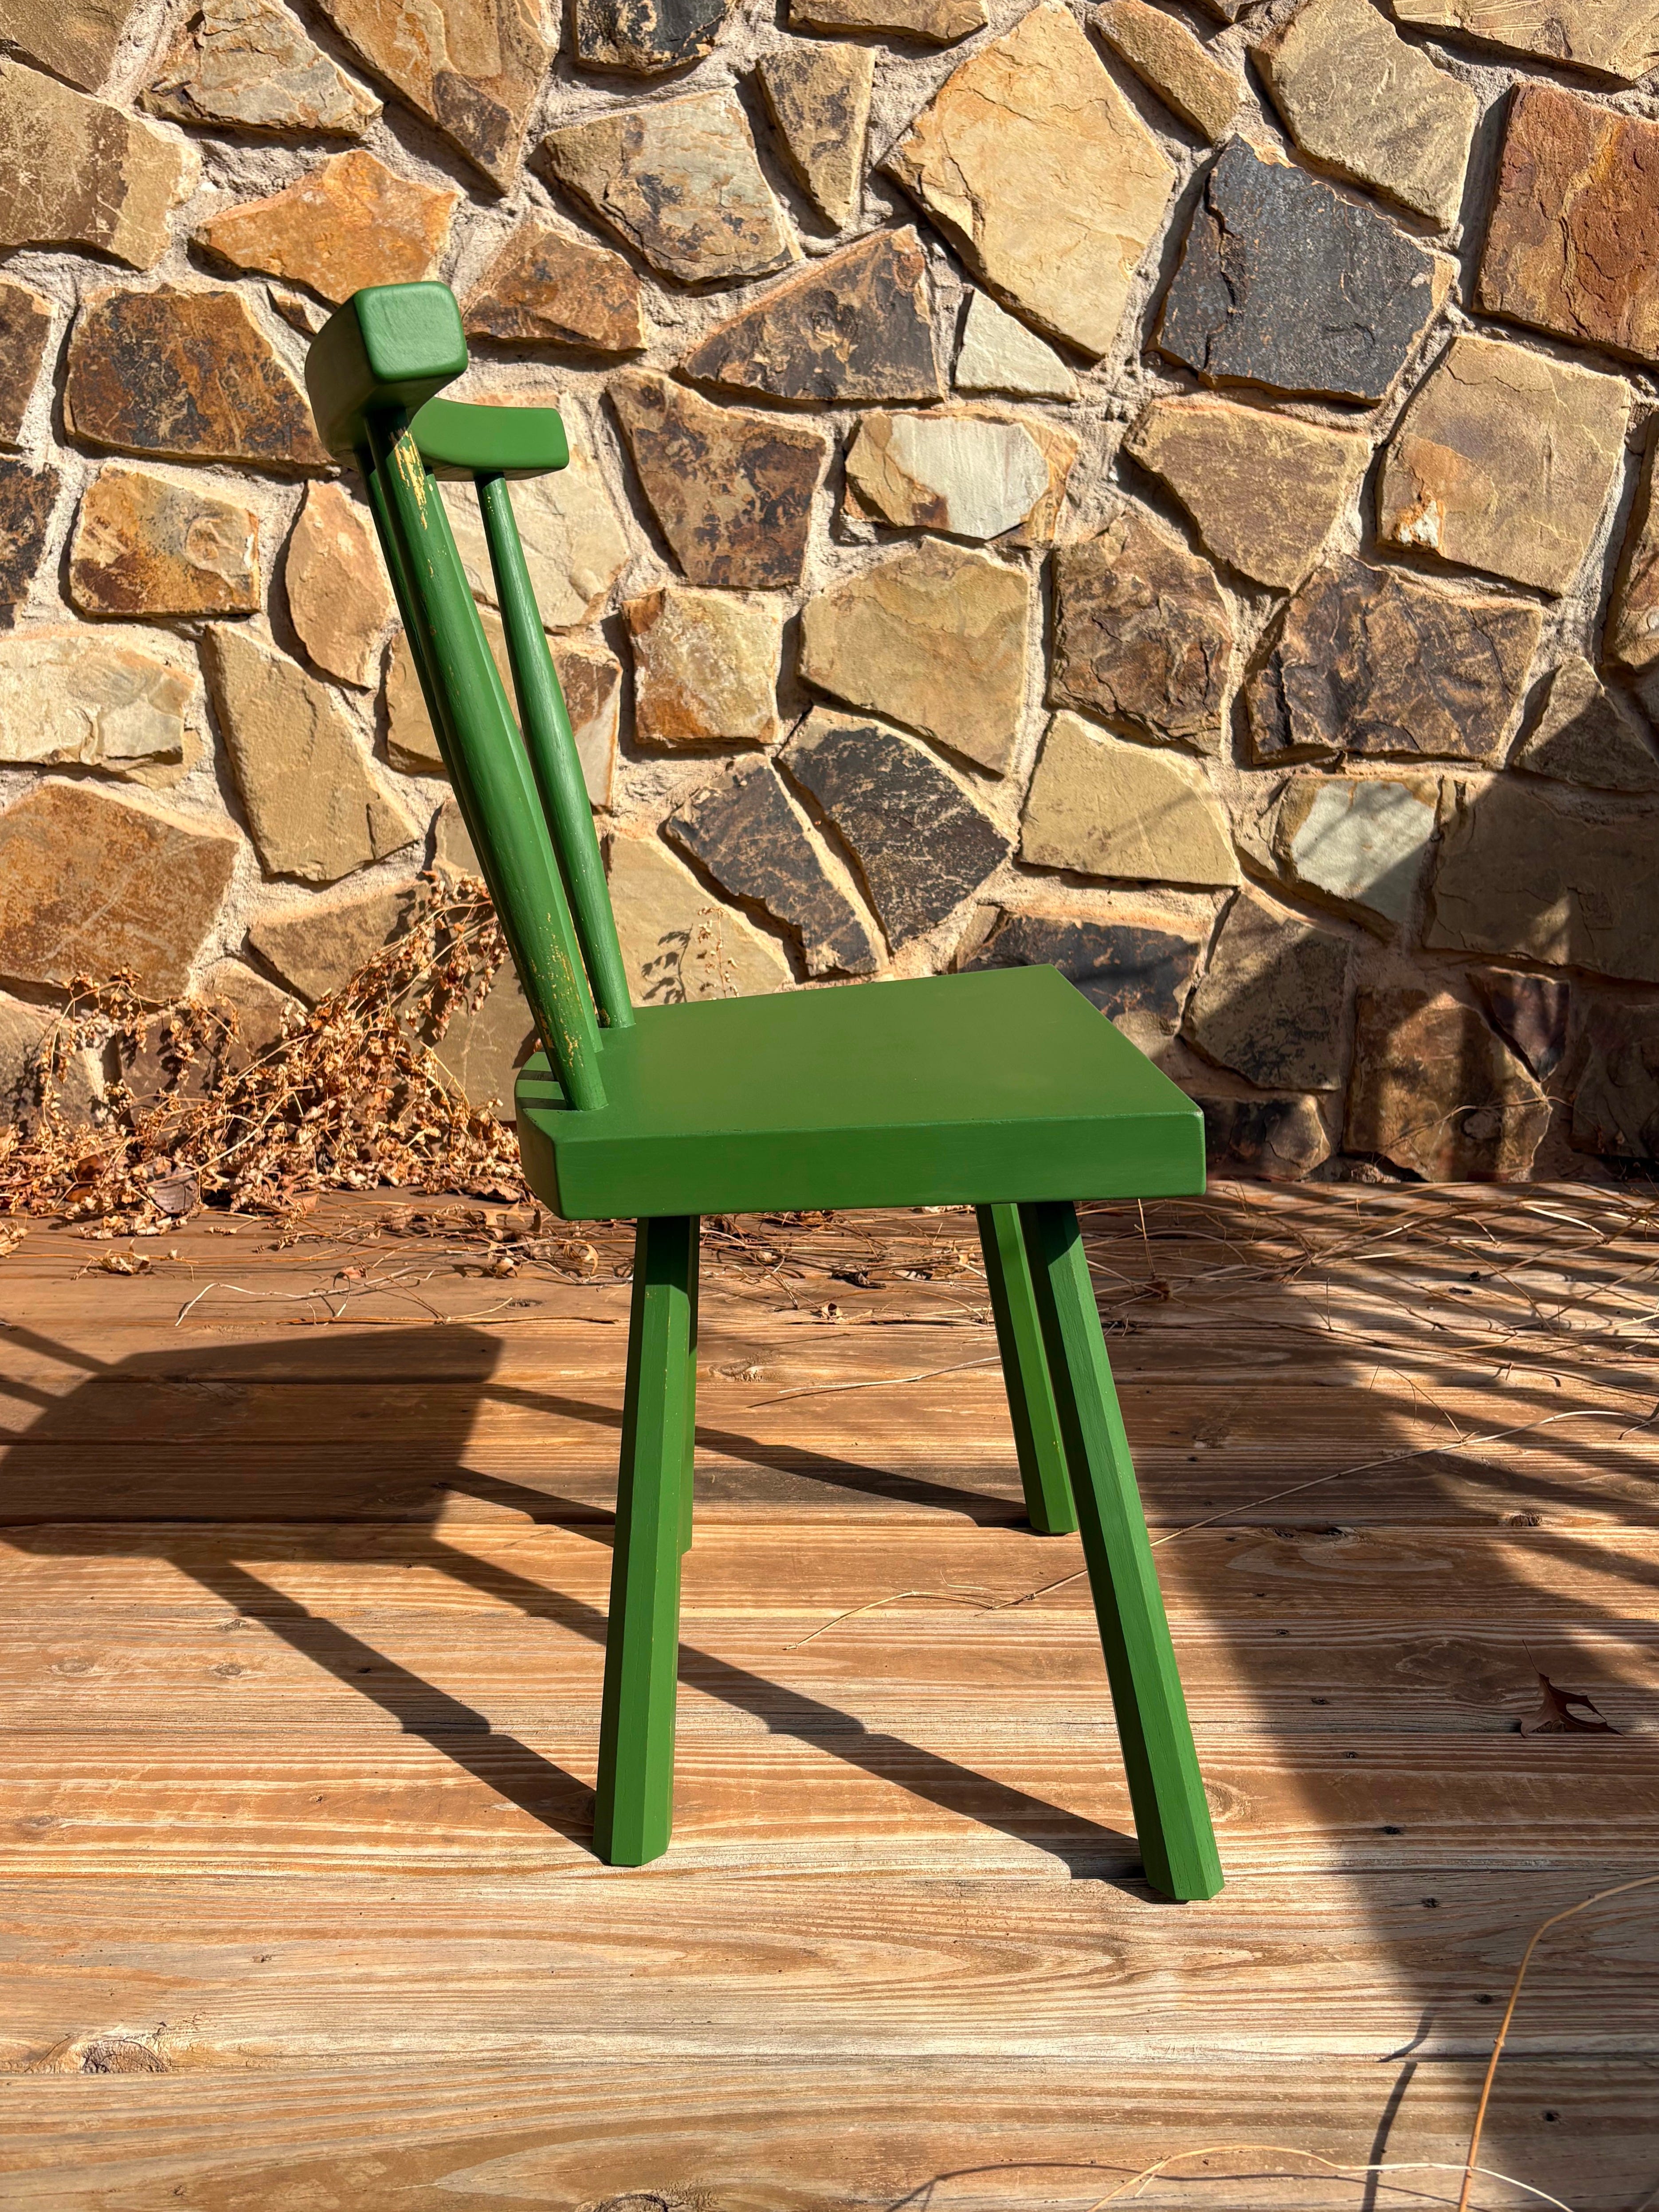
I’m mostly happy with how it turned out, and I really like how the back sticks look with their compound angles. One change I would definitely make is increase the rake of the back legs so their feet are closer to being underneath the back rest. The chair is comfortable, but a little more tippy than I would like (hence the back leg change).
In addition to removing an item from my bucket list, a big driver for working on this chair was to develop it into a 3 day chair class I will add to the store’s schedule this summer. For the class chair, I’ll make the previously mentioned changes to the rear legs, but I’ll also change the sticks and back rest to only have lean and no splay (compound angles are a bit much for a beginner chair class IMO).
Chair Details and Cutting List
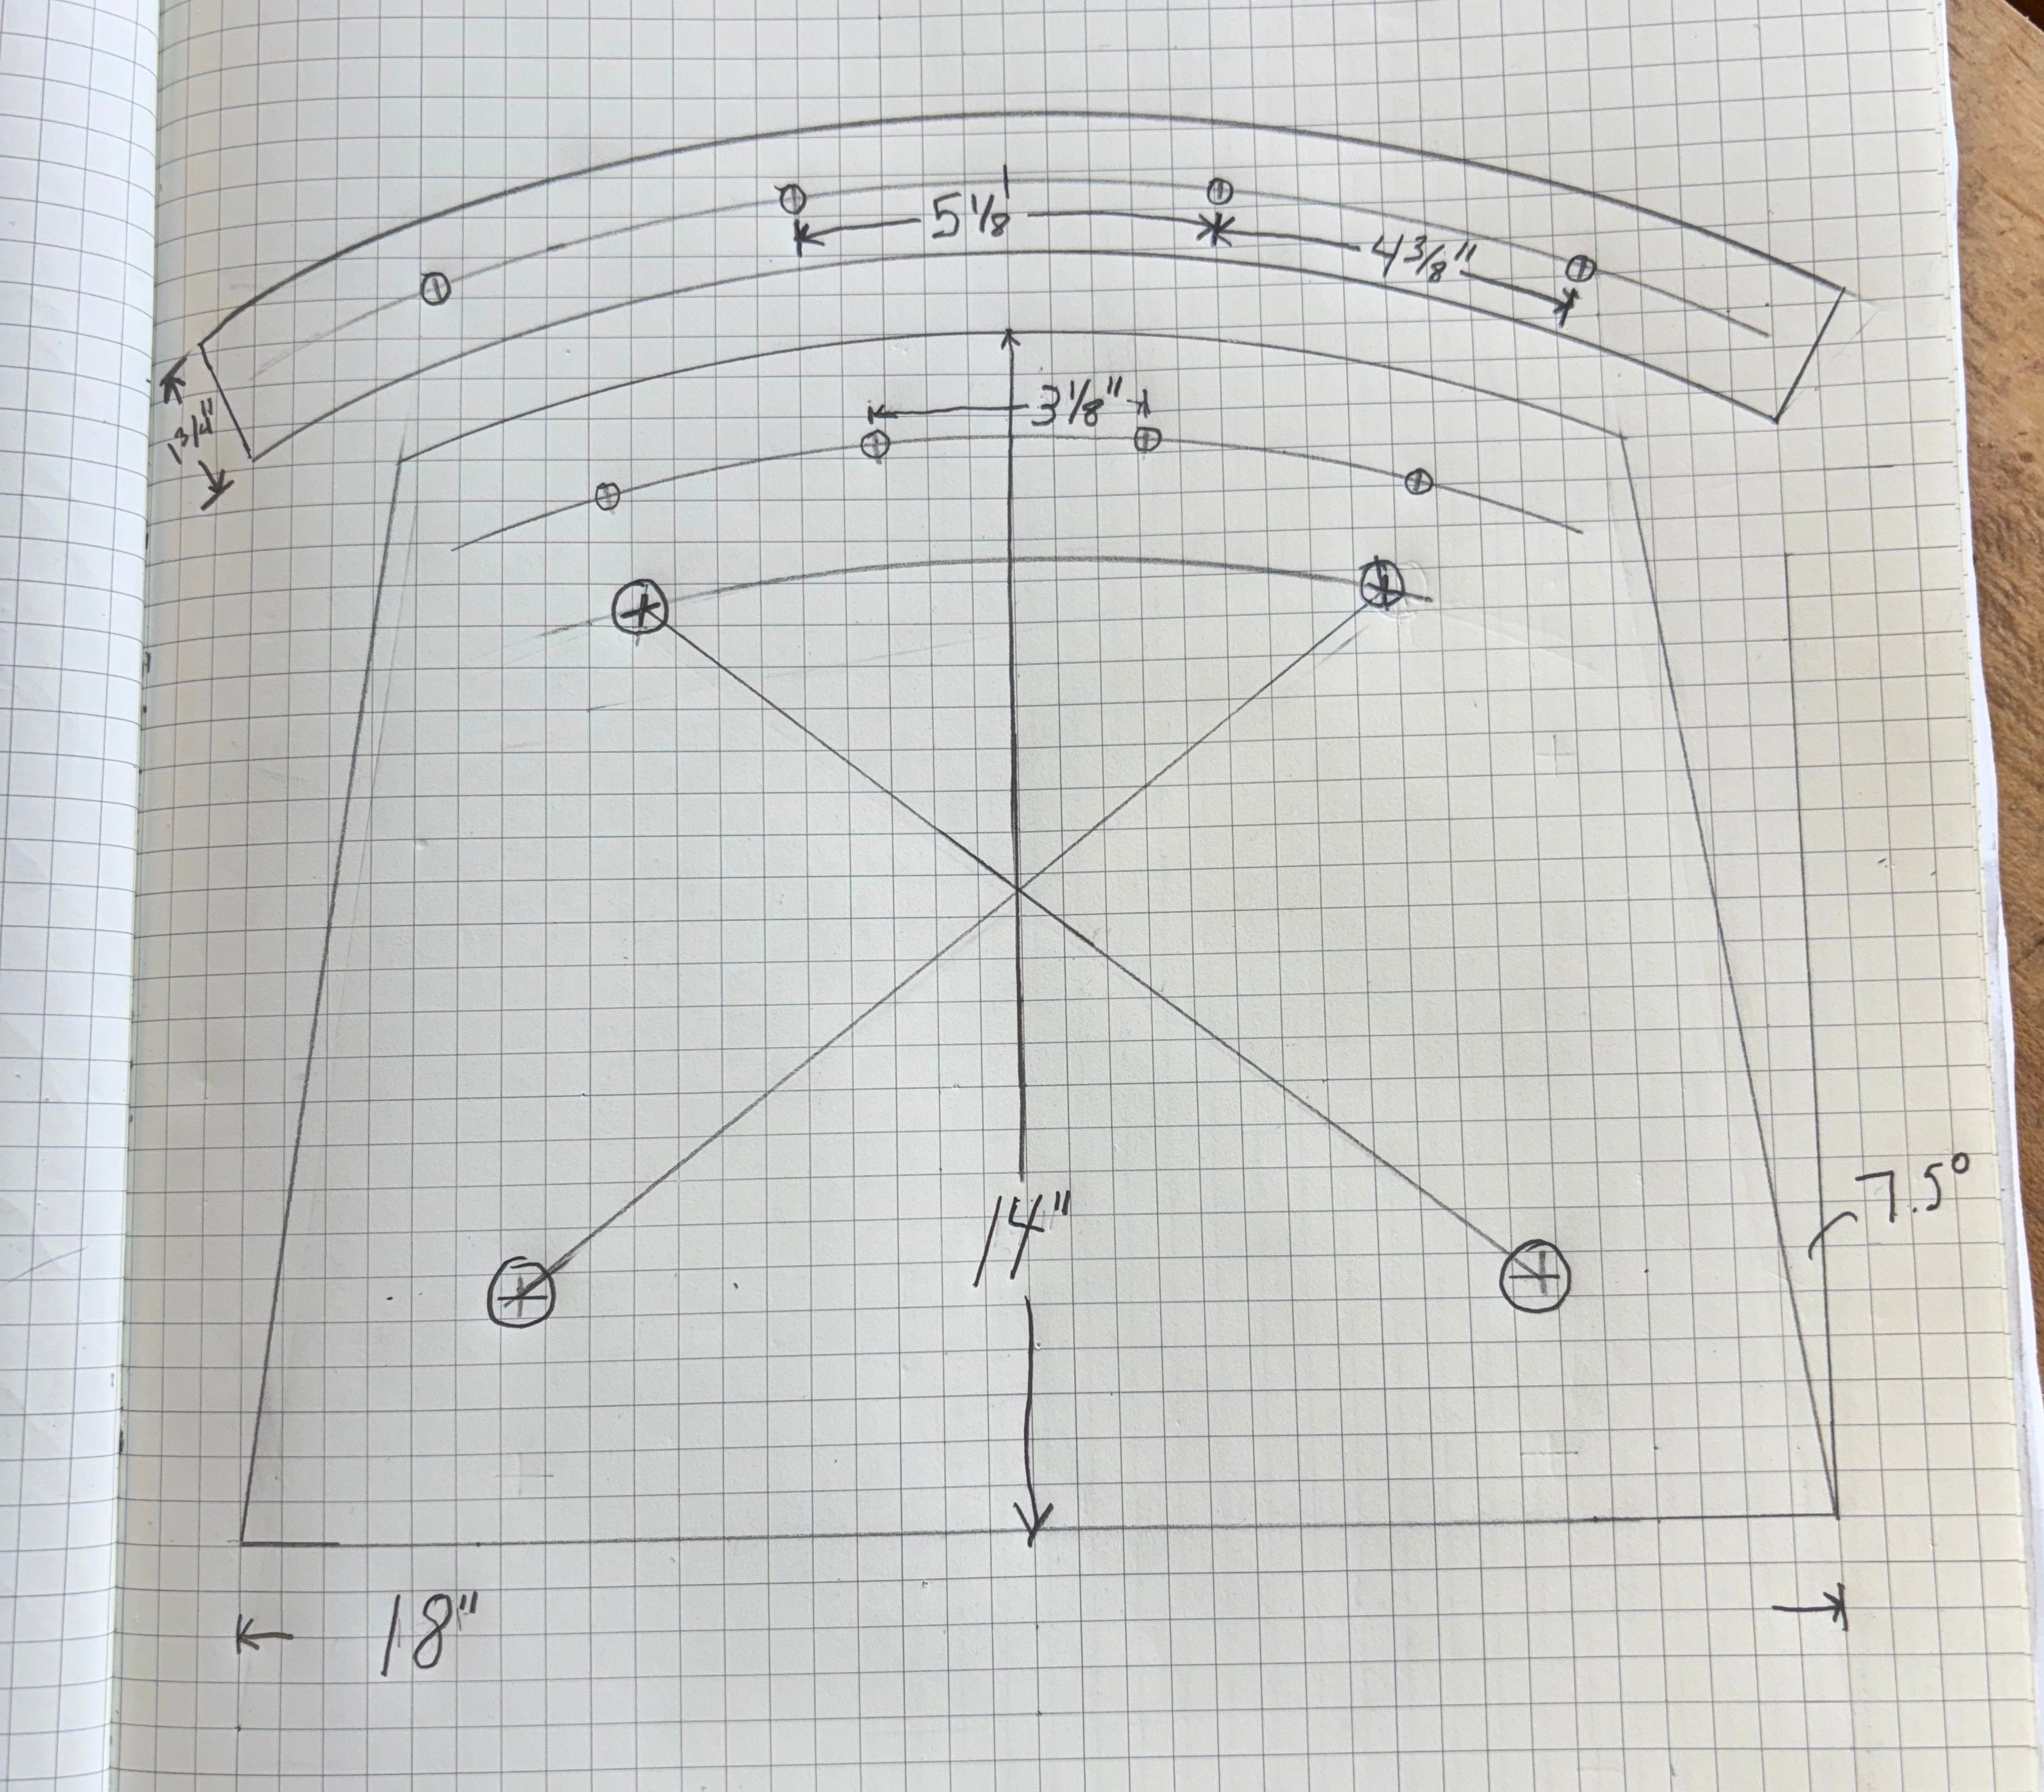
I still haven’t practiced making drawings in CAD, so please forgive my pencil and graph paper scale drawing. Also included are a cutting list and some rough details on the chair construction for anyone that wants to make the chair (or simply use this info as a starting point for their own).
Cutting List
Legs (4) - 1-3/4” x 1-3/4” x 20” (overlong)
Shape into octagons, then taper to 1”
Cut tenons on the 1” end of the leg. They are 1” in diameter and 2-1/4” long
Tenons are kerfed after fitting so they can be wedged during assembly
Seat - 1-3/4” x 18” x 14”
Grain runs left to right
After cutting out the rectangular seat blank, make a mark 2” in from the left and right edges at the rear of the seat. Draw lines connecting the front corners of the seat blank to these marks, making a trapezoid.
Scribe a 18” radius arc along the back of the seat and cut out
For this chair, the seat is 16-3/4” high off the ground at the front of the chair, and 15-3/4” off the ground at the rear.
Sticks (4) - 1-3/8” x 1-3/8” x 19” (overlong, see notes for specific lengths)
Cut into octagons
For the 2 inner sticks, trim to 18-1/8” long
For the 2 outer sticks, trim to 18-3/8” long
Cut a 3/4” tenon on both ends
Taper down to the tenons. Keep a small shoulder for the seat tenons, blend the upper tenons into the sticks (no shoulders) then shave round
Seat tenons are trimmed flush after assembly
During assembly, split the back rest tenons in place with a wide chisel for wedging, then trim flush (or leave slightly proud for some texture).
Back Rest - 1-1/2” x 5” x 21”
Inner radius is 18”
Outer radius is 19-3/4” (yielding a back rest that is 1-3/4” deep)
Angles and Sightlines
For the legs, I used a 13deg drilling angle for both the front and rear legs. For the sightline, I drew a line connecting the front leg mortise location to the opposing rear leg mortise location (I didn’t even bother determining the angle).
The sticks are drilled with compound angles. All sticks lean back 10deg. The 2 inner sticks are drilled 5deg off of vertical and the 2 outer sticks are drilled 10deg off vertical.
The mortises in the back rest are through mortises, drilled with a zero deg sightline (dead ahead) but tilted to match their corresponding sticks (5 and 10deg).
If you have any questions, or if my instructions aren’t great (which is very likely since this is my first attempt at putting anything like this together), please ask for clarification and/or shoot me a message.
I had seen a check in the red oak during milling, but it disappeared after I milled it to final thickness. I should’ve trusted my gut and re-made the part, but I went ahead with it. A split had started to form during wedging and I decided to just cut/split it off, remove the wedged, and remake the part. Given how much I had to fight it to remove it, it might’ve been fine to leave it, but I feel like I made the correct decision.
It’s almost a dead ringer for RMP’s Lily Pad green.
The color looks damned close to an Irish postbox. Interesting thing about Irish post boxes: there are still some very old ones in use that predate Irish independence that have a crown and the letters “GR,” “VR,” or “ER” embossed on them. These were originally English postboxes, which would have been painted bright red, and the letters were for the monarch: “George Rex,” “Victoria Rex,” or “Elizabeth Rex.” After independence in the early Twenties they were kept in use but painted bright green. (The same color schemes were seen on old phone booths.)